Scrub System, Disc 135Service Manual – SC6500
™
Service Note: Once the brush deck is in the lowered position, don’t turn the key switch off until
you disconnect the battery pack (push in the Emergency Disconnect). This will
prevent the scrub deck from automatically rising when the key is turned off.
4. Turn the key switch off.
5. Remove the Solution Feed Hose at solution distribution bladder located on the scrub deck.
6. Remove bottom Scrub Deck Actuator Cotter Hair Pin, then push the Retainer Pin from its housing and
mount bracket holes.
7. Disconnect the Scrub Deck Actuator wire harness connector. Note that this will prevent the Scrub Deck
Actuator
from being switched on and rising when it is disconnected from its deck mount.
8. Note the correct brush motor wire connections at each individual motor, then remove all the wiring from
the motor terminals.
9. Locate the ID (identication) Resistor Plug on the scrub brush deck and separate its connector.
10. Remove the four Hex Nuts, hex screws and bushings from the left and right front deck supports, then
swing the Pivot Support Arms away from their mounting holes.
11. Remove the previously-installed wood blocking from underneath the drive discs. Note that this must be
done to get the needed clearance to remove the scrub deck.
12. Carefully slide the complete deck assembly out from underneath the machine from its left side.
Note: Observe the position of the disconnected lift actuator housing and swing it to the rear to clear
its mount bracket pocket.
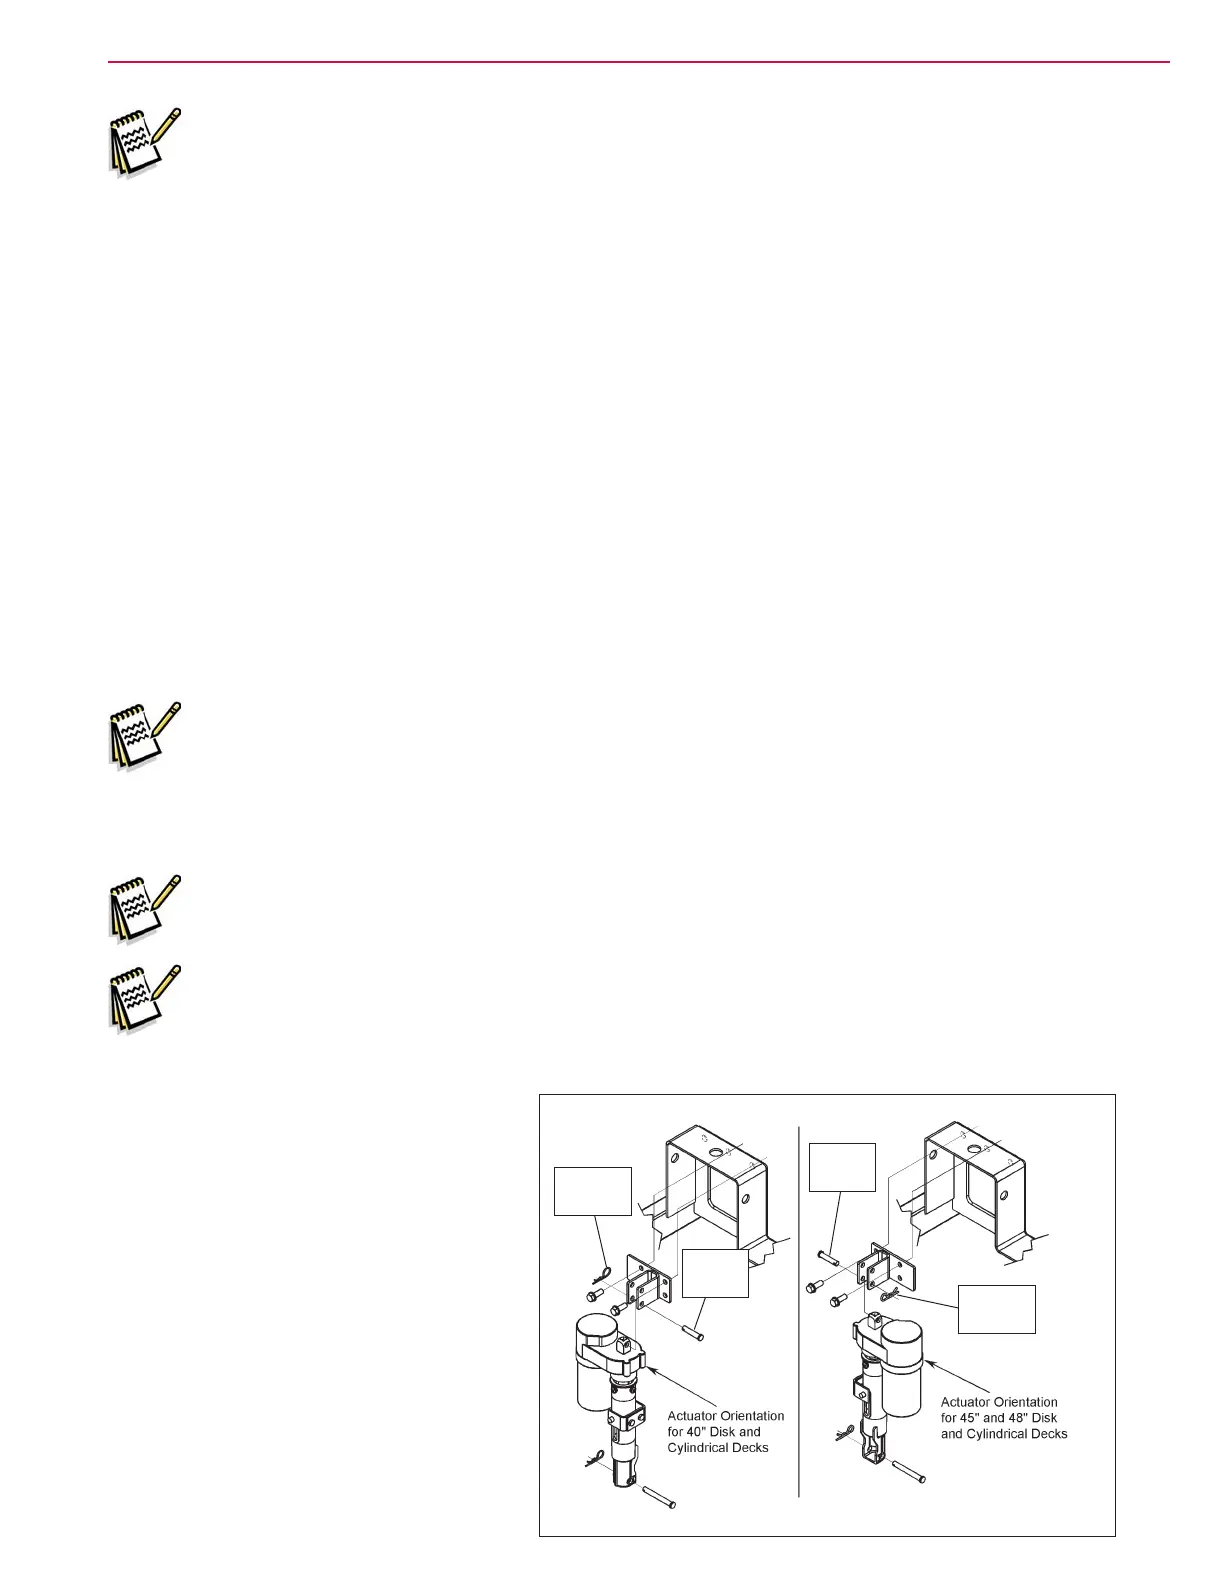
Scrub Deck Lift Actuator
Note: All new replacement actuator motors are not shipped with the lift nut pre-adjusted for any
specic machine model application.
Note: The scrub deck must be removed to access the top mount bracket on the scrub deck lift motor.
1. Remove the scrub deck by following the steps in the Scrub Brush Deck section.
2. Locate and remove the upper Cotter
Hair Pin
from underneath the middle
of the machine.
3. Slide the actuator Mount Pin from the
housing and frame mounting bracket
holes allowing the motor to drop down
completing its removal.
4. Refer to the Drive Nut Adjustment
section for instructions on how to
install a new drive nut and set the
extended and retracted positions.
5. Follow the above steps in reverse
order to install the scrub deck
actuator.
Cotter
Hair Pin
Mount
Pin
Mount
Pin
Cotter
Hair Pin
 Loading...