Sweep System, Side Broom 172Service Manual – SC6500
™
Removal and Installation
Warning! Before removing or reinstalling any machine components, make sure the key switch
is off, the key is removed from the machine and the parking brake is engaged.
Side Broom Lift Actuator
Note: New replacement lift actuator motors do not come with the lift drive nut pre-adjusted.
1. Remove the scrub
deck. (Refer to
the Removal
and Installation/
Scrub Brush Deck
instructions in the
Scrub System,
Cylindrical section of
this manual.)
2. The side broom lift
actuator motor is
located underneath
the left front of the
machine ahead of
its side skirt. Cut
the wiring tie strap
if needed, then
disconnect the wiring
connector at the
motor.
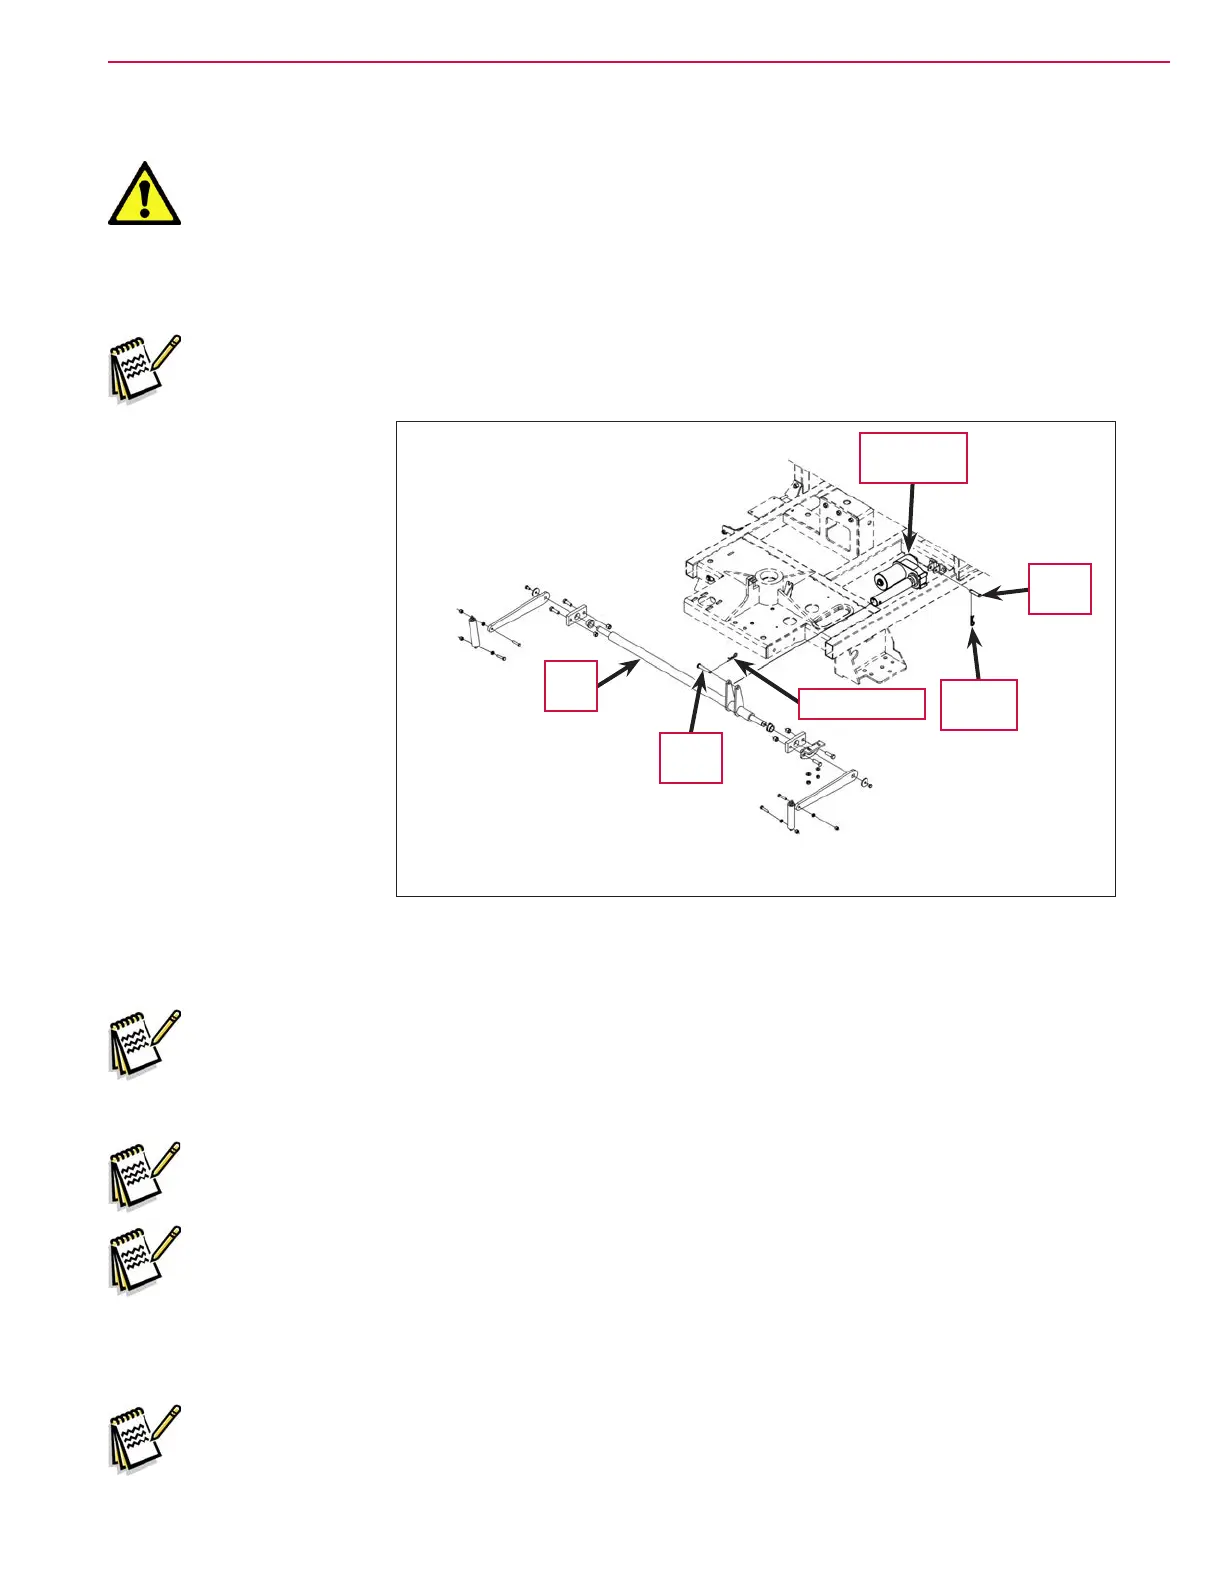
3. Pull out the two Cotter Hair Pins, then remove the two Clevis Pins holding the motor at the frame and Lift
Arm
mounts.
Service Note: It may be helpful to lift up and down on the Lift Arm to relieve any preload pressure
on the Clevis Pins when removing the front Clevis Pin.
4. Drop the Side Broom Lift Actuator out from underneath the machine to remove it.
Note: New replacement lift actuator motors do not come with the lift drive nut pre-adjusted.
Service Note: After removing the lift actuator, and before installing a new actuator or drive
nut, the drive nut and limit switches must be set (or checked) to their correct
specications. Refer to the Lift Actuator Adjustment section.
5. After checking or setting the correct actuator lift drive nut dimensions, install the side broom lift
actuator by following the above steps in reverse order.
Service Note: Connect the special actuator power cord adapter to the lift motor as shown in the
Lift Actuator Adjustment section to help position the lift actuator for an easier
installation of the Clevis Pins.
Clevis
Pin
Cotter
Hair Pin
Side Broom
Lift Actuator
Cotter Hair Pin
Clevis
Pin
Lift
Arm
 Loading...