Adjustment Procedures
8.
Select Done when you have the appropriate display.
9.
One dot
is
displayed.
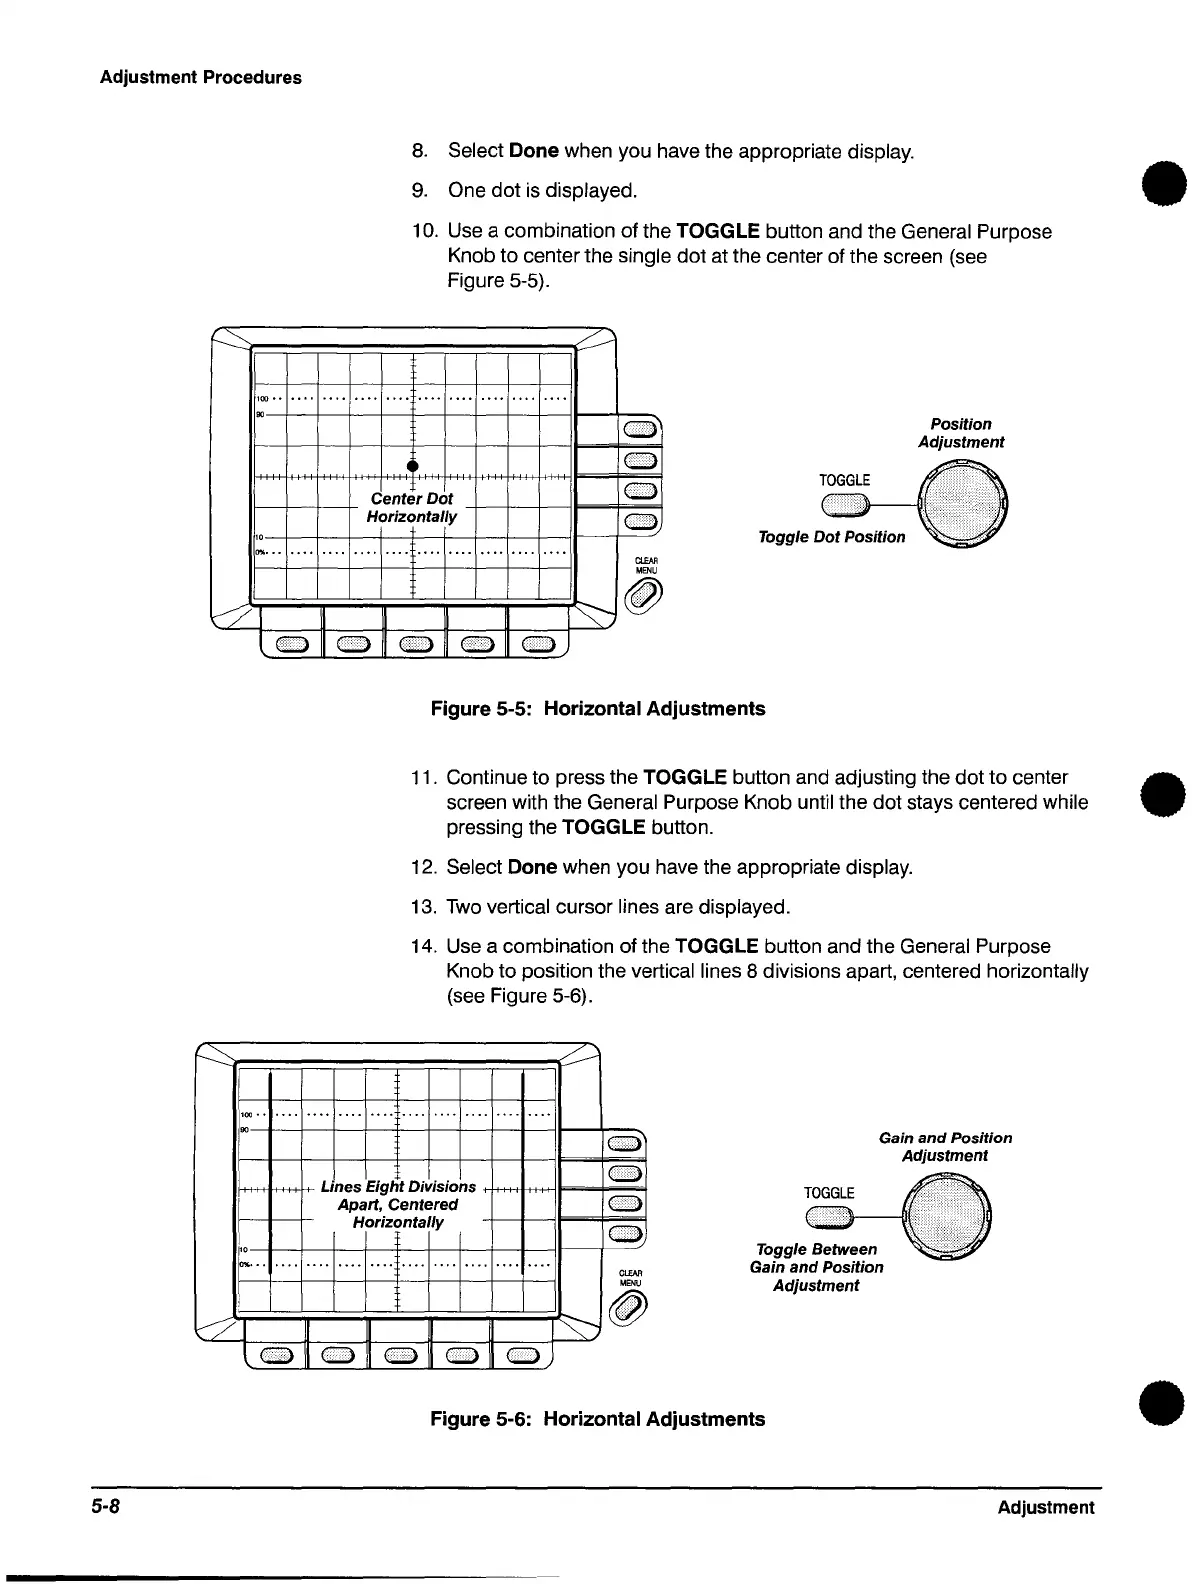
10.
Use a combination of the TOGGLE button and the General Purpose
Knob to center the
single dot at the center of the screen (see
Figure 5-5).
100
••
••••
•••• •••• •••• ••••
•••• •••• ••••
•
•••
Center
Dot
GI:>
Horizontally
+-+-+-"'U
..
~-t=GI:>""
....•
---1.;
••
~LJ
~ ~
l
GI:>
II
GI:>
GI:>
CIDA
MENU
~
L~
(1J
GI:>
GI:»
Figure 5-5: Horizontal
Adjustments
Position
Adjustment
•
11. Continue to press the TOGGLE button and adjusting the dot
to
center •
screen with the General Purpose Knob until the dot stays centered while
5-8
pressing the
TOGGLE button.
12.
Select Done when you have the appropriate display.
13.
Two
vertical cursor lines are displayed.
14. Use a combination of the TOGGLE button and the General Purpose
Knob to position the
vertical lines 8 divisions apart, centered horizontally
(see Figure 5-6).
100"
••••••••••••••••••••••••••••••••••••
o
f+++-i-I++t+l+
Lines
Eight Divisions +++f++H-iI=-=l-
.......
=!
Apart,
Centered
0
Horizontally
o
I'o---l-+--+--+-f--+--+-l--I---II--+-----"
0%
•••••••••••••••••••••••••••••••••••••••
1
l~
0\\
0
0)
ClEAR
MENU
@
Gain
and
Position
Adjustment
Toggle Between
Gain
and
Position
Adjustment
Figure 5-6: Horizontal
Adjustments
Adjustment
•
 Loading...


