9 FUEL SYSTEM/ENGINE MANAGEMENT
TJMH
7.
Leaving the injectors attached to the fuel rail,
ease the injectors upwards and remove from the
throttle body assembly.
Removing the Injectors/Fuel Rail
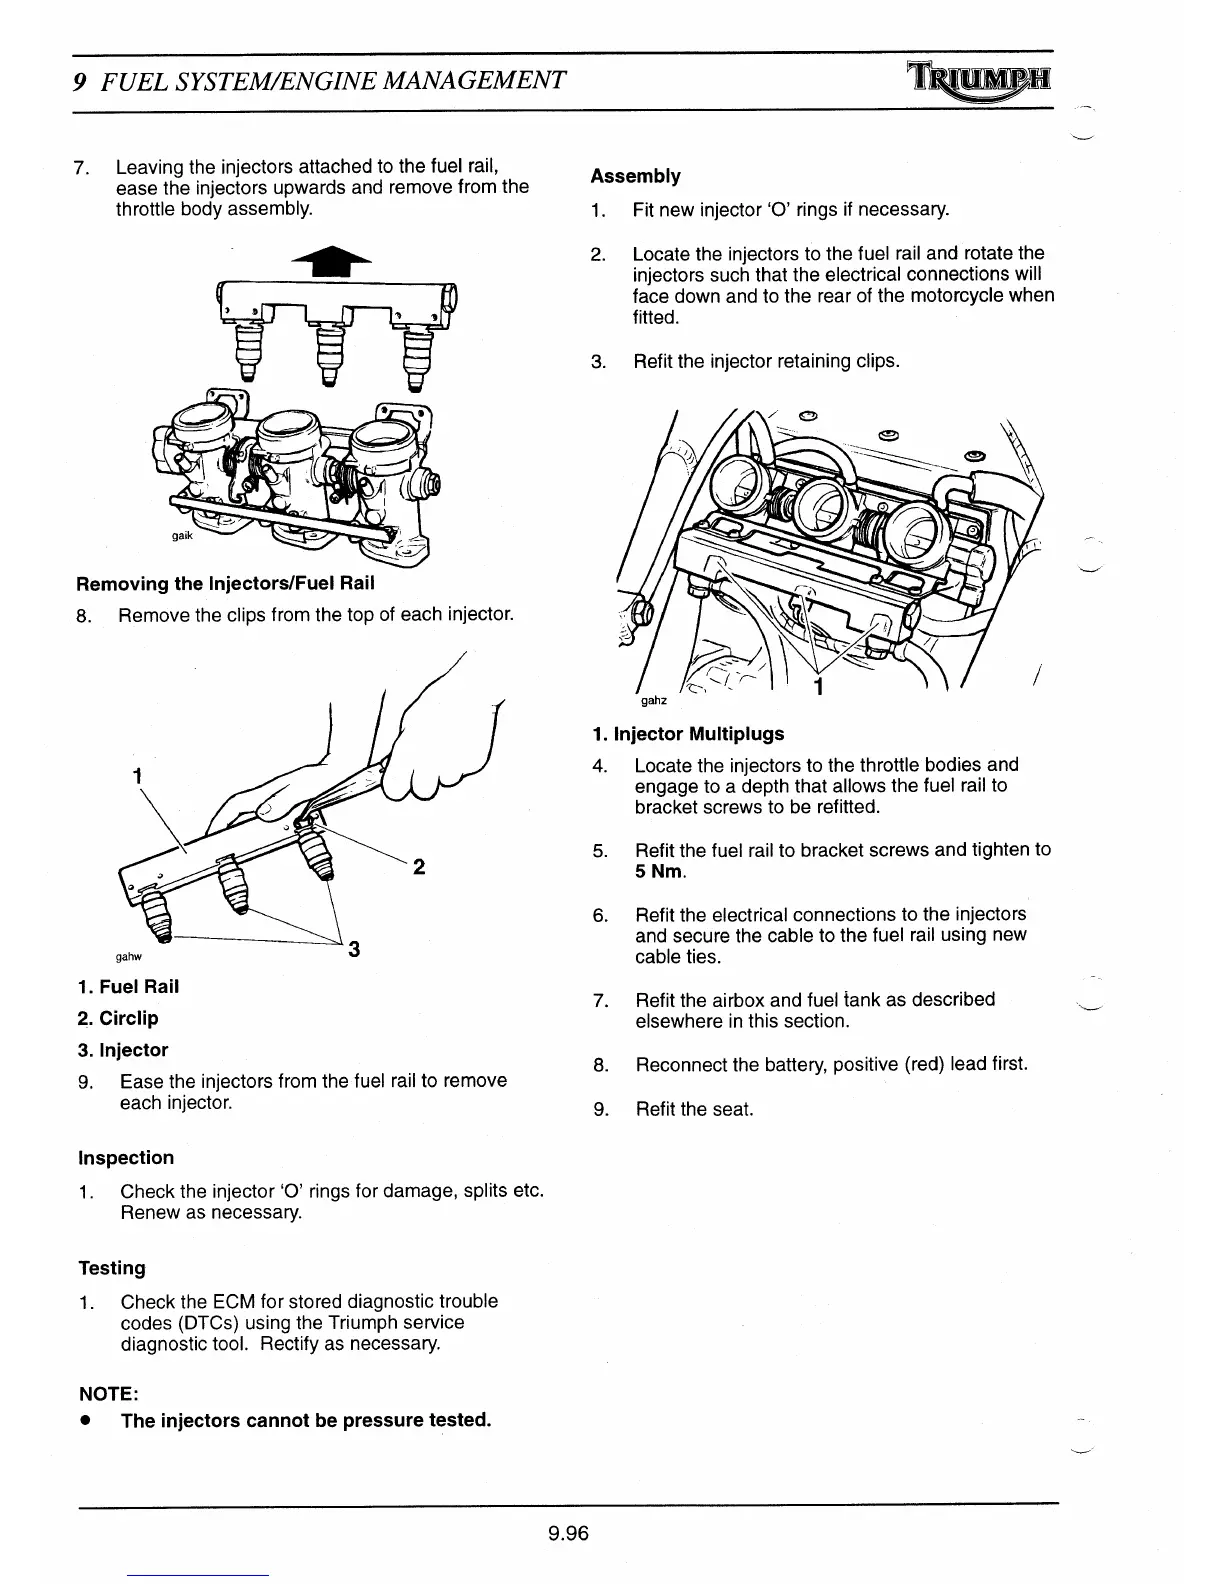
8.
Remove the clips from the top of each injector.
gahw
s
1.
Fuel Rail
2.
Circlip
3.
Injector
9.
Ease the injectors from the fuel rail to remove
each injector.
Inspection
1.
Check the injector `O' rings for damage, splits etc.
Renew as necessary.
Testing
1.
Check the ECM for stored diagnostic trouble
codes (DTCs) using the Triumph service
diagnostic tool. Rectify as necessary.
NOTE:
•
The injectors cannot be pressure tested.
Assembly
1.
Fit new injector `O' rings if necessary.
2.
Locate the injectors to the fuel rail and rotate the
injectors such that the electrical connections will
face down and to the rear of the motorcycle when
fitted.
3.
Refit the injector retaining clips.
gahz
1. Injector Multiplugs
4.
Locate the injectors to the throttle bodies and
engage to a depth that allows the fuel rail to
bracket screws to be refitted.
5.
Refit the fuel rail to bracket screws and tighten to
5 Nm.
6.
Refit the electrical connections to the injectors
and secure the cable to the fuel rail using new
cable ties.
7.
Refit the airbox and fuel tank as described
elsewhere in this section.
8.
Reconnect the battery, positive (red) lead first.
9.
Refit the seat.
9.96

 Loading...