13 BRAKING SYSTEM
TRnJMH
Installation
WARNING: Never use mineral based
grease in any part of the braking system
or in any area where contact with the braking
system is possible. Mineral based grease will
damage the hydraulic seals in the calipers and
master cylinders.
Damage caused by contact with mineral based
grease may reduce braking efficiency resulting in
an accident.
Fit new brake pads as an axle set or, if all the
pads are in a serviceable condition, clean the pad
grooves before refitting all pads in their original
positions.
WARNING: Do not apply more than a
minimum coating of grease to the pad
retaining pins. Excess grease may contaminate
the brake pads, hydraulic seals and discs causing
reduced braking efficiency and an accident.
2.
Lubricate the pad retaining pins using a minimum
amount of proprietary high temperature
'Copperslip' type grease.
3.
Fit the anti—rattle spring over the pads and push
down in the centre to allow the pad retaining pin
to slide across the top of the spring.
4.
Tighten the pad retaining pins to 25 Nm, and
secure with new split pins.
5.
Pump the brake lever to correctly position the
caliper pistons.
Observe the brake fluid handling warnings given
earlier in this section of the manual.
6.
Check the front brake fluid level and top up as
required with new DOT 4 fluid.
FRONT BRAKE CALIPER
Removal
CAUTION: To prevent body damage, do
•
not spill brake fluid onto any area of the
bodywork.
1.
Disconnect the brake hose at the caliper (two
hoses on right hand caliper), and place the free
end of the hose(s) in a suitable container to
collect brake fluid.
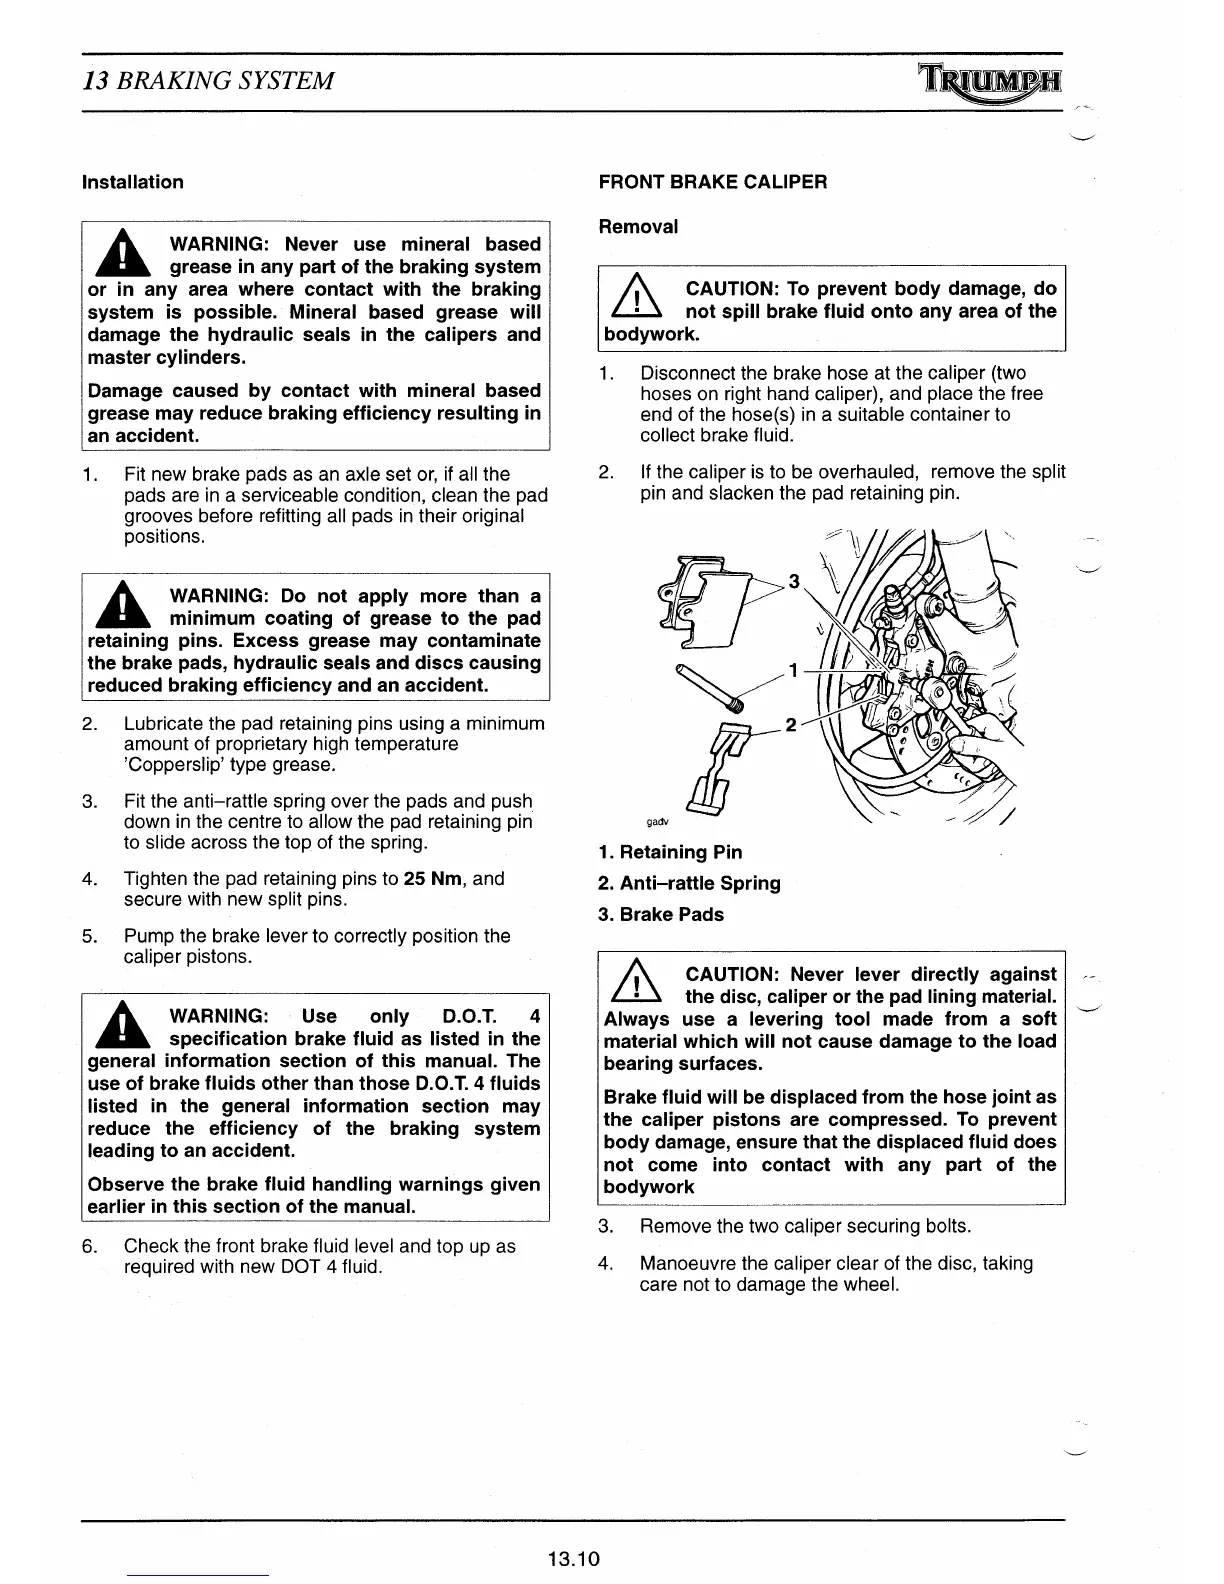
2.
If the caliper is to be overhauled, remove the split
pin and slacken the pad retaining pin.
1.
Retaining Pin
2.
Anti—rattle Spring
3.
Brake Pads
CAUTION: Never lever directly against
•
the disc, caliper or the pad lining material.
Always use a levering tool made from a soft
material which will not cause damage to the load
bearing surfaces.
Brake fluid will be displaced from the hose joint as
the caliper pistons are compressed. To prevent
body damage, ensure that the displaced fluid does
not come into contact with any part of the
bodywork
3.
Remove the two caliper securing bolts.
4.
Manoeuvre the caliper clear of the disc, taking
care not to damage the wheel.
3
P
2
gadv
13.10
 Loading...