WARNING: When using bearing service
tools always ensure that the selected tool
matches the diameter of the bearing being
installed. Damage to the wheel and bearing will
result from incorrect tool selection which may
cause loss of control and an accident.
Ensure that the bearing remains square to the hub
during the drawing in procedure. Damage to the
bearing and hub will result from forcing a bearing
which is not square to the hub which could cause
loss of control and an accident.
Always install bearings with the marked or
shielded sides facing outwards.
2.
Refit the speedometer drive ring with the drive tags
facing outwards.
3.
Lubricate and fit new seals to the wheel hubs.
4.
Refit the wheel as described earlier in this section.
14 WHEELS/TYRES
j i I
^
r^l[ `} ,
REAR WHEEL BEARINGS
Removal
1.
Remove the seat.
2.
Disconnect the batte
ry
, negative (black) lead first.
3.
Remove the silencer as described in the fuel system
section.
WARNING: If the engine has recently
been running, the exhaust system will be
hot. Before working on or near the exhaust system,
allow sufficient time for the exhaust system to cool
as touching any part of a hot exhaust system could
cause burn injuries.
4.
Raise and support the rear of the motorcycle under - ---
the frame or engine.
WARNING: Ensure the motorcycle is
stabilised and adequately supported, to
prevent it falling and causing damage or injury.
5.
Remove the rear wheel as described earlier in this
section.
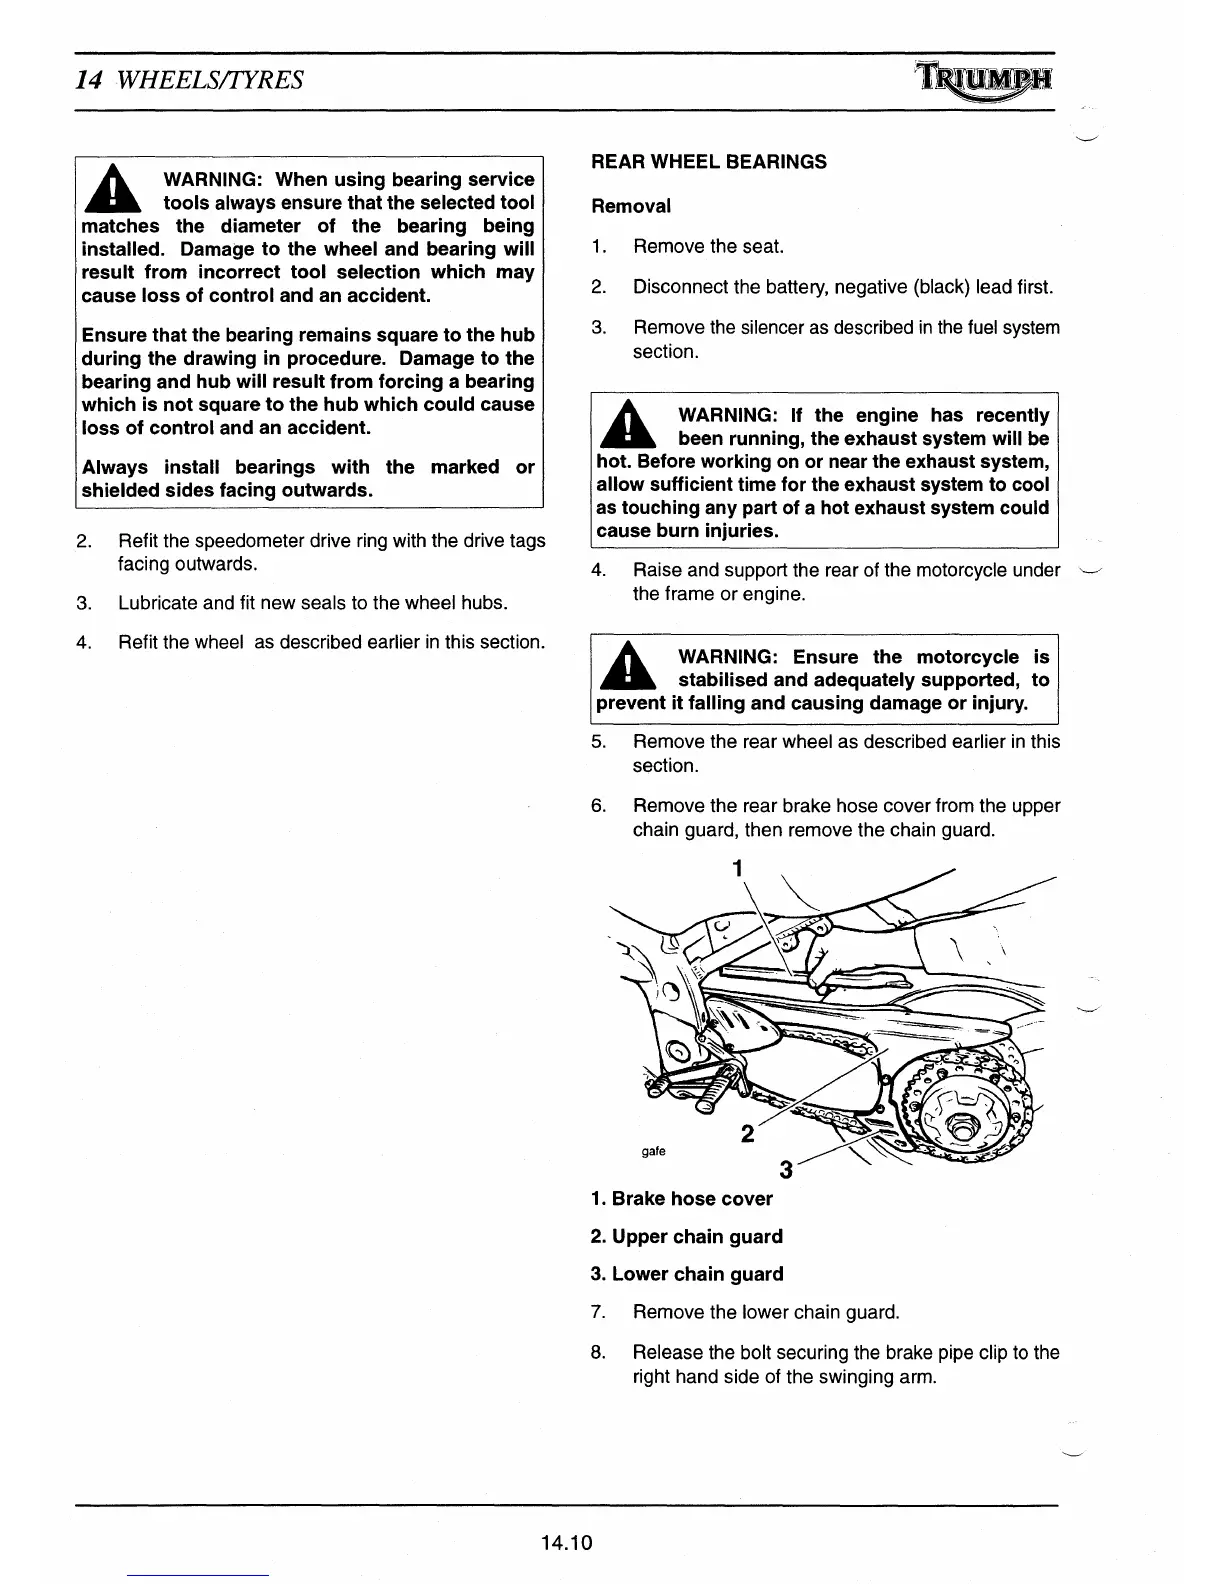
6.
Remove the rear brake hose cover from the upper
chain guard, then remove the chain guard.
gate
`^
3
1.
Brake hose cover
2.
Upper chain guard
3.
Lower chain guard
7.
Remove the lower chain guard.
8.
Release the bolt securing the brake pipe clip to the
right hand side of the swinging arm.
14.10
 Loading...