3 CYLINDER HEAD & CAMSHAFT
6
2
4
Seal
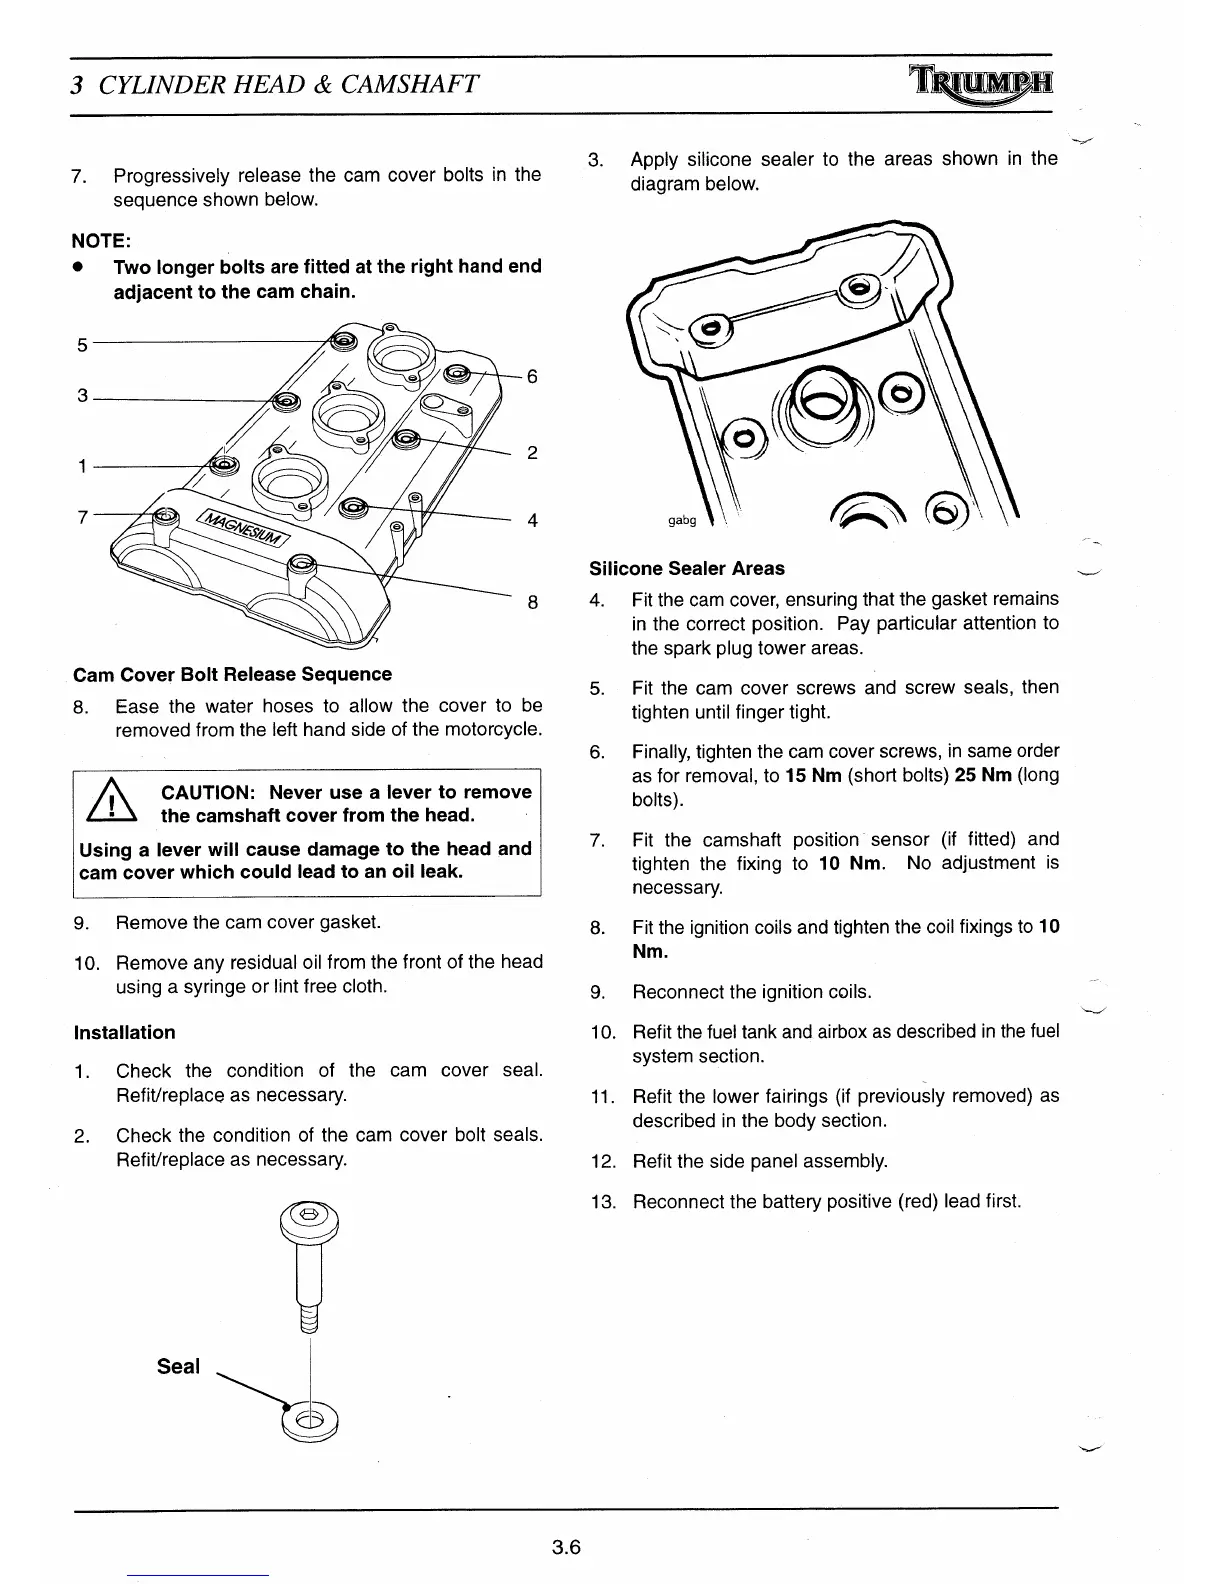
7.
Progressively release the cam cover bolts in the
sequence shown below.
3.
Apply silicone sealer to the areas shown in the
diagram below.
NOTE:
•
Two longer bolts are fitted at the right hand end
adjacent to the cam chain.
5
3
1
7
Silicone Sealer Areas
8
4.
Fit the cam cover, ensuring that the gasket remains
in the correct position. Pay particular attention to
the spark plug tower areas.
9ab
\
,4):
::::::r
(
Cam Cover Bolt Release Sequence
8.
Ease the water hoses to allow the cover to be
removed from the left hand side of the motorcycle.
CAUTION: Never use a lever to remove
the camshaft cover from the head.
Using a lever will cause damage to the head and
cam cover which could lead to an oil leak.
9.
Remove the cam cover gasket.
10.
Remove any residual oil from the front of the head
using a syringe or lint free cloth.
Installation
1.
Check the condition of the cam cover seal.
Refit/replace as necessary.
2.
Check the condition of the cam cover bolt seals.
Refit/replace as necessary.
5.
Fit the cam cover screws and screw seals, then
tighten until finger tight.
6.
Finally, tighten the cam cover screws, in same order
as for removal, to
15 Nm
(short bolts)
25 Nm
(long
bolts).
7.
Fit the camshaft position sensor (if fitted) and
tighten the fixing to
10 Nm.
No adjustment is
necessary.
8.
Fit the ignition coils and tighten the coil fixings to
10
Nm.
9.
Reconnect the ignition coils.
10.
Refit the fuel tank and airbox as described in the fuel
system section.
11.
Refit the lower fairings (if previously removed) as
described in the body section.
12. Refit the side panel assembly.
13. Reconnect the battery positive (red) lead first.
3.6
 Loading...