TJMPH
CLUTCH
4
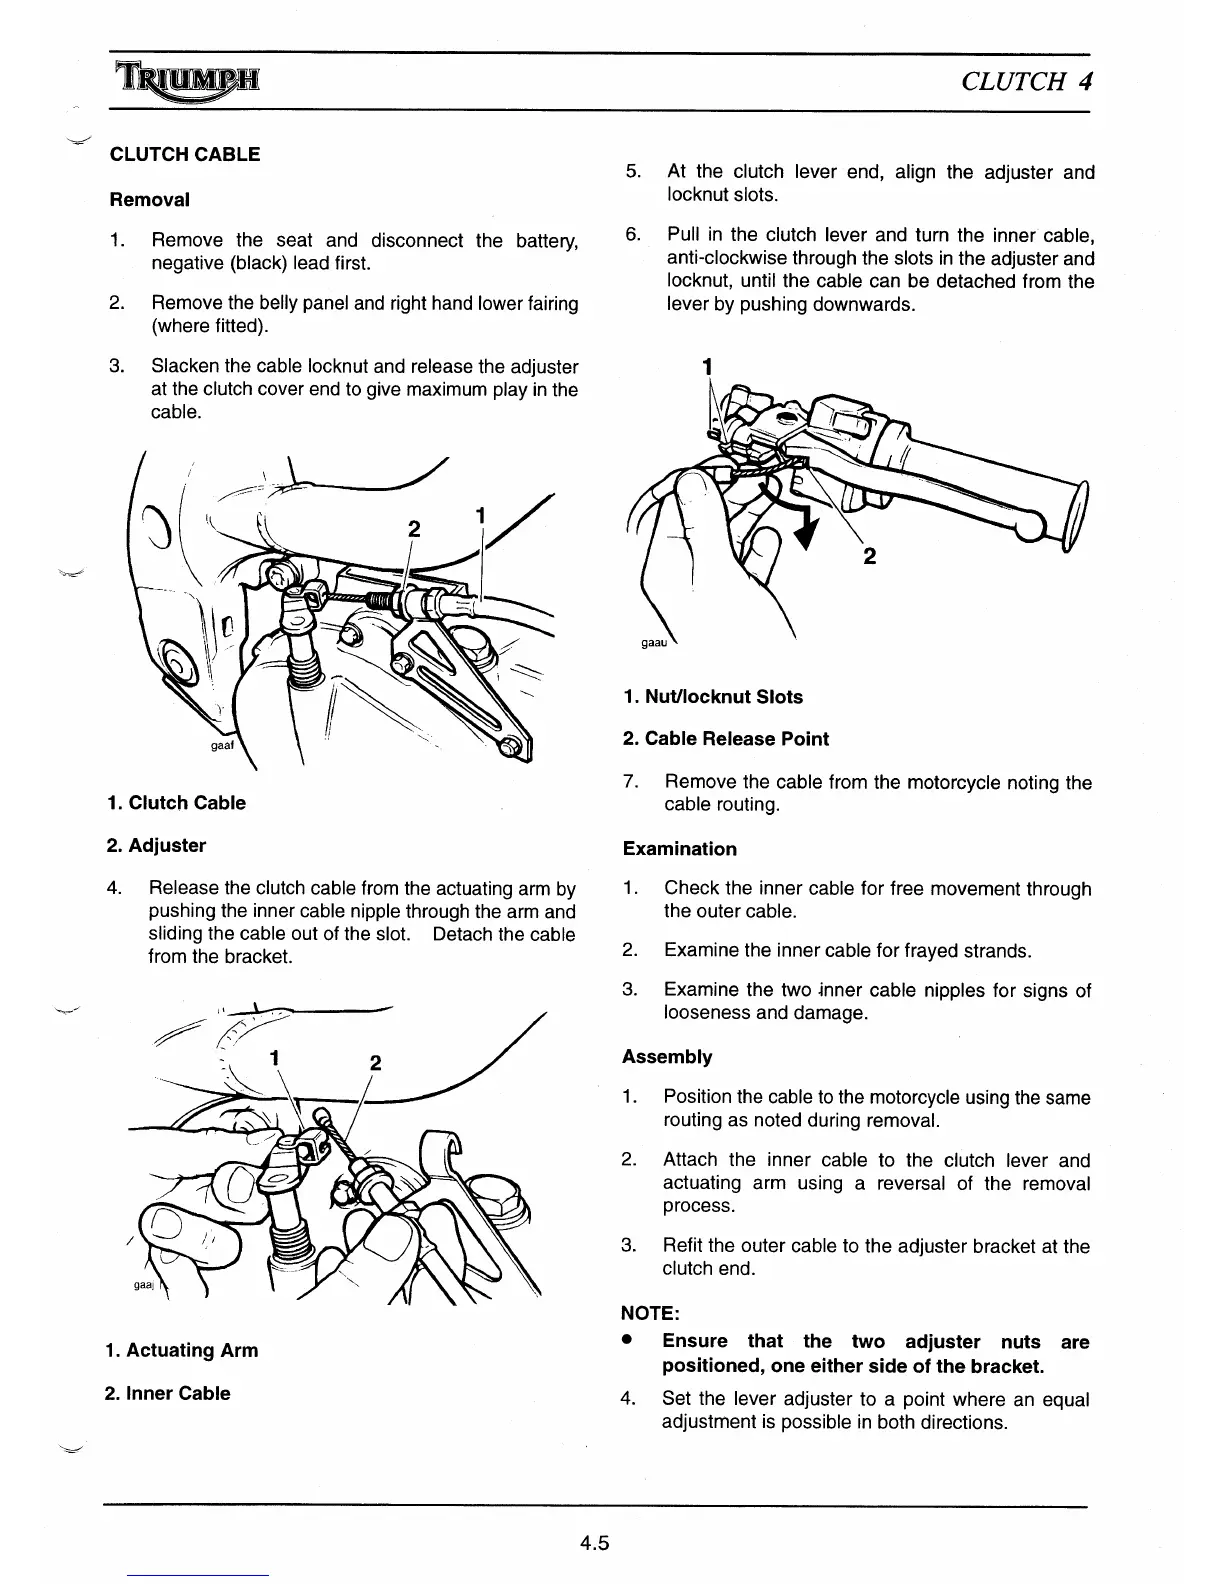
CLUTCH CABLE
Removal
1.
Remove the seat and disconnect the battery,
negative (black) lead first.
2.
Remove the belly panel and right hand lower fairing
(where fitted).
3.
Slacken the cable locknut and release the adjuster
at the clutch cover end to give maximum play in the
cable.
1.
Clutch Cable
2.
Adjuster
4.
Release the clutch cable from the actuating arm by
pushing the inner cable nipple through the arm and
sliding the cable out of the slot.
Detach the cable
from the bracket.
1.
Actuating Arm
2.
Inner Cable
5.
At the clutch lever end, align the adjuster and
locknut slots.
6.
Pull in the clutch lever and turn the inner cable,
anti-clockwise through the slots in the adjuster and
locknut, until the cable can be detached from the
lever by pushing downwards.
1
1.
Nut/locknut Slots
2.
Cable Release Point
7.
Remove the cable from the motorcycle noting the
cable routing.
Examination
1.
Check the inner cable for free movement through
the outer cable.
2.
Examine the inner cable for frayed strands.
3.
Examine the two inner cable nipples for signs of
looseness and damage.
Assembly
1.
Position the cable to the motorcycle using the same
routing as noted during removal.
2.
Attach the inner cable to the clutch lever and
actuating arm using a reversal of the removal
process.
3.
Refit the outer cable to the adjuster bracket at the
clutch end.
NOTE:
•
Ensure that the two adjuster nuts are
positioned, one either side of the bracket.
4.
Set the lever adjuster to a point where an equal
adjustment is possible in both directions.
4.5

 Loading...