WHEELS/TYRES 14
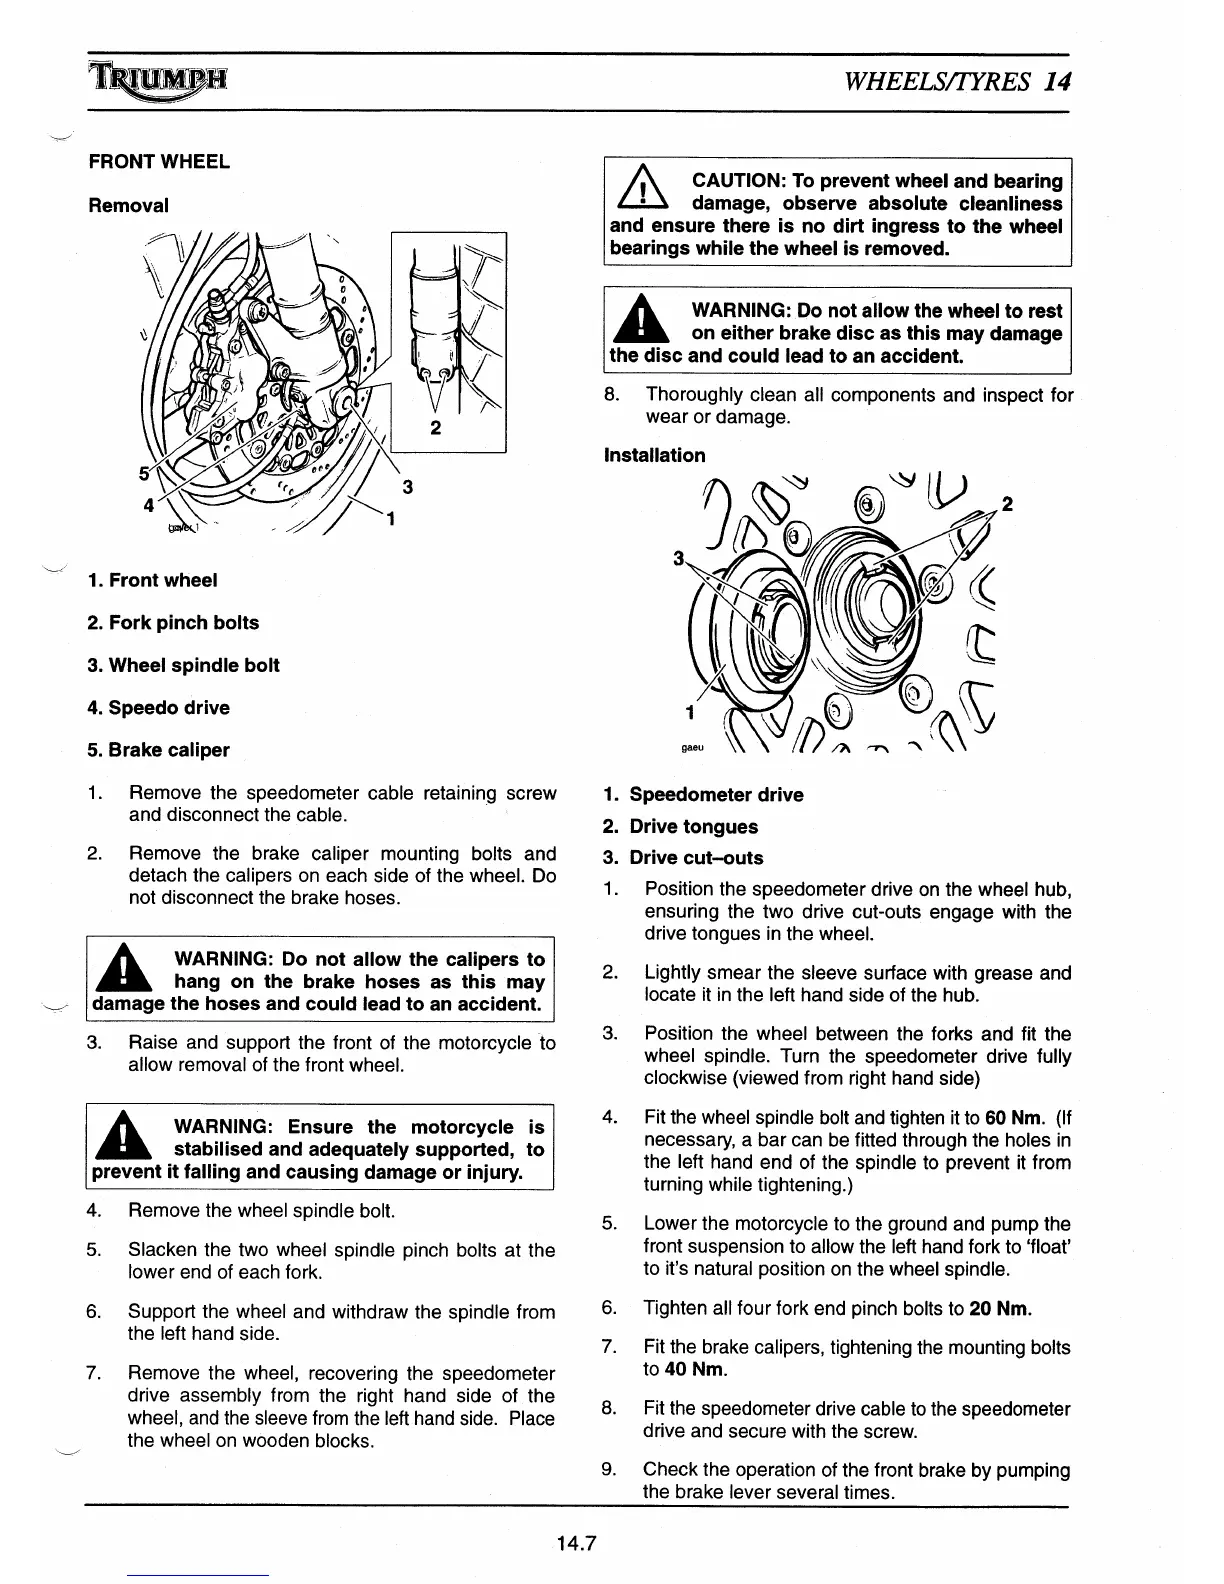
FRONT WHEEL
Removal
d o
z
5
^
rrr
\
r
frc
4
'
^
1.
Front wheel
2.
Fork pinch bolts
3.
Wheel spindle bolt
4.
Speedo drive
5.
Brake caliper
1.
Remove the speedometer cable retaining screw
and disconnect the cable.
2.
Remove the brake caliper mounting bolts and
detach the calipers on each side of the wheel. Do
not disconnect the brake hoses.
WARNING: Do not allow the calipers to
hang on the brake hoses as this may
damage the hoses and could lead to an accident.
3.
Raise and support the front of the motorcycle to
allow removal of the front wheel.
WARNING: Ensure the motorcycle is
stabilised and adequately supported, to
prevent it falling and causing damage or injury.
4.
Remove the wheel spindle bolt.
5.
Slacken the two wheel spindle pinch bolts at the
lower end of each fork.
6.
Support the wheel and withdraw the spindle from
the left hand side.
7.
Remove the wheel, recovering the speedometer
drive assembly from the right hand side of the
wheel, and the sleeve from the left hand side. Place
the wheel on wooden blocks.
CAUTION: To prevent wheel and bearing
•
damage, observe absolute cleanliness
and ensure there is no dirt ingress to the wheel
bearings while the wheel is removed.
WARNING: Do not allow the wheel to rest
on either brake disc as this may damage
the disc and could lead to an accident.
8.
Thoroughly clean all components and inspect for
wear or damage.
Installation
2
1.
Speedometer drive
2.
Drive tongues
3.
Drive cut—outs
1.
Position the speedometer drive on the wheel hub,
ensuring the two drive cut-outs engage with the
drive tongues in the wheel.
2.
Lightly smear the sleeve surface with grease and
locate it in the left hand side of the hub.
3.
Position the wheel between the forks and fit the
wheel spindle. Turn the speedometer drive fully
clockwise (viewed from right hand side)
4.
Fit the wheel spindle bolt and tighten it to 60 Nm. (If
necessa
ry
, a bar can be fi
tt
ed through the holes in
the left hand end of the spindle to prevent it from
turning while tightening.)
5.
Lower the motorcycle to the ground and pump the
front suspension to allow the left hand fork to `float'
to it's natural position on the wheel spindle.
6.
Tighten all four fork end pinch bolts to 20 Nm.
7.
Fit the brake calipers, tightening the mounting bolts
to 40 Nm.
8.
Fit the speedometer drive cable to the speedometer
drive and secure with the screw.
9.
Check the operation of the front brake by pumping
the brake
lever several times.
3
14.7

 Loading...