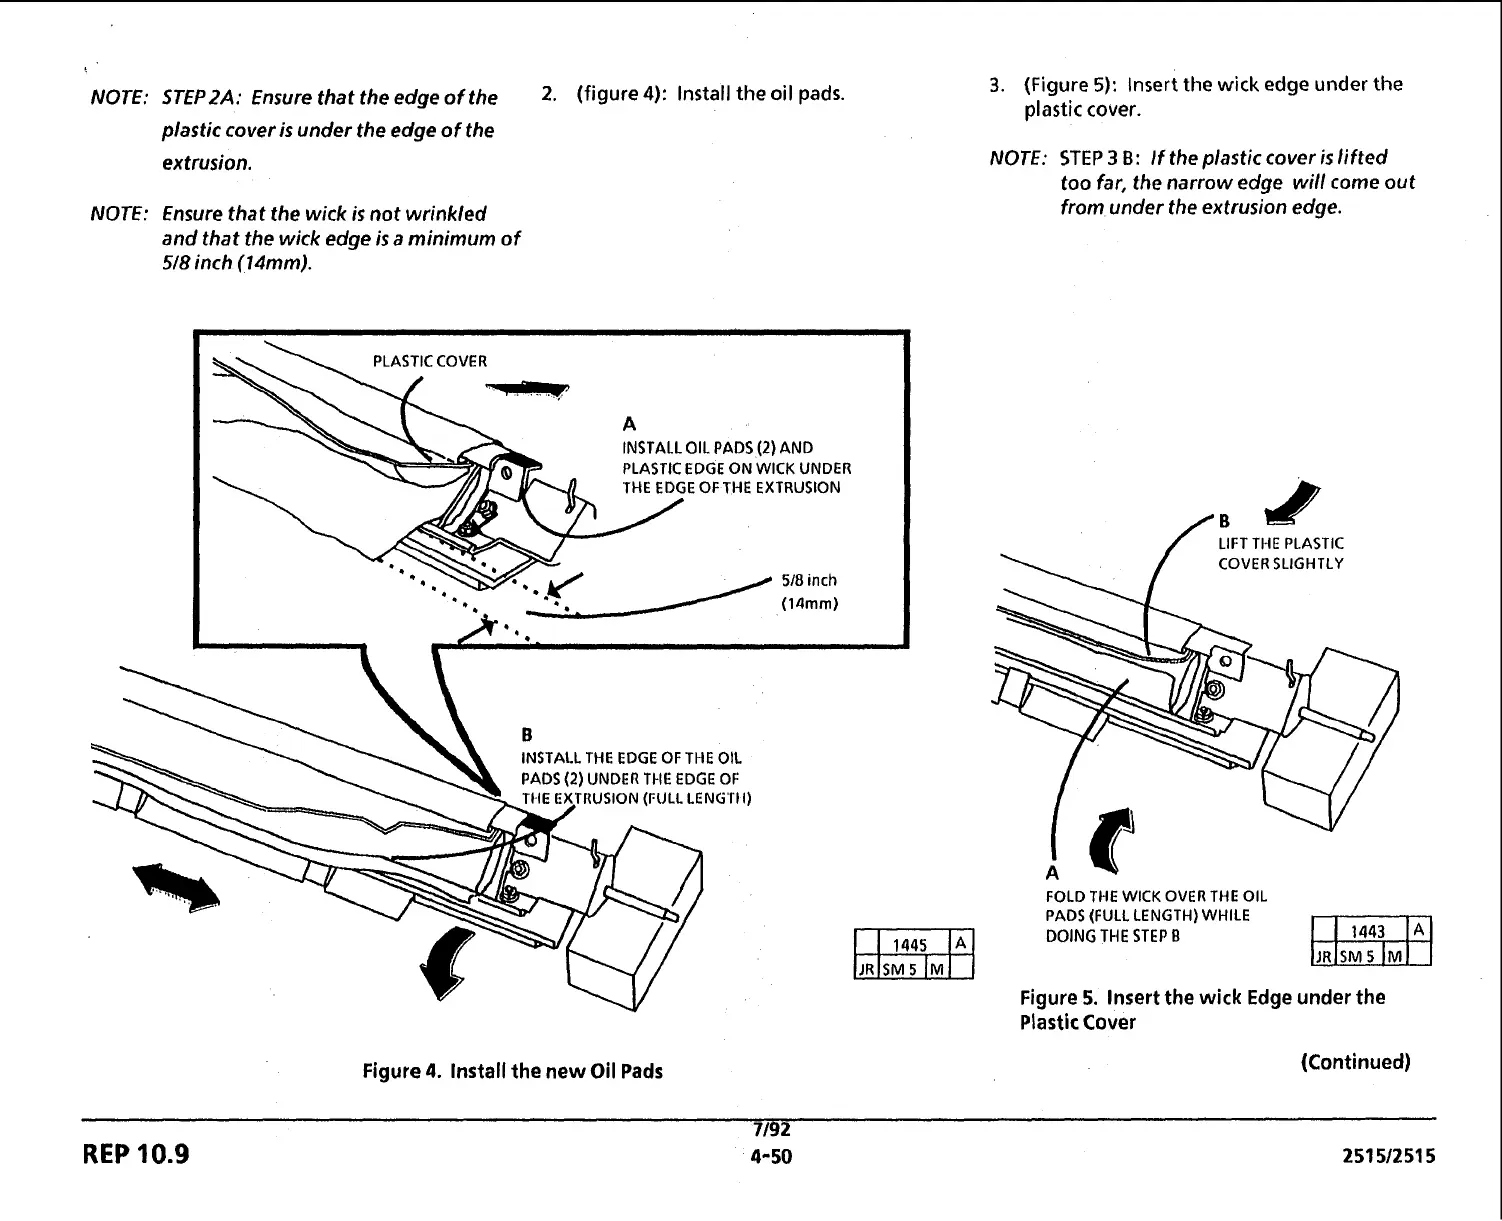
NOTE:
STEP2A:
Ensure that the edge of the
2.
(figure
4):
Install the oil pads.
plastic cover is under the edge of the
extrusion.
NOTE:
Ensure that the wick is not wrinkled
and that the wick edge is
a
minimum of
518
inch (14mm).
3.
(Figure
5):
Insert the
wick
edge under
the
plastic cover.
NOTE:
STEP
3
B:
If
the plastic cover is lifted
too far, the narrow edge will come out
from under the extrusion edge.
PLASTIC COVER
L-
..
.
A
INSTALL OIL PADS
(2)
AND
b
PLASTIC EDGE ON WICK UNDER
THE EDGE OF THE EXTRUSION
INSTALL THE EDGE
OF
THE OIL
PADS
(2)
UNDER
THE
EDGE
OF
TllE EXTRUSION (FULL LENG'TII)
Figure
4.
Install the
new
Oil
Pads
FOLD THE WlCK OVER THE OIL
PADS (FULL LENGTH) WHILE
DOING THE STEP
B
Figure
5.
Insert the
wick
Edge under the
Plastic
Cover
(Continued)
REP
10.9
 Loading...


