60C5D11
7-76
1
2
3
4
5
6
7
8
9
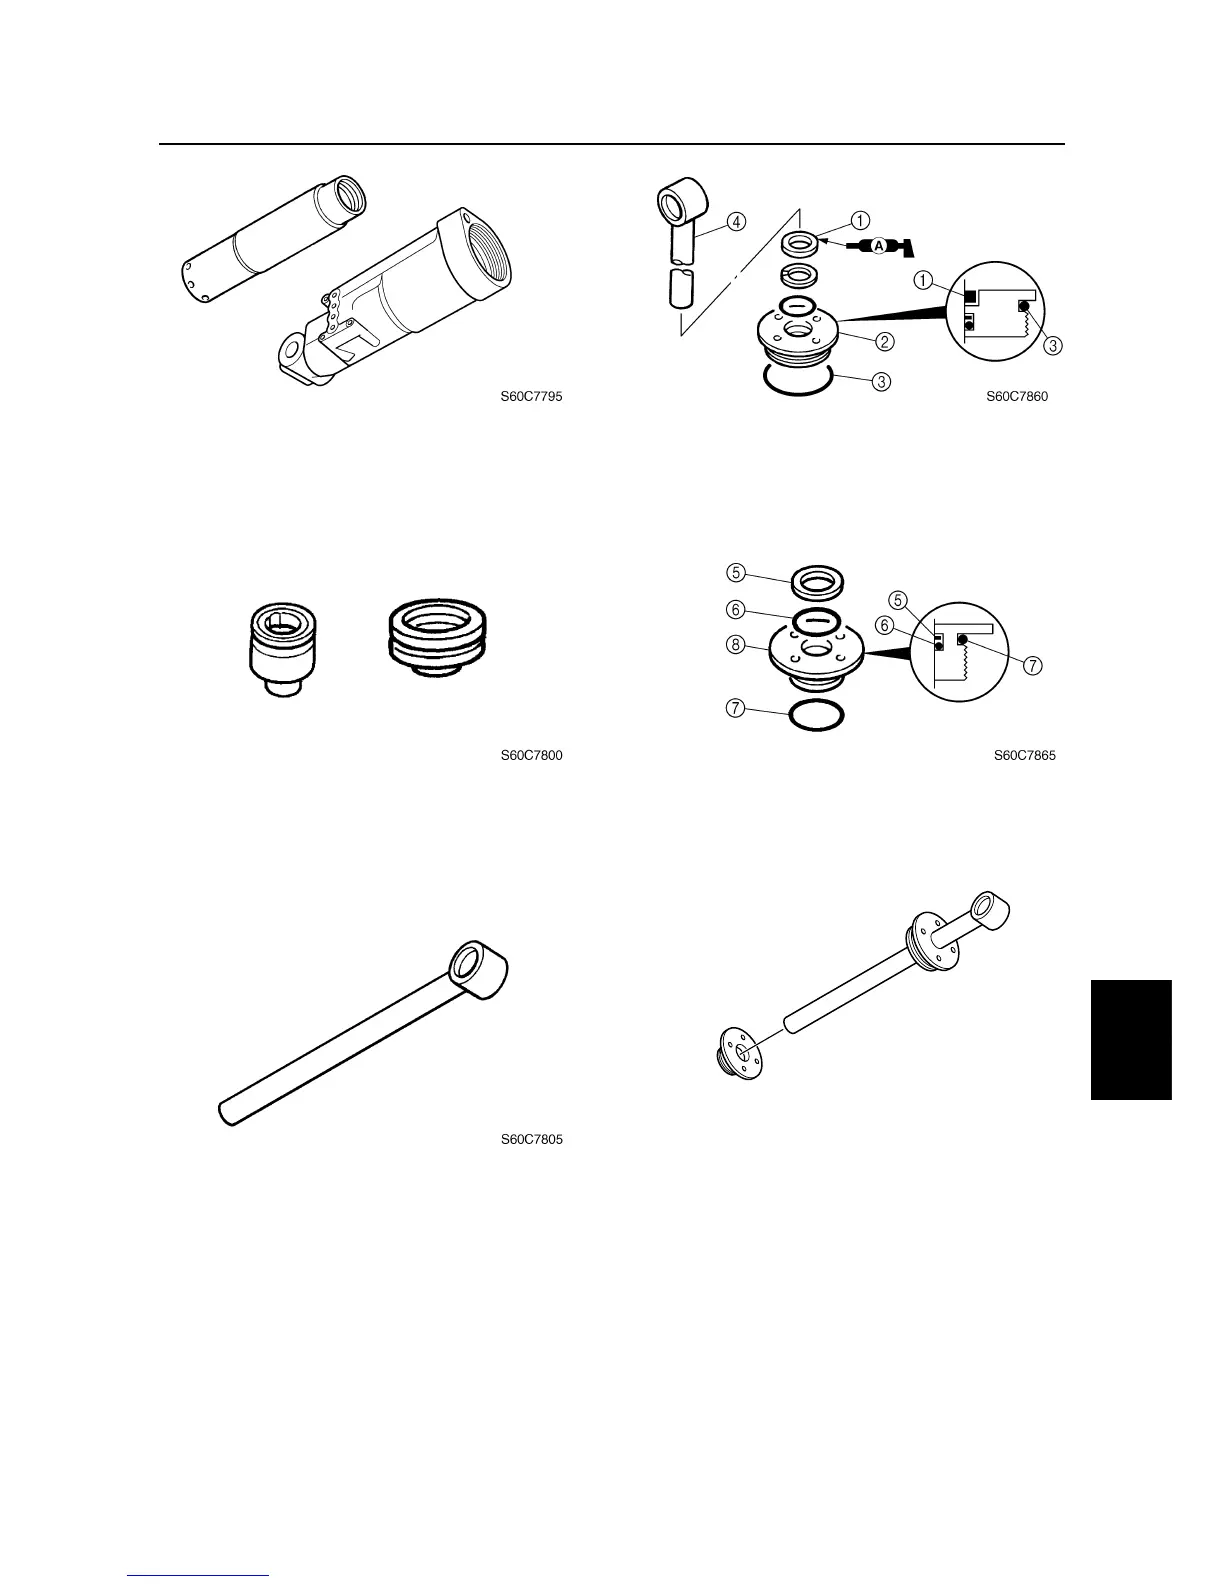
3. Check the outer surface of the tilt piston
and free piston for scratches. Replace if
necessary.
4. Check the tilt ram for bends or excessive
corrosion. Polish with #400–600 grit
sandpaper if there is light rust or replace
if necessary.
Assembling the trim cylinder
1. Install the new dust seal
1
into the tilt
cylinder end screw
2
.
2. Install the O-ring
3
onto the end screw.
3. Install the tilt ram
4
into the end screw.
4. Install the backup ring
5
and O-rings
6
and
7
into the trim cylinder end screw
8
.
5. Install the trim cylinder end screw onto
the tilt ram.
6. Install O-rings
9
and
0
, and backup ring
A
onto the trim piston
B
.
7. Install the balls
C
, absorber valve pins
D
and springs
E
into the trim piston, and
then install the plate
F
and trim piston to
the trim cylinder
G
.
S60C7870
Tilt cylinder and trim cylinder (F100C)

 Loading...