4-7
Cisco Nexus 7000 Series Hardware Installation and Reference Guide
OL-23069-07
Chapter 4 Installing a Cisco Nexus 7010 Chassis
Installing the Chassis
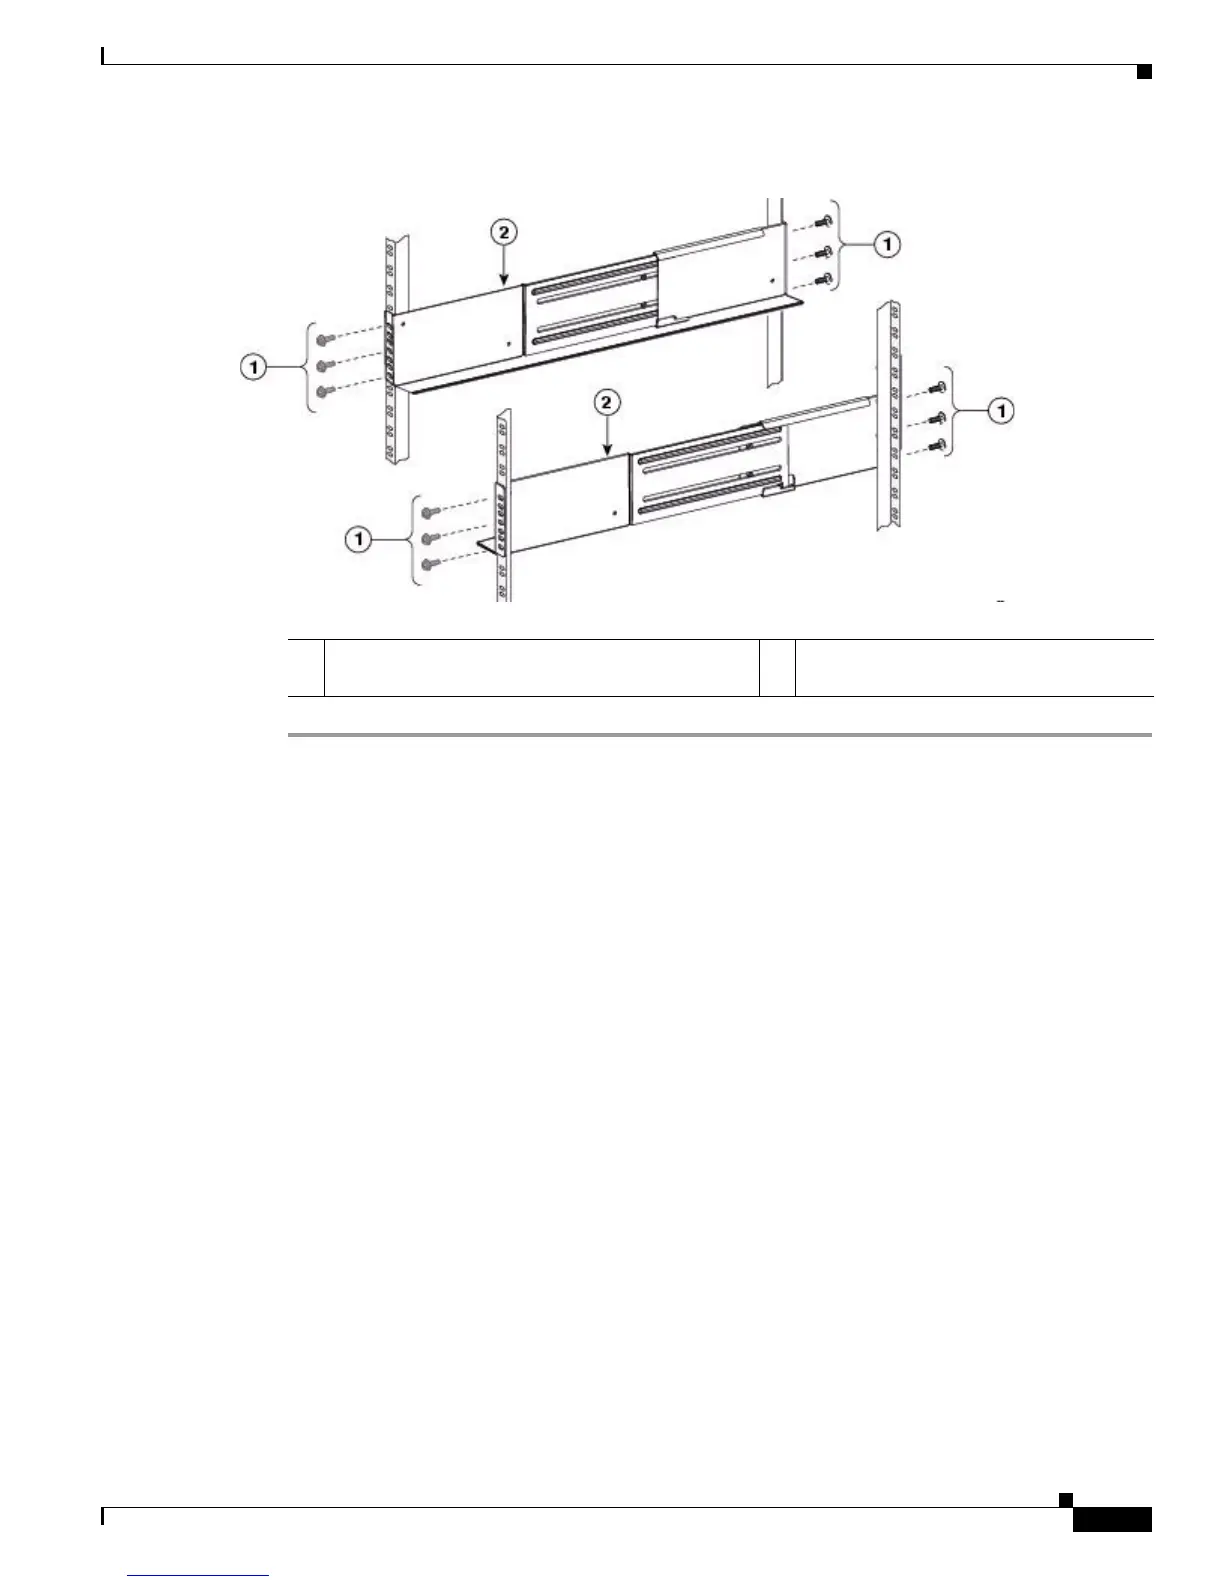
Figure 4-2 Attaching a Bottom-Support Rail to a Rack
Installing the Chassis
This section describes how to install the Cisco Nexus 7010 chassis in a rack or cabinet. These installation
steps include transporting the chassis, elevating the chassis to the rack using a mechanical lift, pushing
the chassis onto the rack, and then securing the chassis to the rack.
This section includes the following topics:
• Prerequisites for Installing the Chassis, page 4-7
• Required Tools and Equipment, page 4-8
• Installing the Chassis, page 4-9
Prerequisites for Installing the Chassis
Before you install the chassis, you must make sure that the following items are available for the
installation:
• Data center ground is accessible where you are installing the Cisco Nexus 7010 chassis.
• Four-post, 19-inch EIA rack or cabinet that includes such a rack.
For more information on the rack or cabinet, see the “Installing a Four-Post Rack or Cabinet” section
on page 4-2.
1 Four sets of 3 M6 x 19 mm Phillips screws or
four sets of 3 12-24 x 3/4 in. Phillips screws
2 Adjustable bottom-support rails (2)
 Loading...


