3-5
Cisco Nexus 7000 Series Hardware Installation and Reference Guide
OL-23069-07
Chapter 3 Installing a Cisco Nexus 7009 Chassis
Installing the Bottom-Support Rails on the Rack
• Attaching the Front-Mount Bottom-Support Rails, page 3-6
• Attaching the Center-Mount Bottom-Support Rails, page 3-8
Prerequisites for Attaching the Bottom-Support Rails
Before you can attach the bottom-support rails, you must fully install the rack or cabinet and use bolts
to anchor the rack to the concrete subfloor. To maximize the stability of the rack, install everything as
low as possible on the rack with heavier items below lighter items. Be sure that there is 15 RU available
for installing the Cisco Nexus 7009 chassis (14 RU) and its bottom-support rack (1 RU).
Required Tools and Equipment
You need the following tools and equipment to attach the bottom-support rails:
• Number 1 Phillips-head screwdriver with torque capability.
• One of the following types of bottom-support rails:
–
Front-mount bottom-support rails (shipped with the Bottom-Support Kit, which is found in the
accessory kit or ordered separately [part number N7K-C7009-BSK])
–
Center-mount bottom-support rails (not shipped with the chassis unless special ordered [part
number N7K-C7009-CMK])
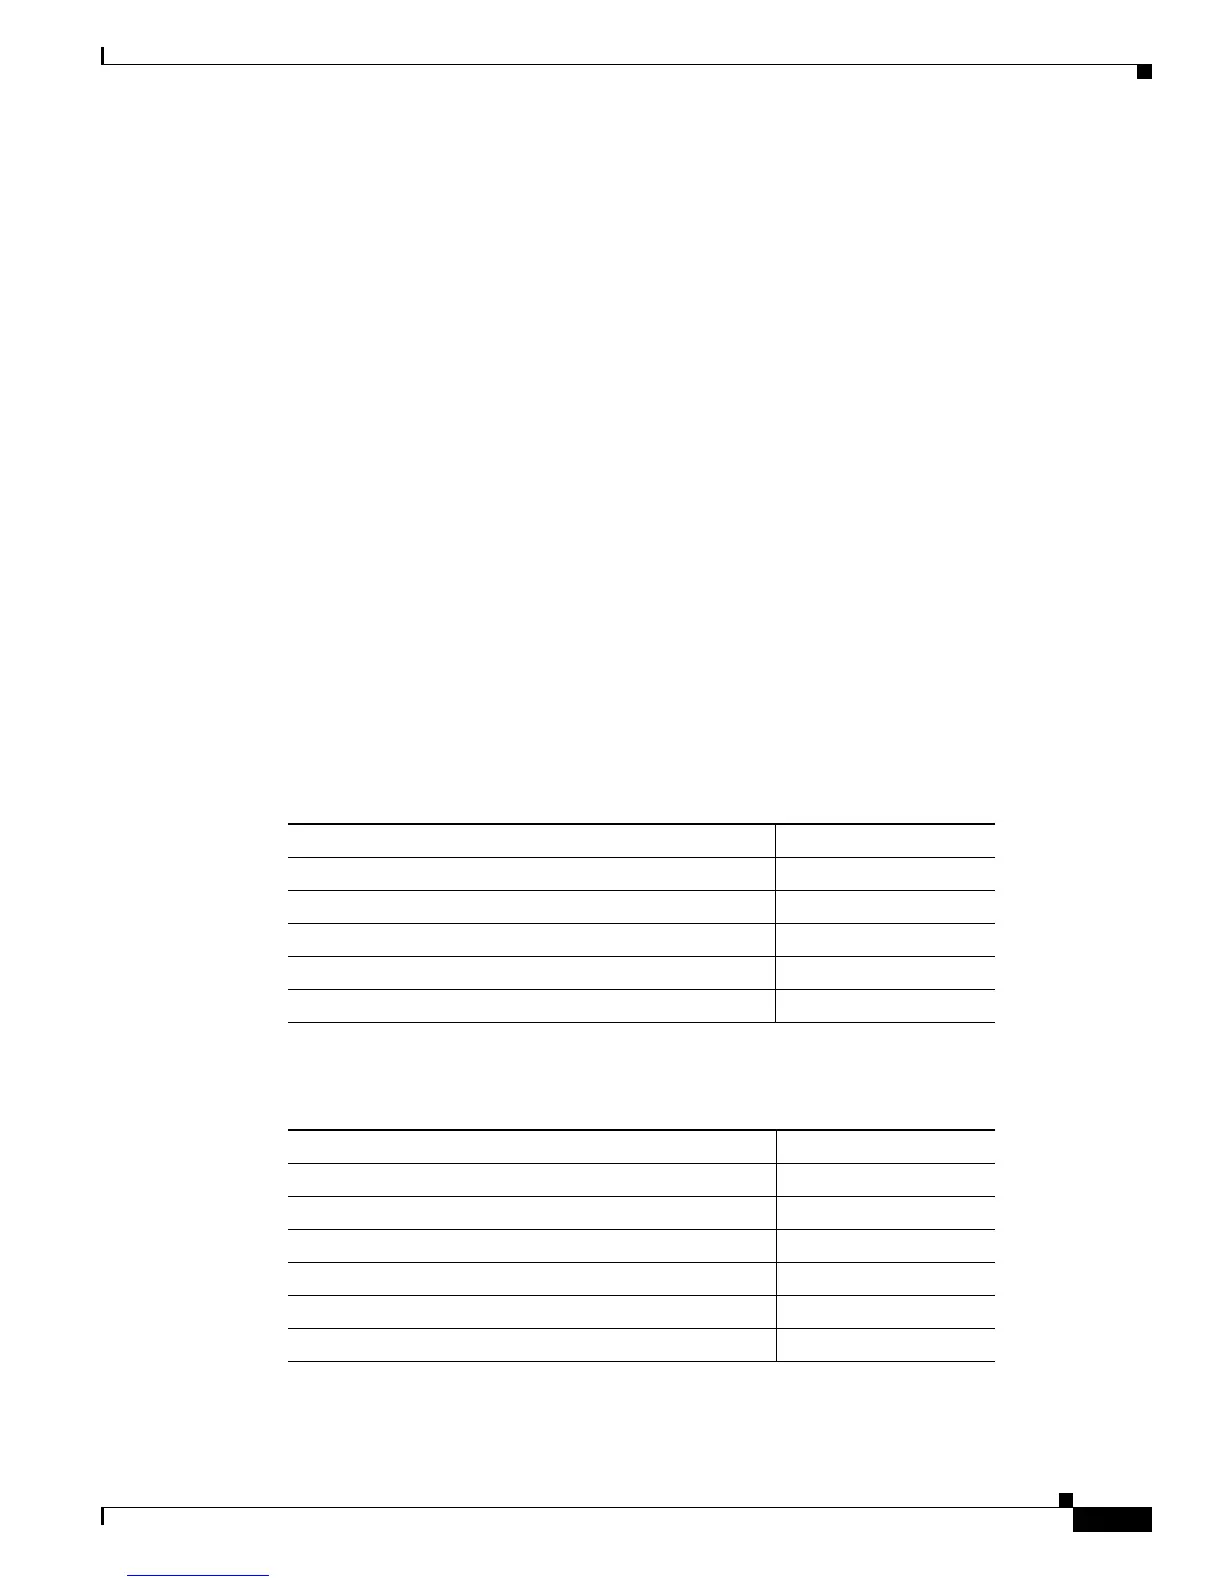
Table 3-1 lists the items in the Bottom-Support Kit and Table 3-2 lists the items in the Center-Mount Kit.
Table 3-1 Bottom-Support Kit Contents
Part Description Quantity
Front-mount bottom-support rails 2
Crossbar 1
12-24 x 3/4 in. Phillips screws 20
M6 x 19 mm Phillips screws 20
M4 x 8 mm Phillips screws 2
Table 3-2 Center-Mount Kit Contents
Part Description Quantity
Center-mount rack mounting brackets 2
Center-mount bottom-support rails 2
Crossbar 1
12-24 x 3/4 in. Phillips screws 20
M6 x 19 mm Phillips screws 20
M4 x 8 mm Phillips screws 2

 Loading...


