10-40
Cisco Nexus 7000 Series Hardware Installation and Reference Guide
OL-23069-07
Chapter 10 Installing or Replacing Components
Installing a NAM Module
Step 11 On the replacement I/O module, rotate both ejector levers fully away from the front of the module.
Step 12 If you are inserting the module into a Cisco Nexus 7010 chassis, rotate the module 90 degrees clockwise.
Step 13 Align the module to the chassis guides for the vacated slot, and slide the module part way into the slot.
Step 14 With one or both hands on the front of the module, push the module all the way into the slot until it seats
on the midplane connector.
Step 15 Simultaneously push both ejector levers inward until they come in contact with the face of the module.
Note Verify that the ejector levers are fully closed before tightening the captive screws. Failure to fully seat
the module in the backplane connector can result in error messages.
Step 16 Tighten the two captive screws on the I/O module to 8 in-lb (0.9 N·m).
Step 17 Reconnect the I/O cables to the ports or the transceivers on the fiber-optic cables to the ports on the
module.
Installing a NAM Module
The Network Analysis Module (NAM) can be installed in an I/O module slot on the Cisco Nexus 7004,
7009, 7010, or 7018 switch chassis. You can either replace a NAM or install a new one in an empty I/O
module slot. If you install a new module, you must also install and configure the latest NAM software
on the module.
Note If the switch shipped with one or more NAM modules already installed, then the modules are already
configured with the Prime NAM software and are ready to be used. If you are installing a new NAM
module and the module does not automatically boot up, then you must install and configure the Prime
NAM software in order to use the module.
This section describes how to install NAM modules and includes the following topics:
• Required Tools for Installing a NAM, page 10-41
• Installing or Replacing a NAM, page 10-41
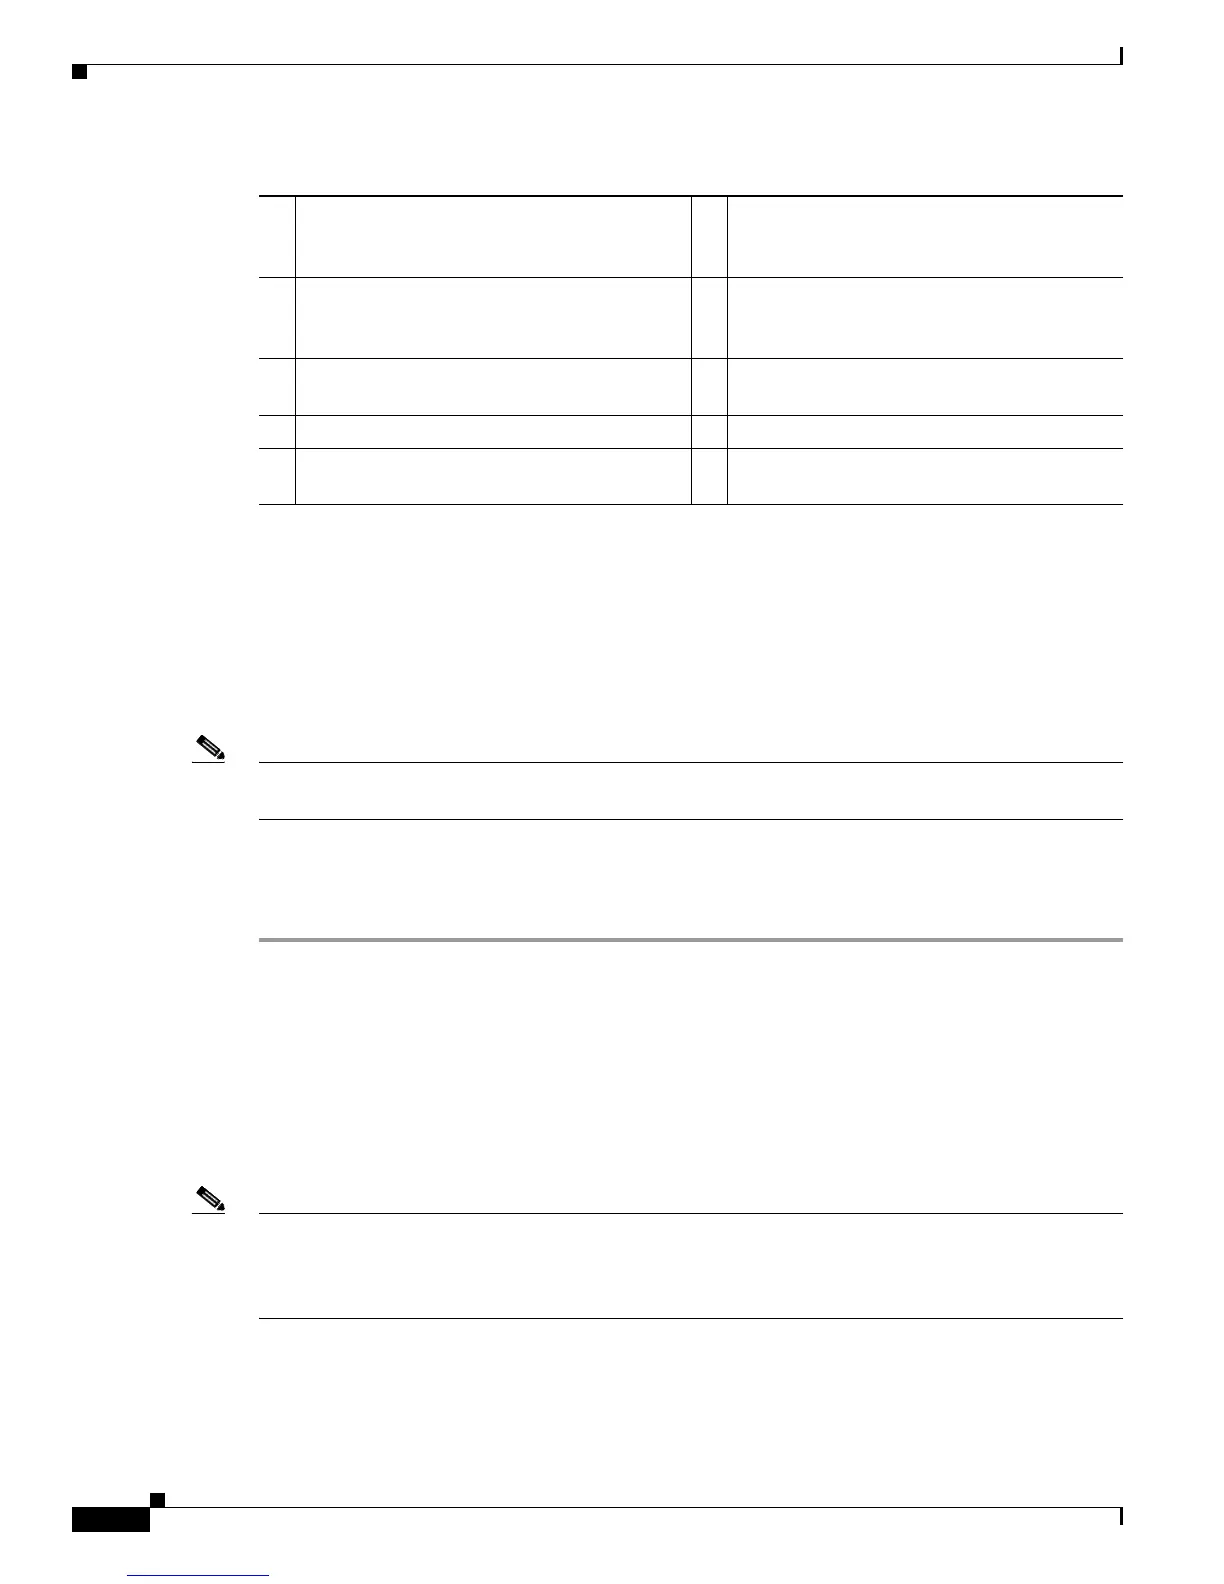
1 Put the I/O module in an ESD bag (not shown)
and then place it between the raised portions
of the flattened box.
6 Place the box and foam blocks into the larger
box.
2 Fold the shorter flaps along the front and back
of the module and then fold them over the
module.
7 Fold the narrow flaps over the box.
3 Fold the longer flaps along the sides of the
module and then over the top of the module.
8 Fold the wide flaps over the box.
4 Tape the longer flaps together and to the box. 9 Tape the wide flaps together and to the box.
5 Insert each of the two sides of the box into one
of the foam blocks.

 Loading...


