150
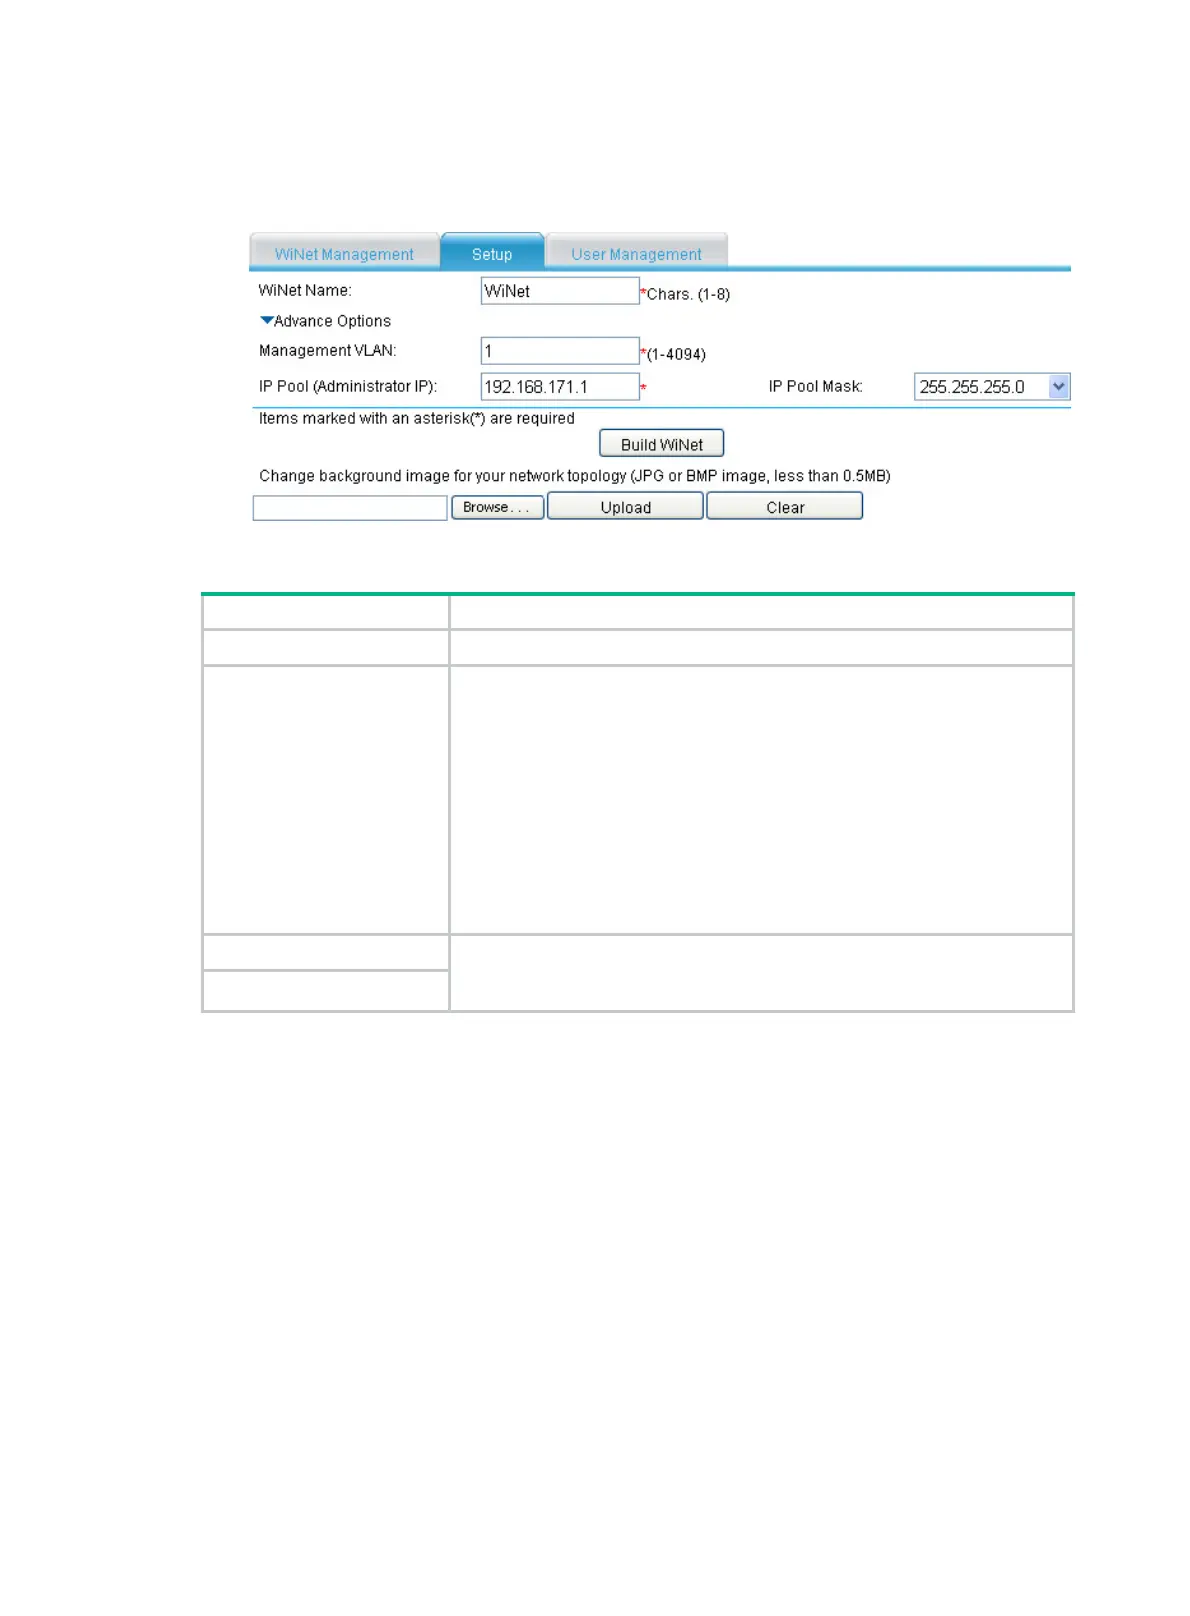
2. Click OK to enter the Setup page, as shown in Figure 535.
3. Configure WiNet, as shown in Table 205.
Figure 535 WiNe
t setup page
Table 205 Configuration items
Item Description
WiNet Name Enter a WiNet name.
Management VLAN
Enter a management VLAN ID in the WiNet. You can enter an existing static
VLAN only.
The management VLAN is used by WiNet packets for communication. It
actually defines the WiNet management range and delivers the following
functions:
• Isolates WiNet management packets from other packets.
• Enables internal communication between the administrator, members,
and candidates.
WiNet management requires that the management VLAN traffic be permitted
on the administrator’s ports (including cascade ports if there is any)
connected to members, candidates, and the external network.
IP Pool (Administrator IP)
Enter an IP address and select a network mask for the administrator. After
that, each WiNet member is assigned an IP address on the same subnet as
the administrator.
Mask of IP Pool
After a WiNet is built, you cannot configure items on the Setup page, and the Build WiNet button
changes to Close WiNet. To delete the WiNet, click the Close WiNet button.
Setting the background image for the WiNet topology
diagram
The WiNet topology diagram is displayed in the WiNet Management page and uses a white
background by default. You can customize the background image by uploading a JPG or BMP image
(which is less than 0.5 MB).
Select WiNet from the navigation tree and then click the Setup tab to enter the configuration page as
shown in Figure 535.
T
o
customize the background image, click Browse, locate the image you want to use, and click
Upload.
To remove the customized background image, click Clear.

 Loading...


