Chapter
2
!Press
with
Semiautomatic
Plate
Changer!
Plate Mounting
and
Removing,
and
Diagonal Image Adjustment Process
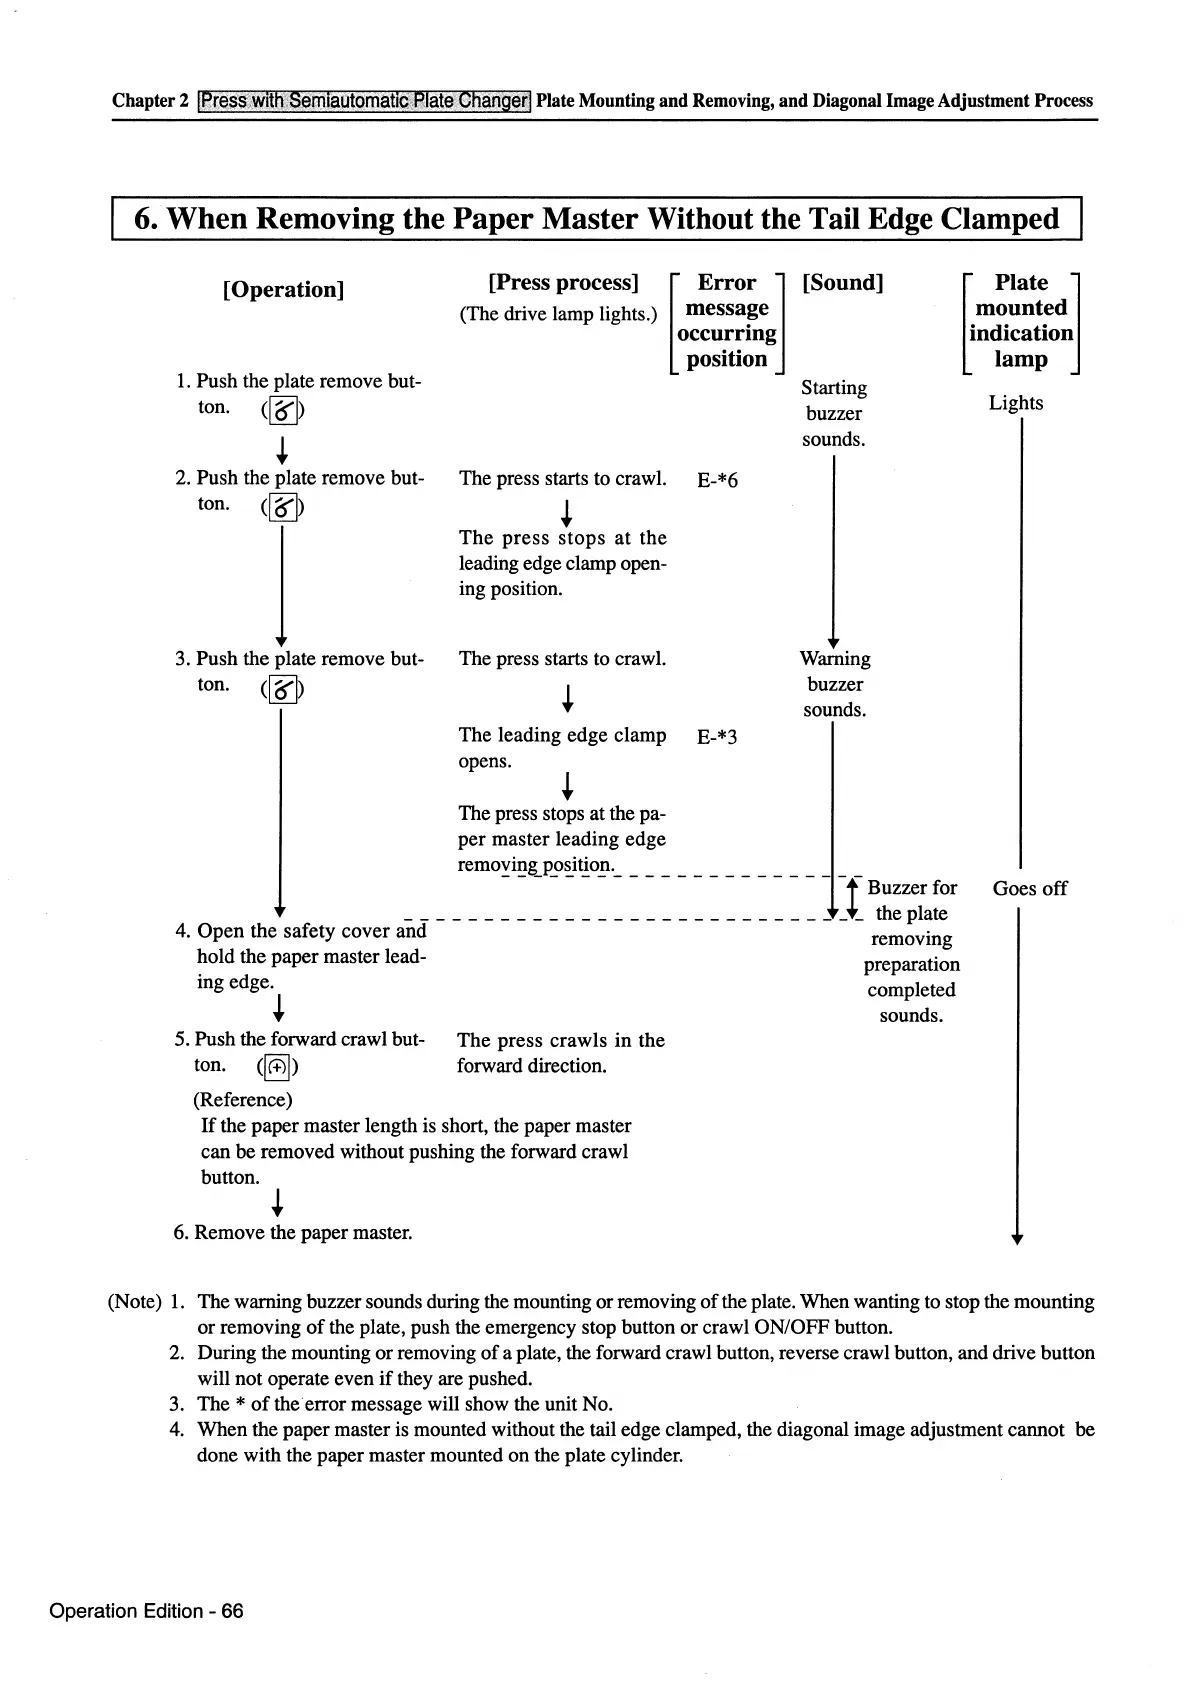
6.
When
Removing the
Paper
Master
Without the Tail Edge Clamped
[Operation]
1.
Push the plate remove but-
ton.
C[RJ)
~
2. Push the plate remove but-
ton.
C[RJ)
j
3.
Push the plate remove but-
ton.
C[RJ)
[Press process]
(The drive lamp lights.)
The press starts to crawl.
~
The
press stops at the
leading edge clamp open-
ing position.
The press starts to crawl.
~
The leading edge clamp
opens.
~
The press stops at the pa-
per master leading edge
[
Error
]
[Sound]
message
occu!~ing
position
Starting
buzzer
sounds.
E-*6
Warning
buzzer
sounds.
E-*3
remo~i!_!g_p~~it_!op.
_______________
_
! Buzzerfor
_ _ _ _ _ _ _ _ _ _ _ _ _ _ _ _ _ _ _ _ _ _ _ _ _ _ _ _ _ the plate
4.
Open the safety cover and removing
hold the paper master lead- preparation
ing edge. completed
~
sounds.
5. Push the forward crawl but-
ton.
([@])
(Reference)
The press crawls in the
forward direction.
If
the paper master length is short, the paper master
can be removed without pushing the forward crawl
button.
~
6.
Remove the paper master.
~
Ptare ]
mounted
indication
lamp
Lights
Goes
off
(Note)
1.
The warning buzzer sounds during the mounting or removing of the plate. When wanting to stop the mounting
or removing
of
the plate, push the emergency stop button or crawl ON/OFF button.
2. During the mounting or removing of a plate, the forward crawl button, reverse crawl button, and drive button
will not operate even
if
they are pushed.
3.
The *
of
the
error message will show the unit No.
4.
When the paper master is mounted without the tail edge clamped, the diagonal image adjustment cannot be
done with the paper master mounted on the plate cylinder.
Operation Edition - 66
 Loading...