MultiLevel Instruction Manual MENU structure
457 – Read Layouts
The print layouts created previously and stored on the chip card can be read
into the MultiLevel’s memory here.
The procedure is identical to ‘451 - Read param.’
458 – Write Layouts
The print layouts stored in the MultiLevel are written to the chip card here.
The procedure is identical to ‘452 – Write param.’
9.8.6. Software-Update – 46
For a detailed description, see chapter chapter 13.5.8 "Operating procedure to update the
software."
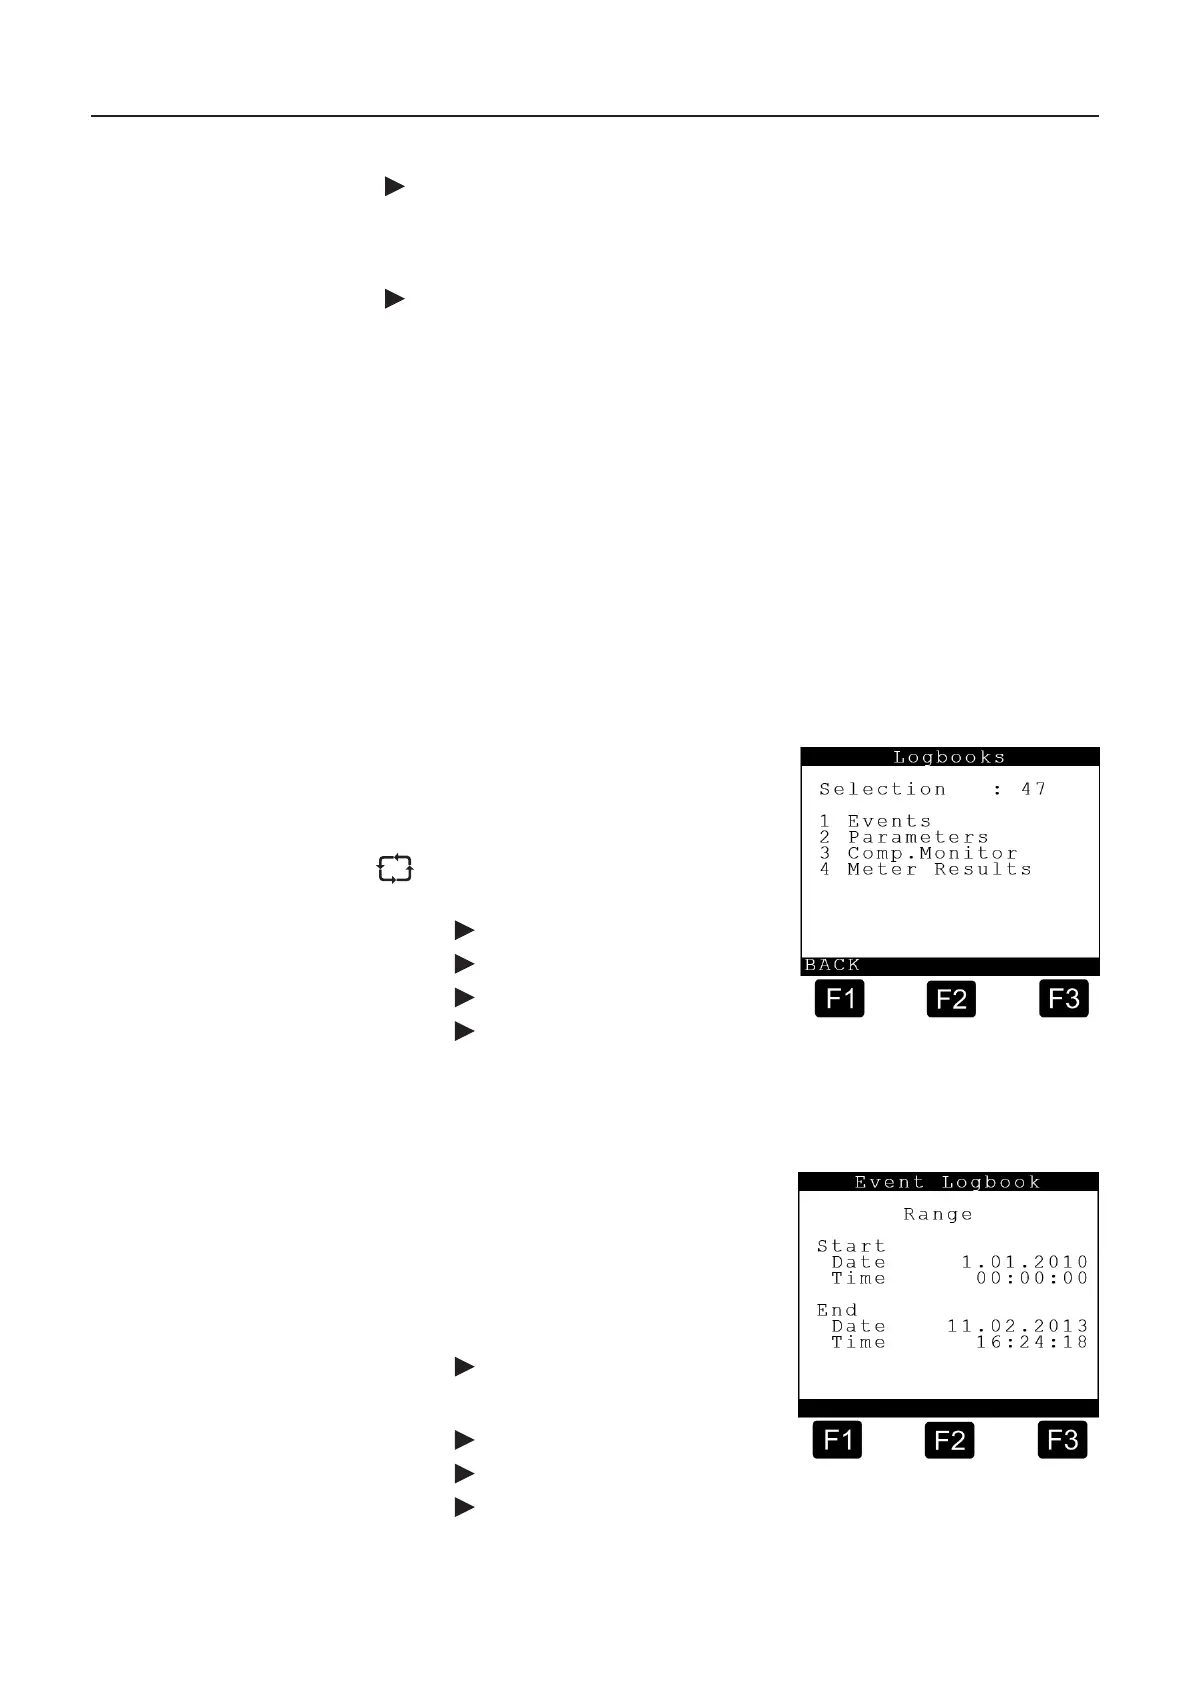
9.8.7. Logbooks – 47
In the Logbooks menu, all events entered in the logbook can be shown in chronological order
on the display.
In order to list them, enter a time range for which the logbook events are to be displayed.
These logbook displays are mainly of interest to the service department, since all alarms that
refer to possible sources of error or malfunctions are also listed there.
Displaying the logbooks
The Logbooks submenu is accessed
from the Service menu by pressing <7>.
the ‘Logbooks’ submenu to further
submenus.
1. Events
2. Parameters
3. Compartment Monitoring
4. Measurement
All device activities (especially deliveries) are recorded in the logbook. Trip reports are then
derived from this.
The logbook (list of the events) is designed as a ring buffer, in which only a limited number of
events can be held. The event data are secured by a checksum for the purposes of data security.
Select range in the event logbook
In order to list them, enter a time range
for which the logbook events are to be
displayed.
Before entering the time range, the
various IDs must be entered.
1. Start Date
Enter the date at the flashing cursor
and confirm with ‘Enter’.
2. Start time: (same as for the date)
3. End date: (see above)
4. End time: (see above)
 Loading...