REVERSE DISC REMOVAL AND REPLACEMENT
Improper
alignment
of
your
disc
and
pulley
causes uneven wear and noise. It
will
require
early
disc
replacement. Often, when
the
disc
is
misaligned,
the
operator
must exert
undue
up-
per pressure to hold the lever in Reverse. The
reverse disc
is
made
of
an asbestos
fiber
similar
to
that used in brake linings; it will
normally
wear
out
with use.
HOW
TO
REMOVE THE REVERSE DISC
1.
Turn
the
engine
off
and
shift
the
Forward/
Reverse Lever
into
FORWARD position.
2. Loosen the
boltforthe
reverse
disc
mounting
plate by placing a
9/16"
closed-end
wrench
on
the bolt and giving the
wrench
a sharp tap
downward
with
a
mallet-see
Photo
7/33, Page
104. Remove
the
bolt,
mounting
plate and the
reverse disc. If necessary, wedge a hammer
handle, a screwdriver,
or
asmall board between
the
upper
or
lower
pulley
and
the
motor
mount
to
loosen the disc
mounting
bolt. This will pre-
vent pulleys from
turning.
Remove the disc
as
shown in Photo 7/18.
PLEASE NOTE:
After
you
install a new re-
verse disc, take
the
following
steps
to
"break it
in"
properly. Place
the
depth regUlator in travel
position
to
keep the tines
off
of
the
floor. Put the
Wheel Speed
Shift
Lever in Free Wheel position
and start the engine. Then, using
the
Forward/
Reverse Lever,
lower
the
reverse disc
into
the
pulley groove and
up
into
Neutral several times.
This will
form
a glaze
on
the
reverse disc
which
will
minimize
further
problems.
If
you are removing
or
replacing the
disc
be-
cause you have an
alignment
problem,
look
carefully at both edges
of
the
disc-see
Photo
7/31. Severe wear on
the
edge nearest
the
en-
gine,
but
no
sign
of
wear on the edge closest
to
the
operator, means
that
the reverse disc is
not
quite far enough away
from
the engine. A small
shim
or
asecond part #1073 (early) reverse disc
face plate behind the
disc
will move it
forward
enough to get the
proper
alignment.
If
your
reverse
disc
shows exceptional wear on
the edge facing the operator, you must remove
the engine pulley and take
out
a shim that is be-
hind the engine's pUlley. The shims behind the
engine pUlley are usually
about
1/16".
In this
instance, a shim behind
the
pulley
of
half
thick-
ness would suffice.
The
inner
diameter
of
shims (part #1138) is 49/64 inches.
NOTE: On a
tiller
that has had twenty-five
or
more hours
of
use, if the
upper
pulley
can't be
aligned with the
lower
pulley
(part #1008-1)
properly, it
could
be
that the main drive shaft
has become loose. (See page 134
for
"How
to
Shim the
Tiller
Transmission Drive Shaft.")
To
remove one shim
or
more
from
behind
the
engine pulley (part #1007-1), here are the steps
you will have to take. First,
you
probably
have
already removed
the
mounting
bolt
securing
the reverse disc and the engine
pulley
as
des-
cribed in Step 2above and
shown
in Photo 7/33.
If not, remove the
bolt
and
the
reverse disc.
After you have loosened the
pulley
mounting
bolt, remove the belts (refer to belt
changing
instructions on page 99
of
this section). With
the reverse disc removed, take
out
both
motor
mount
bars (part #1034) by backing
off
the
bolt
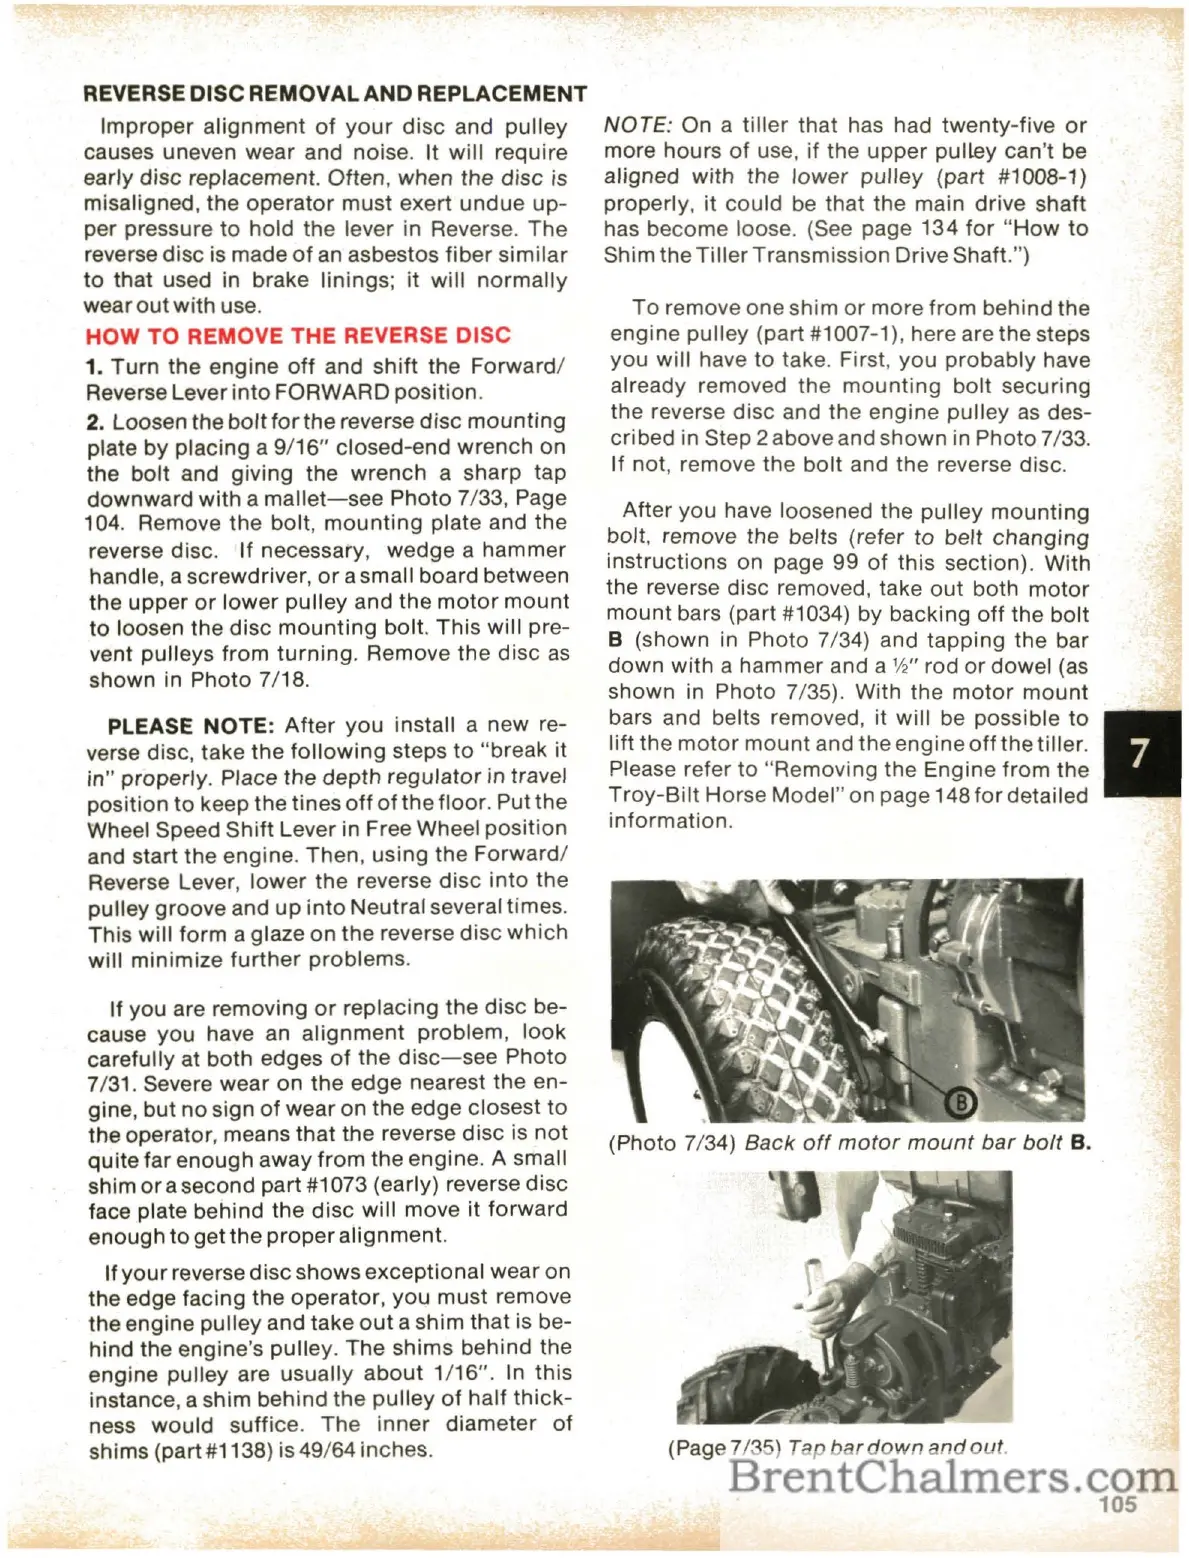
B (shown in Photo 7/34) and tapping the bar
down
with a hammer and a
'12"
rod
or
dowel (as
shown
in
Photo 7/35). With the
motor
mount
bars and belts removed, it will be possible to
lift the
motor
mount
and the engine
off
the
tiller.
Please refer
to
"Removing
the
Engine
from
the
Troy-Silt
Horse
Model"
on page 148
for
detailed
information.
(Photo 7/34) Back
off
motor
mount
bar
bolt
B.
(Page 7/35) Tap
bardown
andout.
105
 Loading...