I
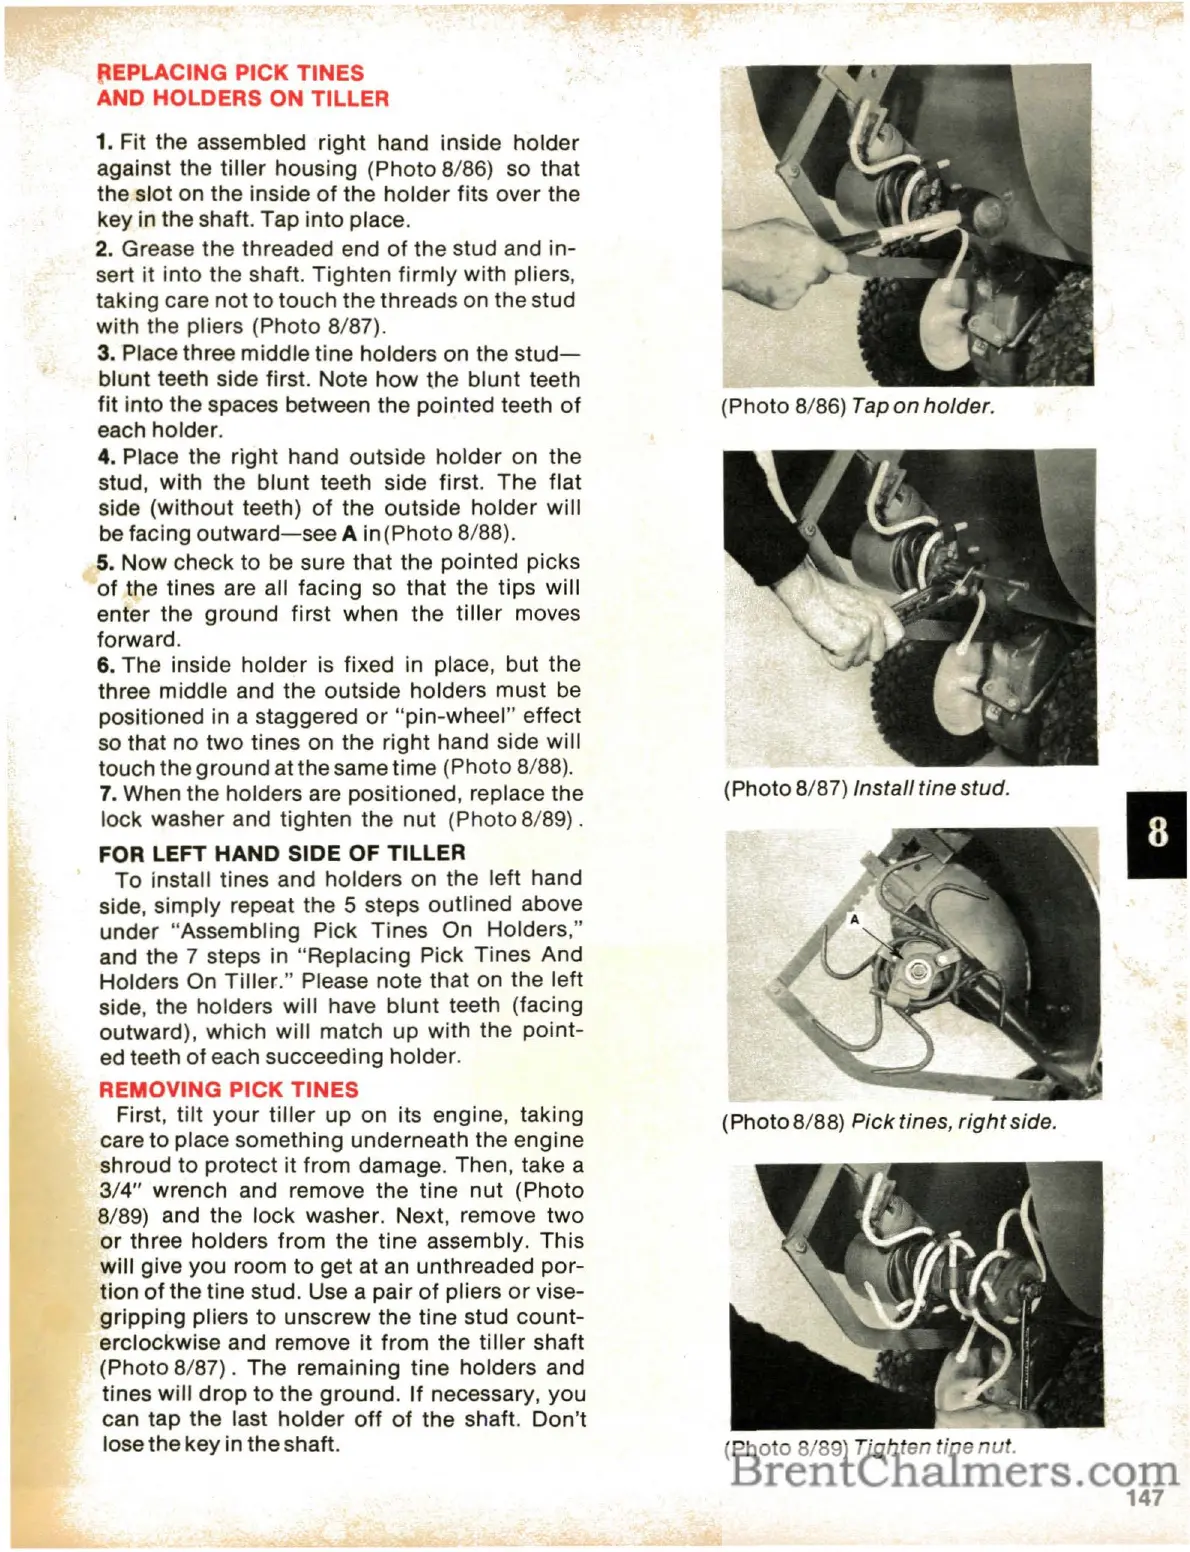
(Photo 8/89) Tighten tine nut.
(Photo 8/87) Install tine stud.
(Photo8/88) Pick tines,
right
side.
(Photo 8/86) Tap
on
holder.
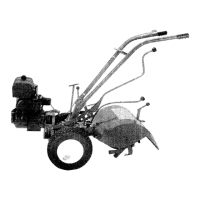
EPLACING PICK TINES
AND HOLDERS ON TILLER
1. Fit the assembled
right
hand inside
holder
against the
tiller
housing (Photo 8/86) so that
the slot on the inside
of
the
holder
fits over the
key in the shaft. Tap into place.
2. Grease the threaded end
of
the stud and
in-
sert it into the shaft.
Tighten
firmly
with pliers,
taking care
not
to
touch
the
threads on the stud
with the pliers (Photo 8/87).
3.
Place three middle tine holders on the
stud-
blunt
teeth side first. Note
how
the
blunt
teeth
fit
into
the
spaces between the pointed teeth
of
each holder.
4. Place the
right
hand outside
holder
on the
stud, with the
blunt
teeth side first. The flat
side
(without
teeth)
of
the
outside
holder
will
be facing
outward-see
A in(Photo 8/88).
5. Now check to be sure that the pointed picks
of
the tines are all facing so
that
the
tips
will
enter the
ground
first
when the
tiller
moves
forward.
6. The inside
holder
is
fixed in place,
but
the
three middle and the outside holders must
be
positioned in a staggered
or
"pin-wheel"
effect
so that
no
two
tines on the
right
hand side will
touch the
ground
at the same time (Photo 8/88).
7.
When
the
holders are positioned, replace
the
lock washer and tighten the
nut
(Photo 8/89) .
FOR LEFT HAND SIDE OF TILLER
To
install tines and holders on the left hand
side, simply repeat the 5 steps outlined above
under
"Assembling Pick Tines On Holders,"
and the 7 steps in "Replacing Pick Tines And
Holders On
Tiller."
Please note that on the left
side, the holders
will
have
blunt
teeth (facing
outward),
which
will match up with the
point-
ed teeth
of
each succeeding holder.
REMOVING PICK TINES
First,
tilt
your
tiller
up
on its engine, taking
care to place something underneath the engine
shroud to
protect
it
from
damage. Then, take a
3/4"
wrench and remove the tine
nut
(Photo
8/89) and the lock washer. Next, remove
two
or
three holders
from
the
tine assembly.
This
will give you room
to
get at an unthreaded
por-
tion
of
the tine stud. Use a
pair
of
pliers
or
vise-
gripping
pliers to unscrew the tine stud
count-
erclockwise and remove
it
from
the
tiller
shaft
(Photo
8/87).
The remaining
tine
holders and
tines
will
drop
to
the
ground.
If
necessary,
you
can tap
the
last
holder
off
of
the
shaft.
Don't
lose
the
key in
the
shaft.
147
 Loading...