I
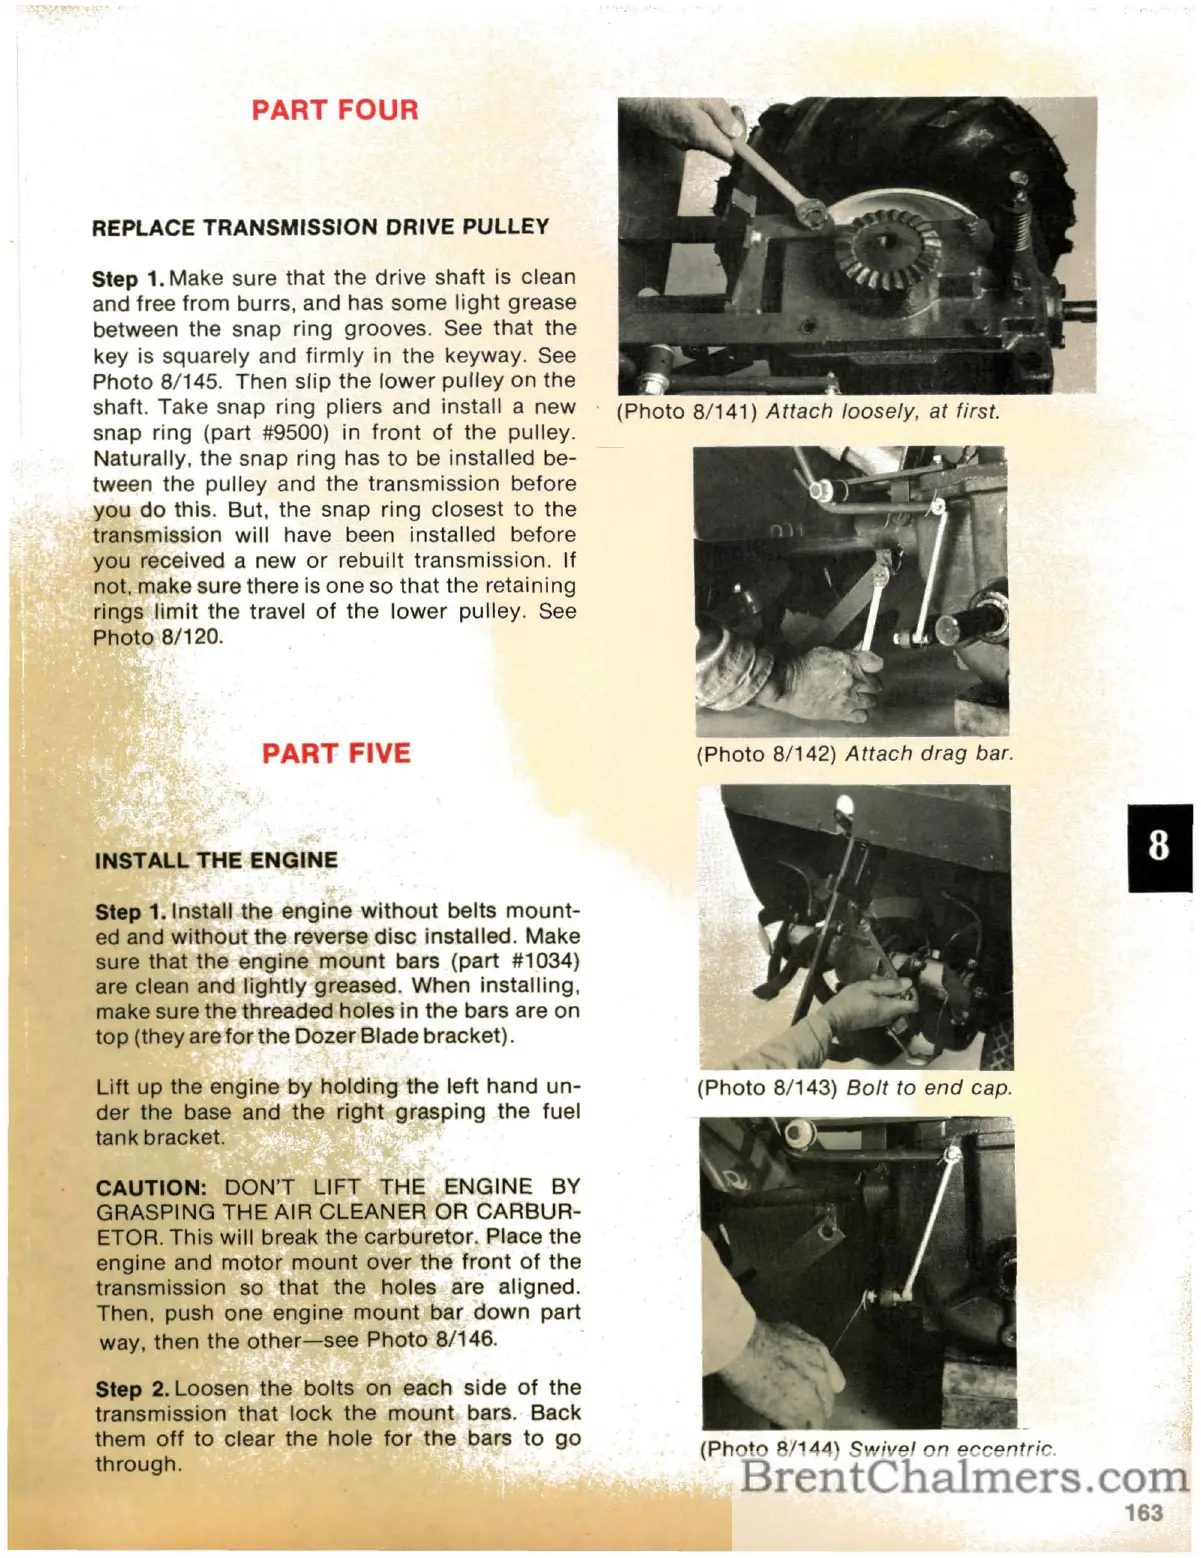
(Photo 87144)
Swivel
on
eccentric.
(Photo 8/143)
Bolt
to
end
cap.
(Photo 8/142)
Attach
drag bar.
(Photo 8/141) Attach loosely, at first.
PART FIVE
CAUTION:
DON'T
LIFT THE ENGINE BY
GRASPING
THE
AIR CLEANER OR
CARBUR-
ETOR. This will break the carburetor. Place the
engine and
motor
mount
over
the
front
of
the
transmission so
that
the holes are aligned.
Then, push
one
engine
mount
bar
down
part
way, then
the
other-see
Photo 8/146. .
Step
2.
Loosen
the
bolts
on each side
of
the
transmission
that
lock
the
mount
bars. Back
them
off
to
clear
the hole
for
the
bars
to
go
through.
Lift
up
the engine
by
holding
the
left hand
un-
der
the base and
the
right
grasping
the
fuel
tank bracket.
PART FOUR
INSTALL THE ENGINE
Step 1. Install the engine
without
belts
mount-
ed and
without
the
reverse
disc
installed. Make
sure that the engine
mount
bars (part #1034)
are clean and
lightly
greased. When installing,
make sure the threaded holes in the bars are on
top
(they are
for
the Dozer Blade bracket).
Step 1. Make sure that
the
drive shaft is clean
and free
from
burrs, and has some
light
grease
between
the
snap ring grooves. See
that
the
key is squarely and
firmly
in the keyway. See
Photo
8/145. Then slip the
lower
pUlley on the
shaft. Take snap ring pliers and install a new
snap ring (part
#9500) in
front
of
the pulley.
Naturally, the snap ring has
to
be
installed be-
tween the
pulley
and the transmission before
you
do
this. But, the snap ring closest to the
transmission will have been installed before
you received a new
or
rebuilt transmission. If
not, make sure there
is
one so
that
the retaining
rings
limit
the travel
of
the
lower
pulley. See
Photo
8/120.
REPLACE TRANSMISSION DRIVE PULLEY
163
 Loading...