REPLACING THE TILLER SHAFT
OIL SEALS
HOW
TO
CHECK AN OIL LEAK
First
of
all, if
you
suspect that
you
have an oil
leak at
the
tiller
shaft,
you
should
determine
exactly where
it
is
coming
from. It
might
be
that it is leaking
through
the shaft seal. Other
wise, the oil may be leaking
through
the gasket
(part #1129) and around
the
tiller
housing
co-
ver (Part #1023) on the left hand side
of
the ti
1-
ler shaft. (Please see page
10
of
your
Master
Parts Catalog for the
location
of
these parts.)
Please be sure that you had #90
or
#140 gear
oil in the
tiller
transmission. A
lighter
oil, such
as
motoroil,
will leak badly.
If you suspect that
the
oil seal
is
leaking,
wipe
all the oil
off
the parts and run
the
tiller
for
a
short
while (Without tines installed). Then,
look
and feel
with
your
fingers
to
determine
which
area has oil on it.
To
save yourself unnecessary work, make
sure that the oil is leaking
through
the
oil
seal-
that is, between the tilIer shaft and
the
oil
seal-
before
you
go
to
the
trouble
of
changing
it. A
leak between the gasket and
the
tiller
housing
cover can often be misinterpreted
as
a leaking
oil seal.
REMOVING THE
LEFT-HAND
TILLER SHAFT
OIL SEAL
If you are sure the
tiller
shaft seal
on
the
left-
hand side
is
leaking,
the
easiest
way
to
replace
it
is
to
first
remove the
tiller
housing cover
(part #1023). The seal
will
remain in the
cover
and can be removed and replaced
more
easily.
(Instructions
for
removing the right-hand seal
are given
further
on
in
this
section.)
To
remove the
tiller
housing
cover,
first
re-
move the five socket head
mounting
screws
with a 3/16"
wrench-see
Photo 8/11. Before
you remove them, note
whether
any
of
the
screws are loose,
particularly
the
two
on the
top. It
might
be an
indication
that
the
oil is leak-
ing past the cover. When the screws are remov-
ed,
try
to remove
the
cover
with
your
fingers.
Note
how
snugly
it
fits and
whether
or
not
there
is
any movement
from
side
to
side. If
you
have to tap the cover
off
lightly
with
a hammer,
or
find
it
difficult
to
pry
it
off
with
your
fin-
gers, the cover
probably
fits properly. It
should
besnug.
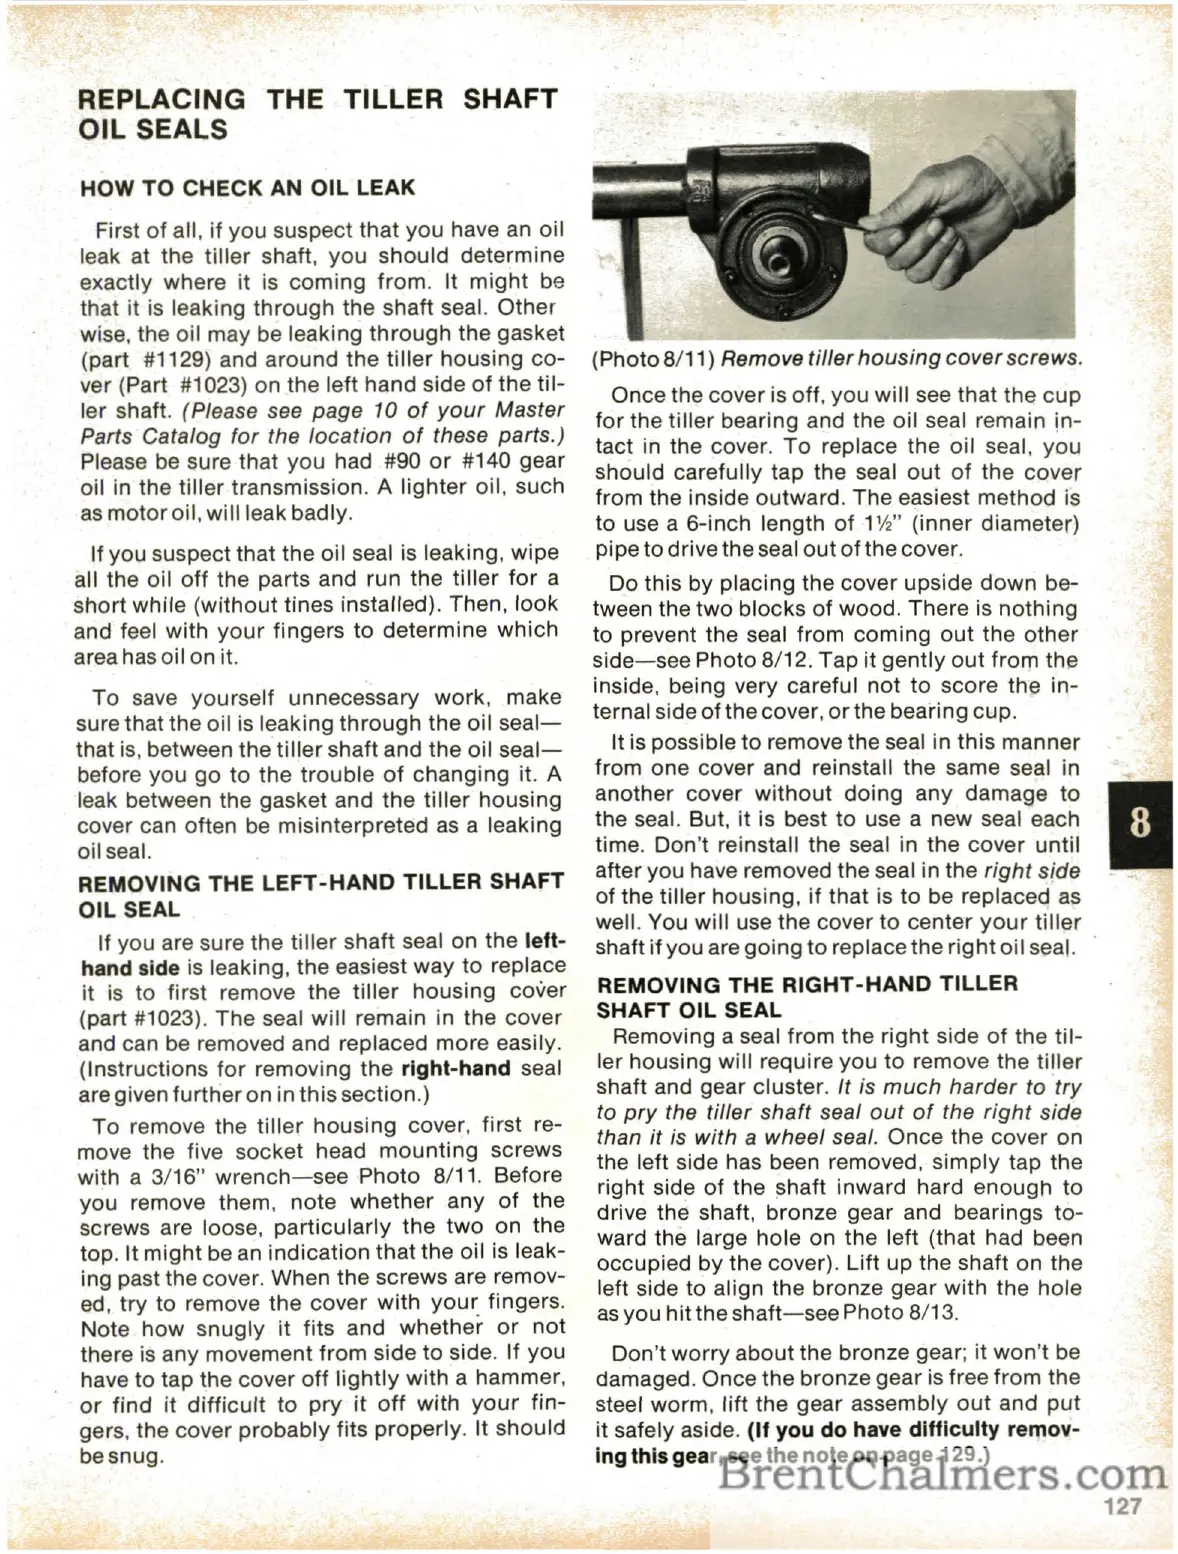
(Photo 8/11) Remove
tiller
housing
cover
screws.
Once the cover is off, you
will
see that
the
cup
for
the
tiller
bearing and the oil seal remain
in-
tact in the cover.
To
replace the oil seal,
you
should carefully tap the seal
out
of
the
cover
from the inside outward. The easiest
method
is
to use a 6-inch length
of
1W' (inner diameter)
pipe
to
drive the seal
out
of
the
cover.
Do this by placing the cover upside
down
be-
tween the
two
blocks
of
wood. There is
nothing
to prevent the seal
from
coming
out
the
other
side-see
Photo 8/12. Tap it
gently
out
from
the
inside, being very careful
not
to
score
the
in-
ternal side
of
the cover,
or
the bearing cup.
It is possible
to
remove the seal in
this
manner
from one cover and reinstall the same seal in
another cover
without
doing
any damage
to
the seal. But, it is best to use a new seal each
time. Don't reinstall the seal in
the
cover until
after you have removed the seal in the
right
side
of the
tiller
housing,
if
that is
to
be replaced
as
well. You will use the cover
to
center
your
tiller
shaft
if
you are going
to
replace
the
right
oil seal.
REMOVING THE RIGHT
-HAND
TILLER
SHAFT OIL SEAL
Removing a seal from
the
right
side
of
the
til-
ler housing will require
you
to
remove the
tiller
shaft and gear cluster. It is
much
harder
to 'try
to
pry
the tiller
shaft
seal
out
of
the
right
side
than it is with a wheel seal. Once the cover on
the left side has been removed,
simply
tap the
right
side
of
the shaft inward hard enough
to
drive the shaft, bronze gear and bearings
to-
ward the large hole on
the
left (that had been
occupied by
the
cover).
Lift
up
the shaft on the
left side to align the bronze gear
with
the
hole
as
you
hit
the
shaft-see
Photo 8/13.
Don't
worry
about the bronze gear; it
won't
be
damaged. Once
the
bronze gear
is
free
from
the
steel worm,
lift
the gear assembly
out
and
put
it
safely aside. (If you do have difficulty remov-
ing
thisgear, see the
note
on
page 129.)
127
 Loading...