2. Preparing the projector
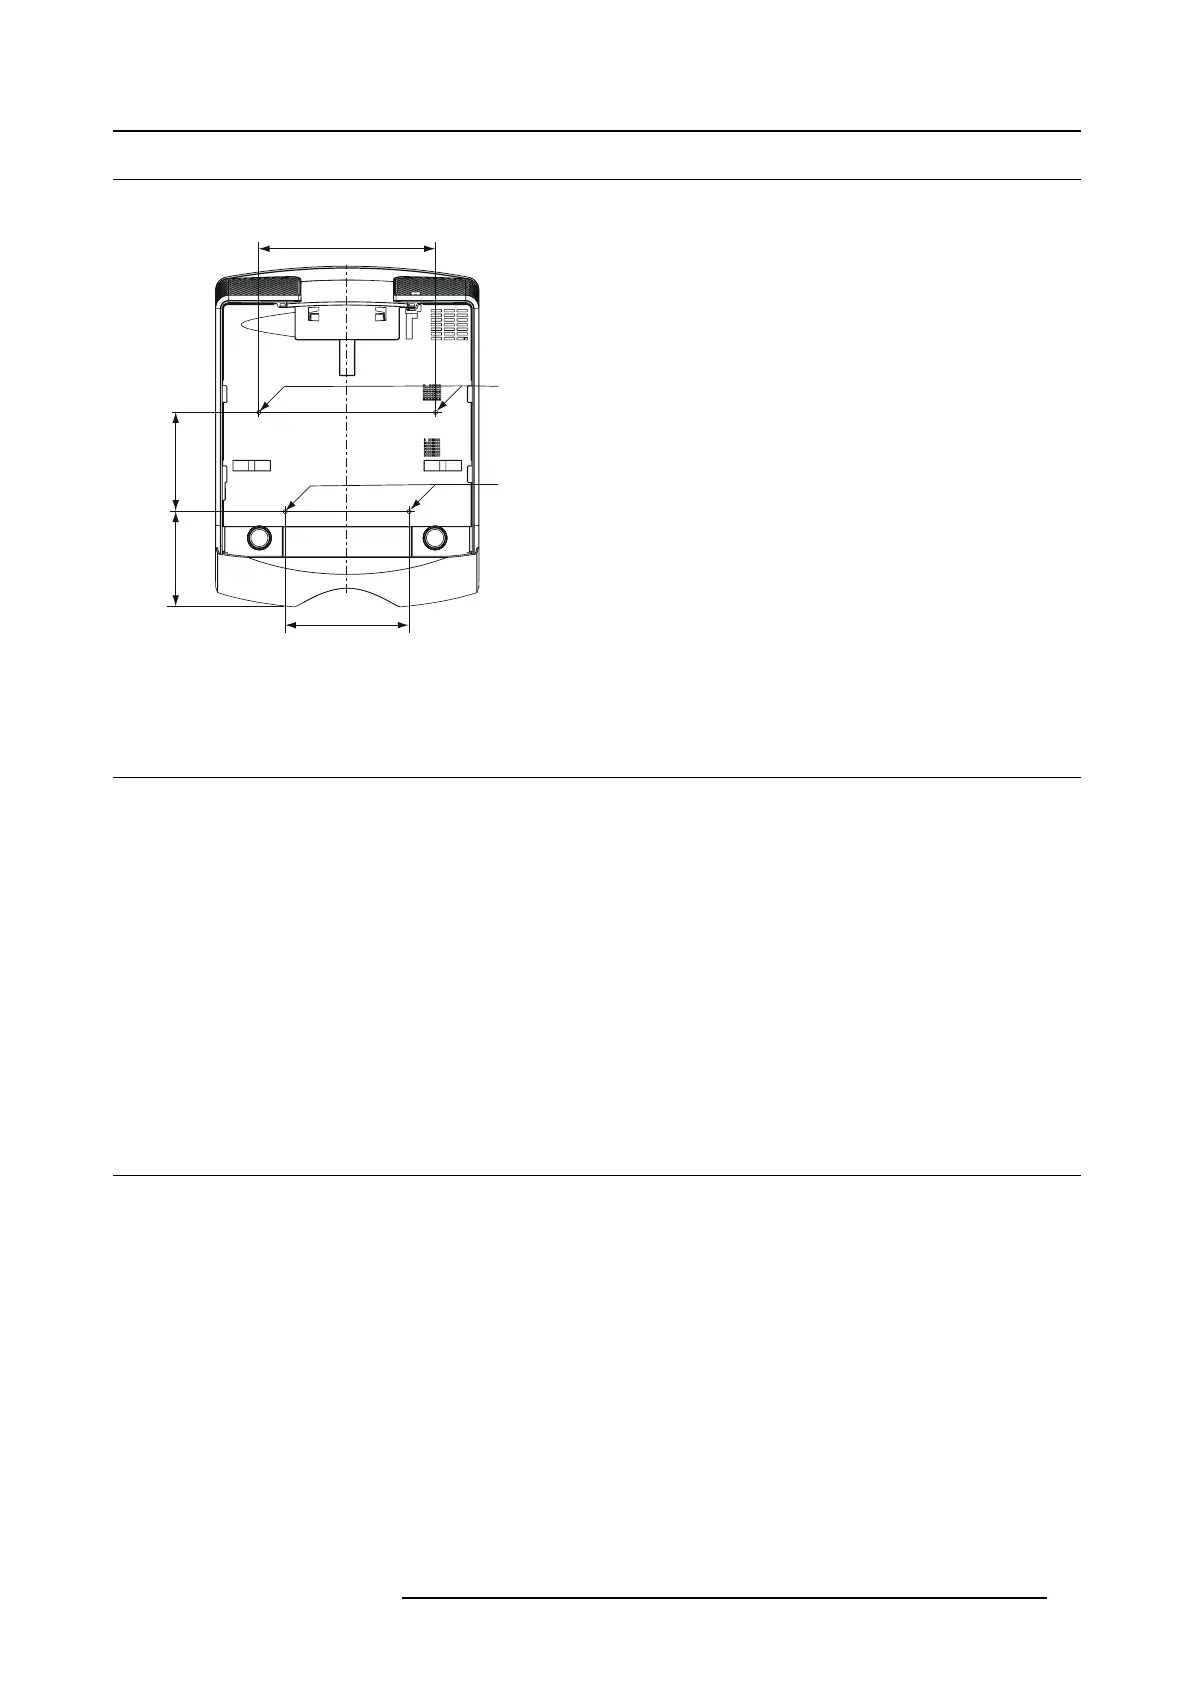
2.6 Location of ceiling mounting holes
Location
342
169
240
A
192
A
Image 2-11
A : 4 mounting holes for c eiling mount plate. (M4, depth 10 mm
)
2.7 Screen setup
Environment check
Before s etting up t he projector, check the operating environment. If the environmental requirements a re not satisfied , the projector
may break down or fail.
The allowable operating tempera ture is +41°F (+5°C) to +104°F (+40°C).
Setting up the screen
Install the s creen per pendicularly to the pro jector. If the screen c an not be installed in such a way, a djust the projection angle of the
projector.
• Install the screen and projector s o that the pr ojector’s lens is placed at the same height and horizontal position of the screen
center.
• Do not install the screen w here it is exposed to direct sunlight or lighting. Light directly reflecting on the screen makes the
projected images whitish a nd hard to view
.
2.8 Screen size and projection distance
Before installation
Refer to the table to determine the screen size and projection distance.
• For the aspect r atio setting
•Thefigures in the tables are approx imate and may be slightly different from the actual me asurem ents.
• The lens s hift height and width show distances from the factory default position.
• “L” shows the distance between the
screen and the lens. • Fo r the projection distance of the option lenses, see the tables in
appendix.
R5905597 PHXX SERIES 20/05/2014
17
 Loading...


