6. Adjustments with the ADVANCED menu
14.Select a s etting value by pressing the ◄ or ► key.
15.R epeat step 13 a nd step 14, if necessary.
16.Press the MENU k ey once.
17.Select BRIGHT UNIFORMITY CORRECTION
by pressing the ◄ or ► ke y.
SETTING
BRIGHT UNIFORMITY
CORRECTION
Image 6-16
→ When ED GE BLENDING is ON , the brightness of the pr ojected images is made even.
18.Press the ENTER key.
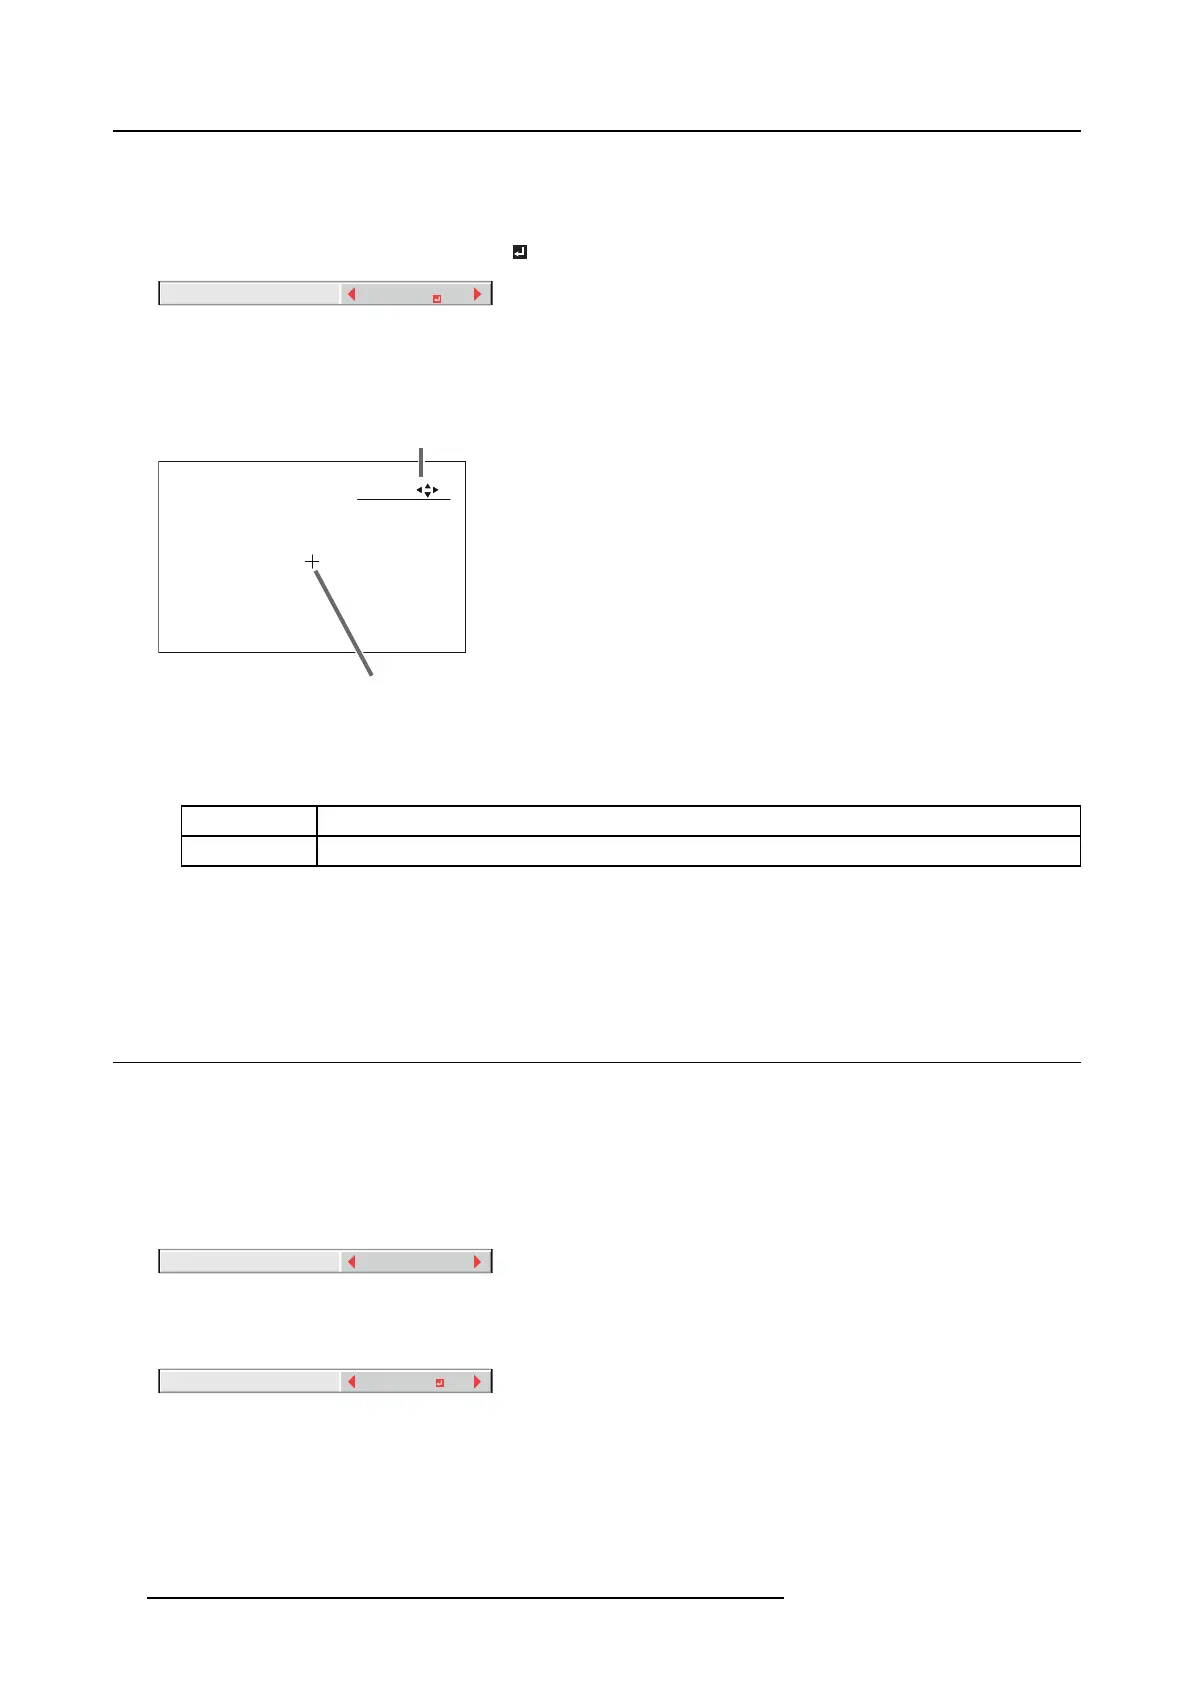
The BRIGHT UNIFORM ITY CO RRECT ION dialog box and the correction position marker are displayed.
:
:
2
1
POSITION
SELECT ENTER
Image 6-17
1 BRIGH T UNIFORMITY CORRECTION dialog box
2 Correction position m arker
Every time you press the ENT E R key, the BRIGHT UNIFORM ITY CORRECTION dialog box shows POSITION and LEVEL al-
ternately.
POSITION
Press the ▲, ▼, ◄,or► key to m ove the correction position marker.
LEVEL Press the ◄,or► key to adjust the correction amount.
19.Cancel the BRIGHT UNIFORMITY CORRE CTION dialog box.
Press any key other than the ▲, ▼, ◄,or►, and ENTER keys to c lear the dialog box. Or, the dialog box disap pears in 10
seconds after the las t use.
20.To cancel the menu, press the ME NU key.
6.17 Adjusting the color variations
How to adjust
You c an adjust the variations in the colors of the images displayed on multiple projectors using the menu settings.
Adjustment while viewing the screen
1. Display the M ULT I-SCREEN menu.
2. Select COLOR M AT CHING by pressing the ▲ or ▼ key.
OFF
COLOR MATCHING
Image 6-18
3. Select MANUAL by pr essing the ◄ or ► key.
4. Select MANUAL by pr essing the ▲ or ▼ key.
MANUAL
SETTING
Image 6-19
5. Select SETTING by pressing the ◄ or ► key.
6. Press the ENTER key.
66
R5905597 PHXX SERIES 20/05/2014
 Loading...


