3. Connections
Take care for the following points
• Plug in the p ower cord firmly. When unplugging, hold and pull the power plug, not the power cord.
• Do not plug in or out the pow er cord w ith your hand wet. It m ay c ause elec tric shock.
• When you m ove t he projector, turn off the power, unplug the power c ord from the wall outlet, and then remov e the connected
cords. Otherwise, the powe r cord m ay be damaged, resulting in fire or electric shock.
• If dust or metallic substance is on or around the pins of t he po wer plug, unplug the power cord and clean it using a dry cloth.
If you continue to use the projector witho ut cleaning, it m ay result in fire or electric shock. Clean the power plug periodically at
least once a year.
• Be sure to unplug the power c ord from the w all outlet if the pro jector w ill not be used for a long per iod of time. Otherwise, it
may cause fire .
3.3 Conn ecting the projector to a computer
Preparations
Make sure that the power of the projector and that of the computer are turned off.
When connecting the projector to a desktop computer, disconnect the computer cable that is c onnected to the m onitor.
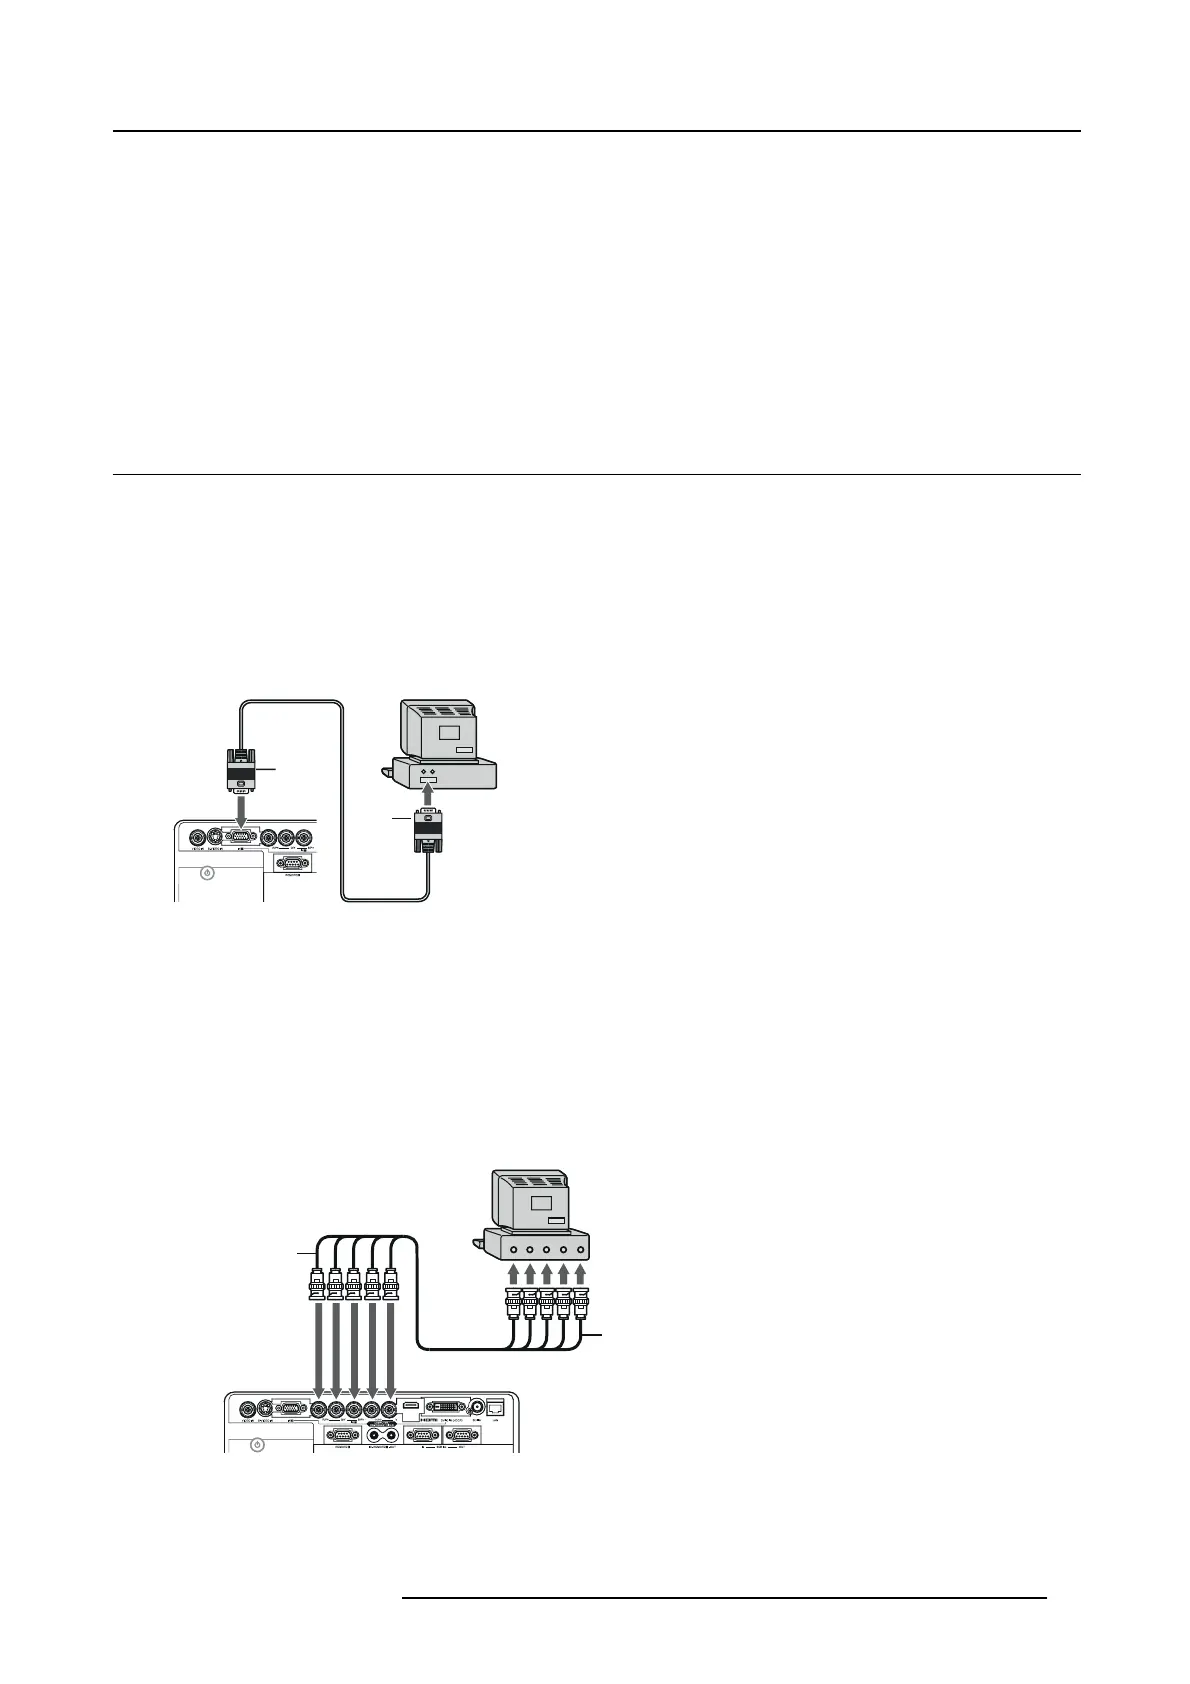
Analog connection to V IDEO IN-1
1. Connect one end of a commer cially available computer cable to the CO M PUTER /COMPO NE NT/VIDEO IN-1 terminal of the
projector.
2
1
D
B
C
A
Image 3-4
Computer connection to Video1
A Computer
B Connector to com puter
C Computer cable (option)
D Connector to Video1
2. Connect the other end of the computer cable to the m onitor port of the compu ter.
Analog connection to V IDEO IN-2
1. Connect one end of a commercially available BNC cable to the COM PUT ER /COM PONE NT VIDEO IN-2 terminals of the projec-
tor.
2
1
R/ PR G/Y B/ PB H/HV V
VH/HVB/P
B G/Y R/ PR
D
B
A
C
Image 3-5
Computer connection to Video2
A Computer
B Connector to com puter
R5905597 PHXX SERIES 20/05/2014 23
 Loading...


