9. Advanced features
Important:
In a system using a serial divider, don’t connect the projectors as above.
To monitor and control the projectors collectively or individually, it is necessary to assign GROUP IDs to them.
Setting GROUP IDs
By div iding the projectors into groups, you can monitor and c ontrol them collectively by grou ps. GR OU P IDs should be A to Z . You
cancreateupto26groups.
→ The default GROUP ID is A.
1. Display the FEATURE menu.
2. Select GROUP I D by pressing the ▲ or ▼ ke y.
3. Set the GROUP ID by pressing the ◄ or ► key.
Important:
• When you want to m onitor and control the projectors by groups, set a different GROUP ID.
• For details, contact your dealer.
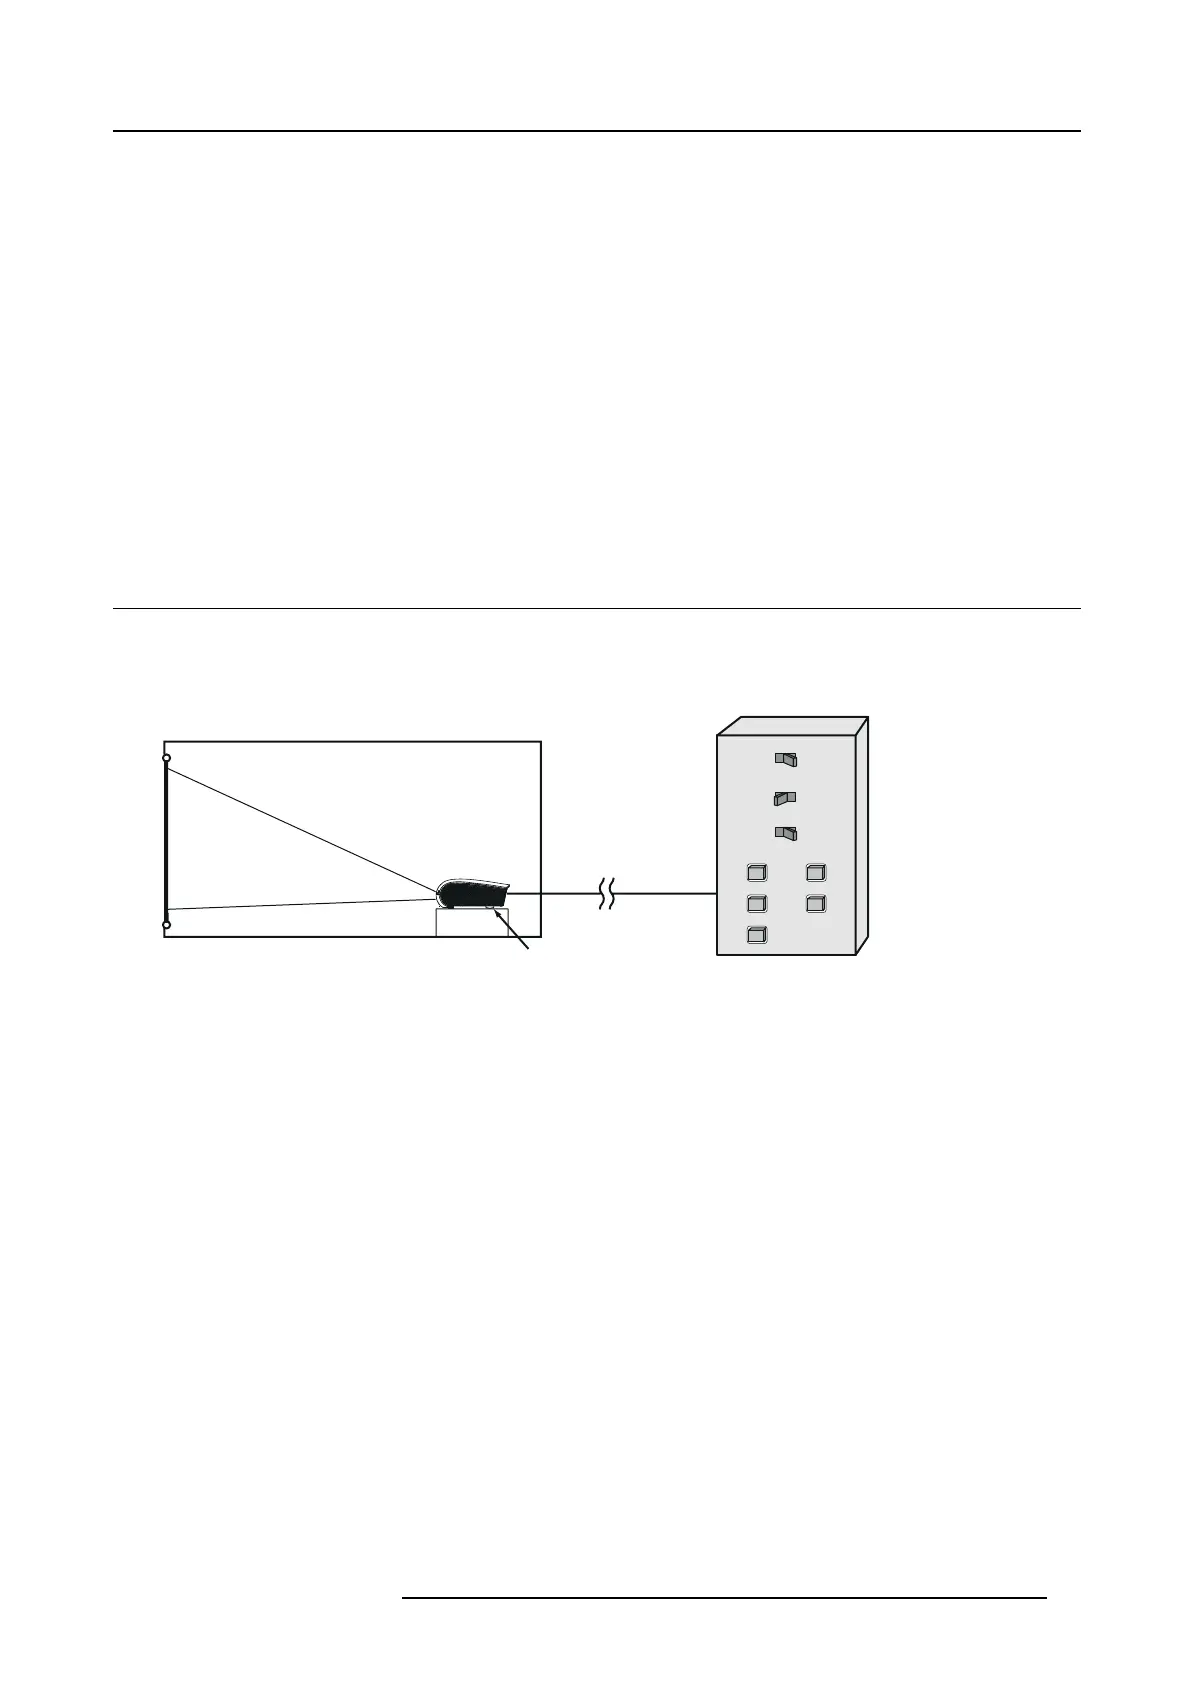
9.6 Control by a control panel, etc.
Overview
When installing the projector in a place whe re the remote control signals cannot reach the projector, you can con trol the projector
using a control panel or other device connec ted to the REMOTE 1 IN terminal.
ON
POWER
COMPUTER1
OFF
ON
BLANK
OFF
R emote control
External contact
control
COMPUTER2
VIDEO S-VIDEO
DVI
A
B
Image 9-8
AProjector
B Control panel
Controllable functions
• Switching between remote con trol and external control
• Switching input s ignals
• Power-on and power-off
• BLANK-on and BLAN K-off
Important:
To control t he projector using a c ontrol panel, set STA NDB Y MODE in the INSTALLATION 1 menu to STAND ARD. When it is LOW,
you cannot c ontrol the projector.
Connections
Make sure that the power supplies of the projector and control panel are off.
R5905597 PHXX SERIES 20/05/2014
91
 Loading...


