10. Lamp replacement
(e)
(d)
Image 10-4
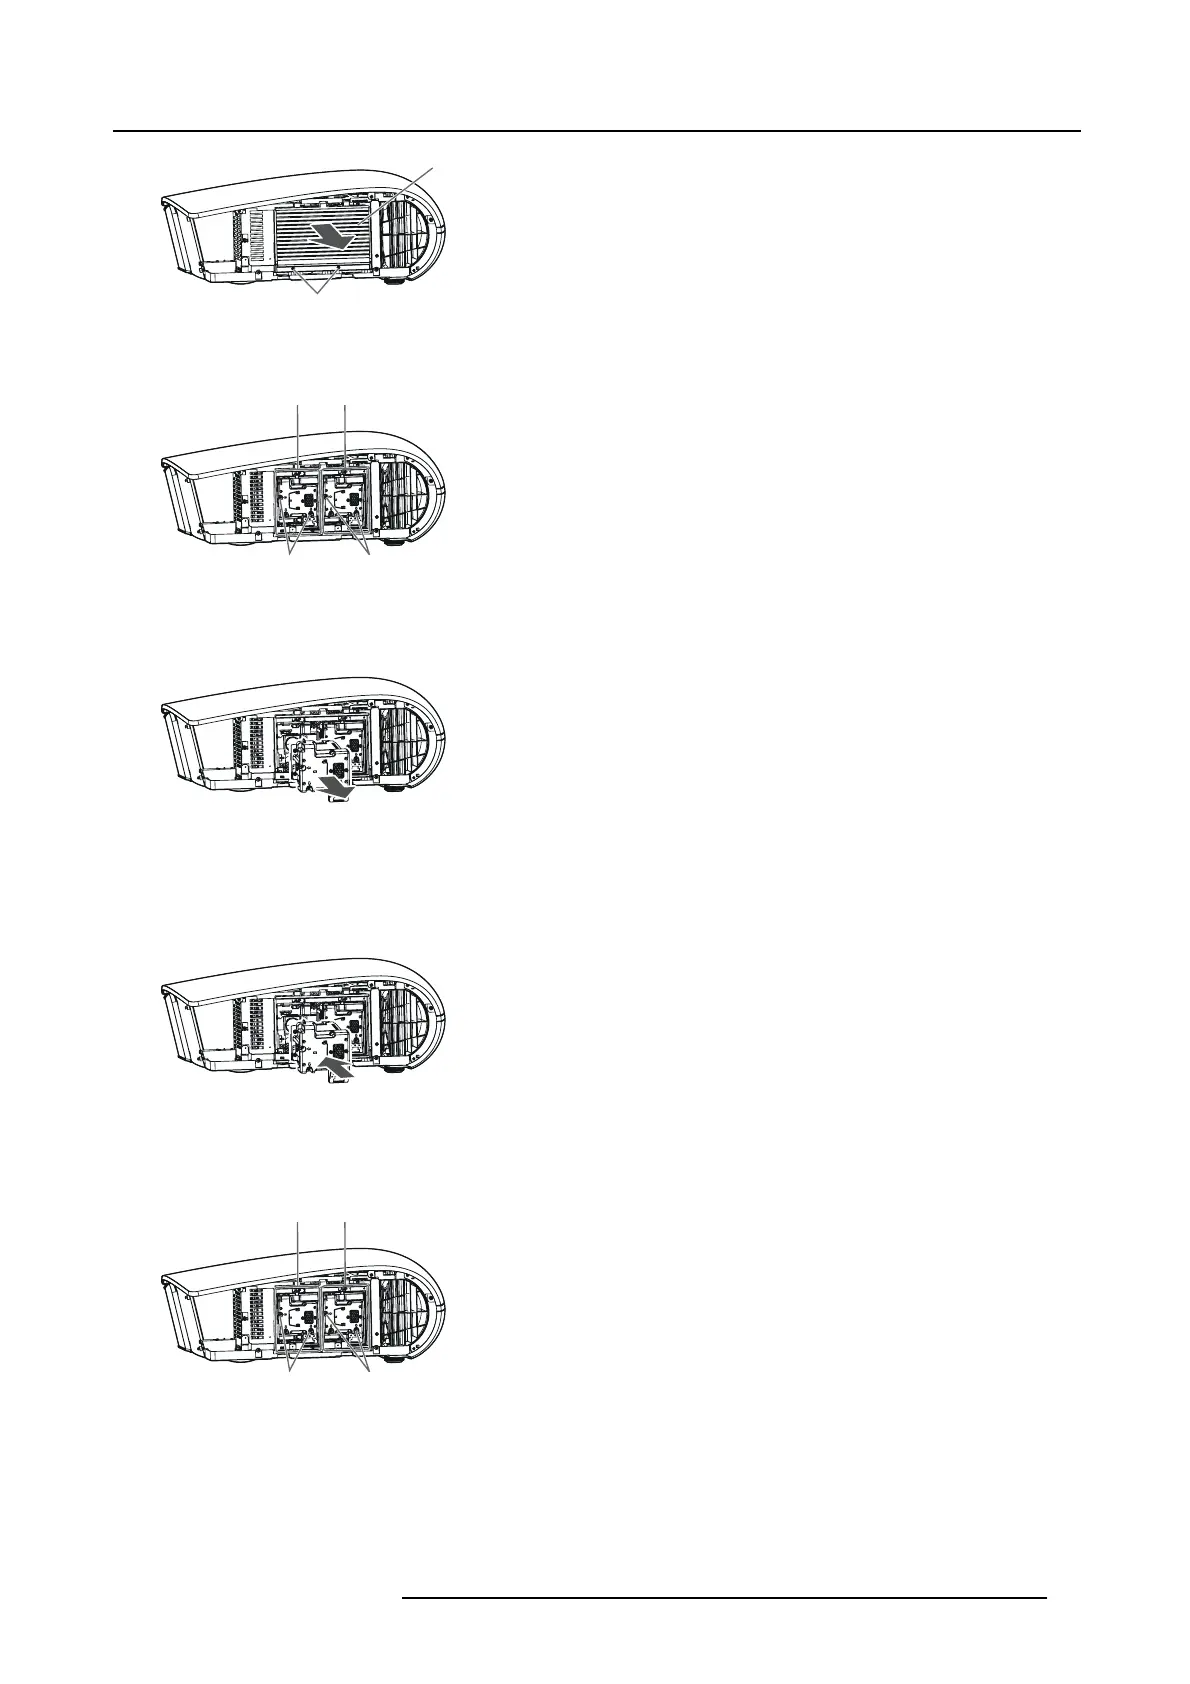
5. Loosen two sc rews (f) that are securing the lamp b ox to be remov ed using a P h illips screwdriver.
21
(f)
(f)
Image 10-5
6. Pull the handle.
7. Pull o ut the lamp box by the handle while holding the projector.
Image 10-6
- Pull the lamp box out of the projector slowly. When the lamp is broken, glass fragments m ay be scattering by quickly pulling
out the lamp box.
- Do not spill liquid on the rem oved lamp box or do not place it near any flammable object or where children c an reach to prevent
injury or fire.
8. Load a new lamp box securely into the projector in the right orientation.
Image 10-7
9. Put the han dle back t o the original position.
Note: Make sure that the handle is locked.
10.Tighten two scr ews (f) of the new lamp box tightly using a P hillips screwdriver.
21
(f)
(f)
Image 10-8
Note: Make sure that the screws are tightened firmly.
11.Insert the lamp cover (e) into the projector and tighten two screws ( d) o n the lamp cover firmly using a P hillips s crewdriver.
R5905597 PHXX SERIES 20/05/2014
95
 Loading...


