Maintenance
175
5
5.9
Adjusting Gradation
5.9.1 Gradation Adjustment
When the color gradation of the print image is out, you can easily adjust it.
Through this gradation adjustment, the image quality of this machine can be con-
sistently maintained.
To adjust the gradation, print the gradation adjustment chart and compare it with
"Color sample for gradation adjustment" included with the printer to get the value
for lighter/darker settings, and then set this value to the printer.
You can specify low density (Low), middle density (Mid), or high density (High)
for C (cyan), M (magenta), Y (yellow), and K (black).
To reset the density values to the default settings after gradation adjustment, set
all values to 0. If all values are set to 0, the gradation adjustment is disabled dur-
ing printing.
●
If color gradation is often out even after gradation adjustment, contact our Customer Support
Center or your dealer.
●
Resetting the density values to the default value (all 0) does not mean that the image quality returns
to the quality that you could get first at installation time. Using the printer for a long period, the
image quality has differed from that at installation time under influence of aging, change in the
environment, and amount printed.
5.9.2 Performing Gradation Adjustment
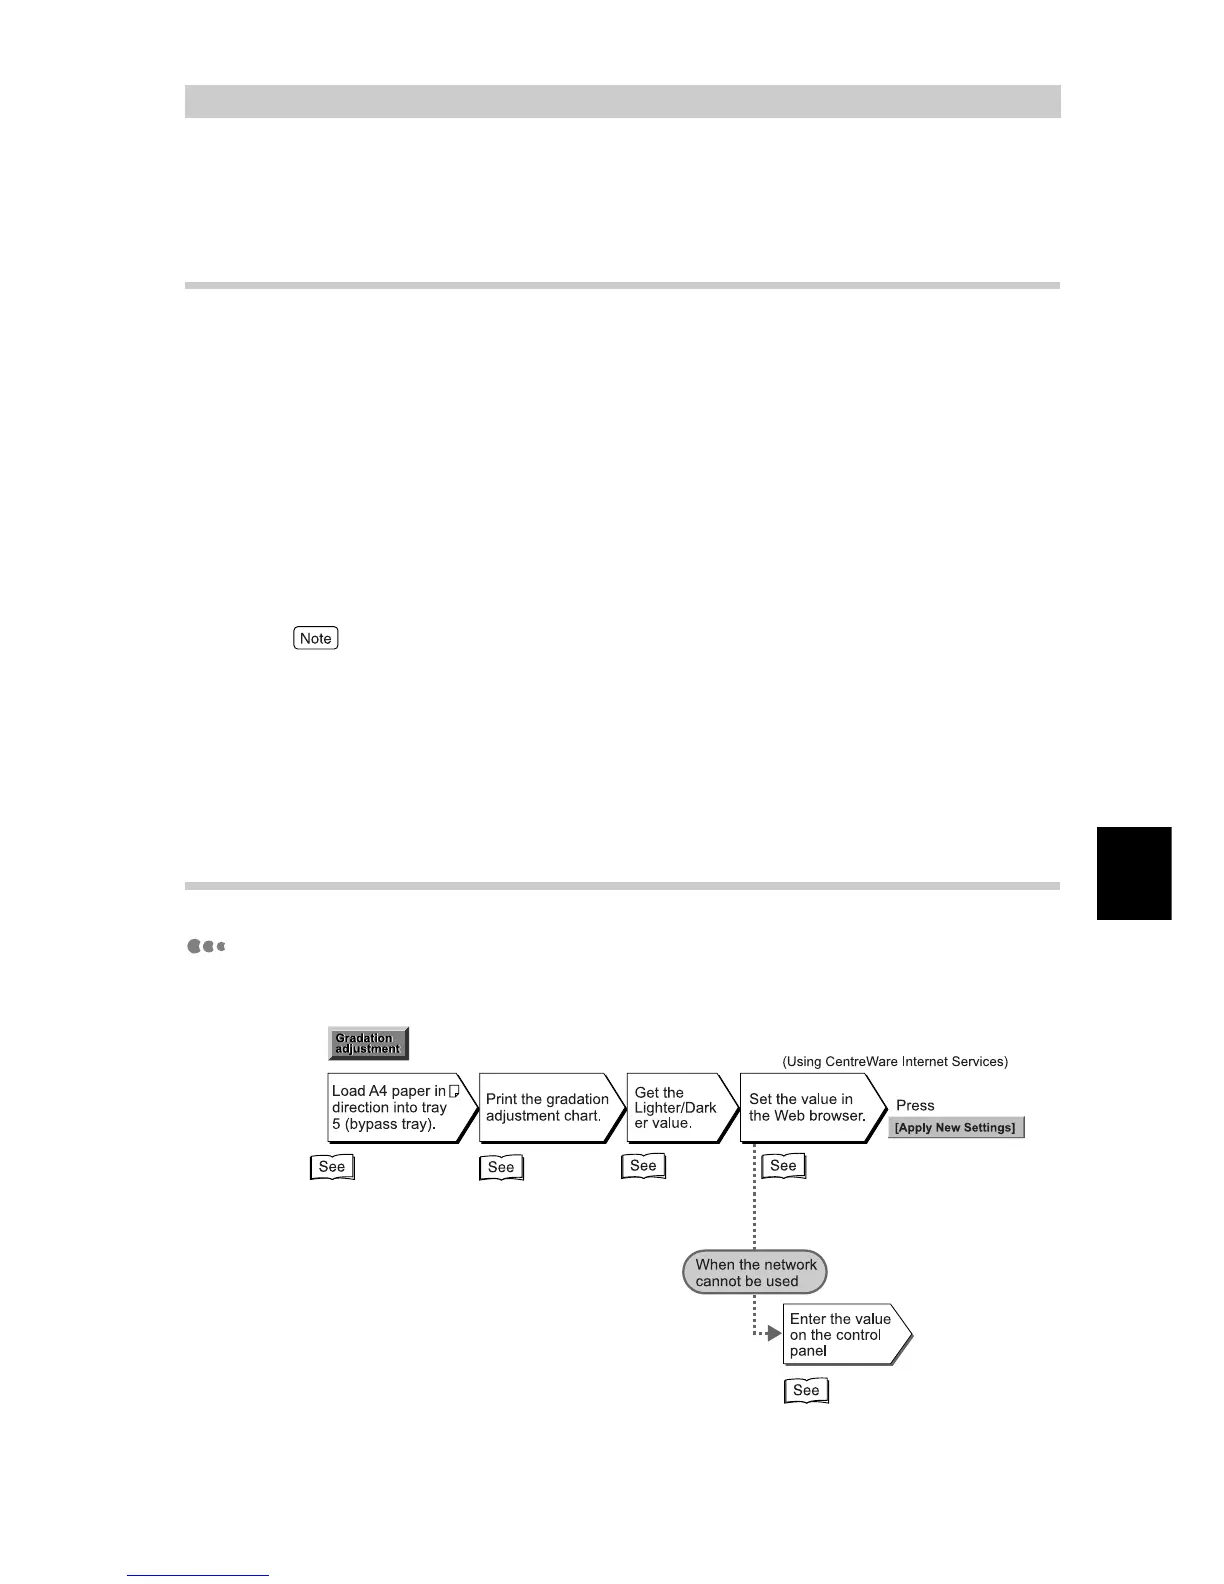
Flow of Gradation Adjustment
Flow of gradation adjustment is as follows.
“Loading Paper into
Tray 5 (Bypass)”(P.127)
“Printing
Chart”(P.176)
“How to get the set-
ting value”(P.177)
“How to enter the value
Entering the value from
Web browser”(P.181)
“How to enter the value Entering the
value on the control panel”(P.183)
 Loading...


