186
CIRCLE
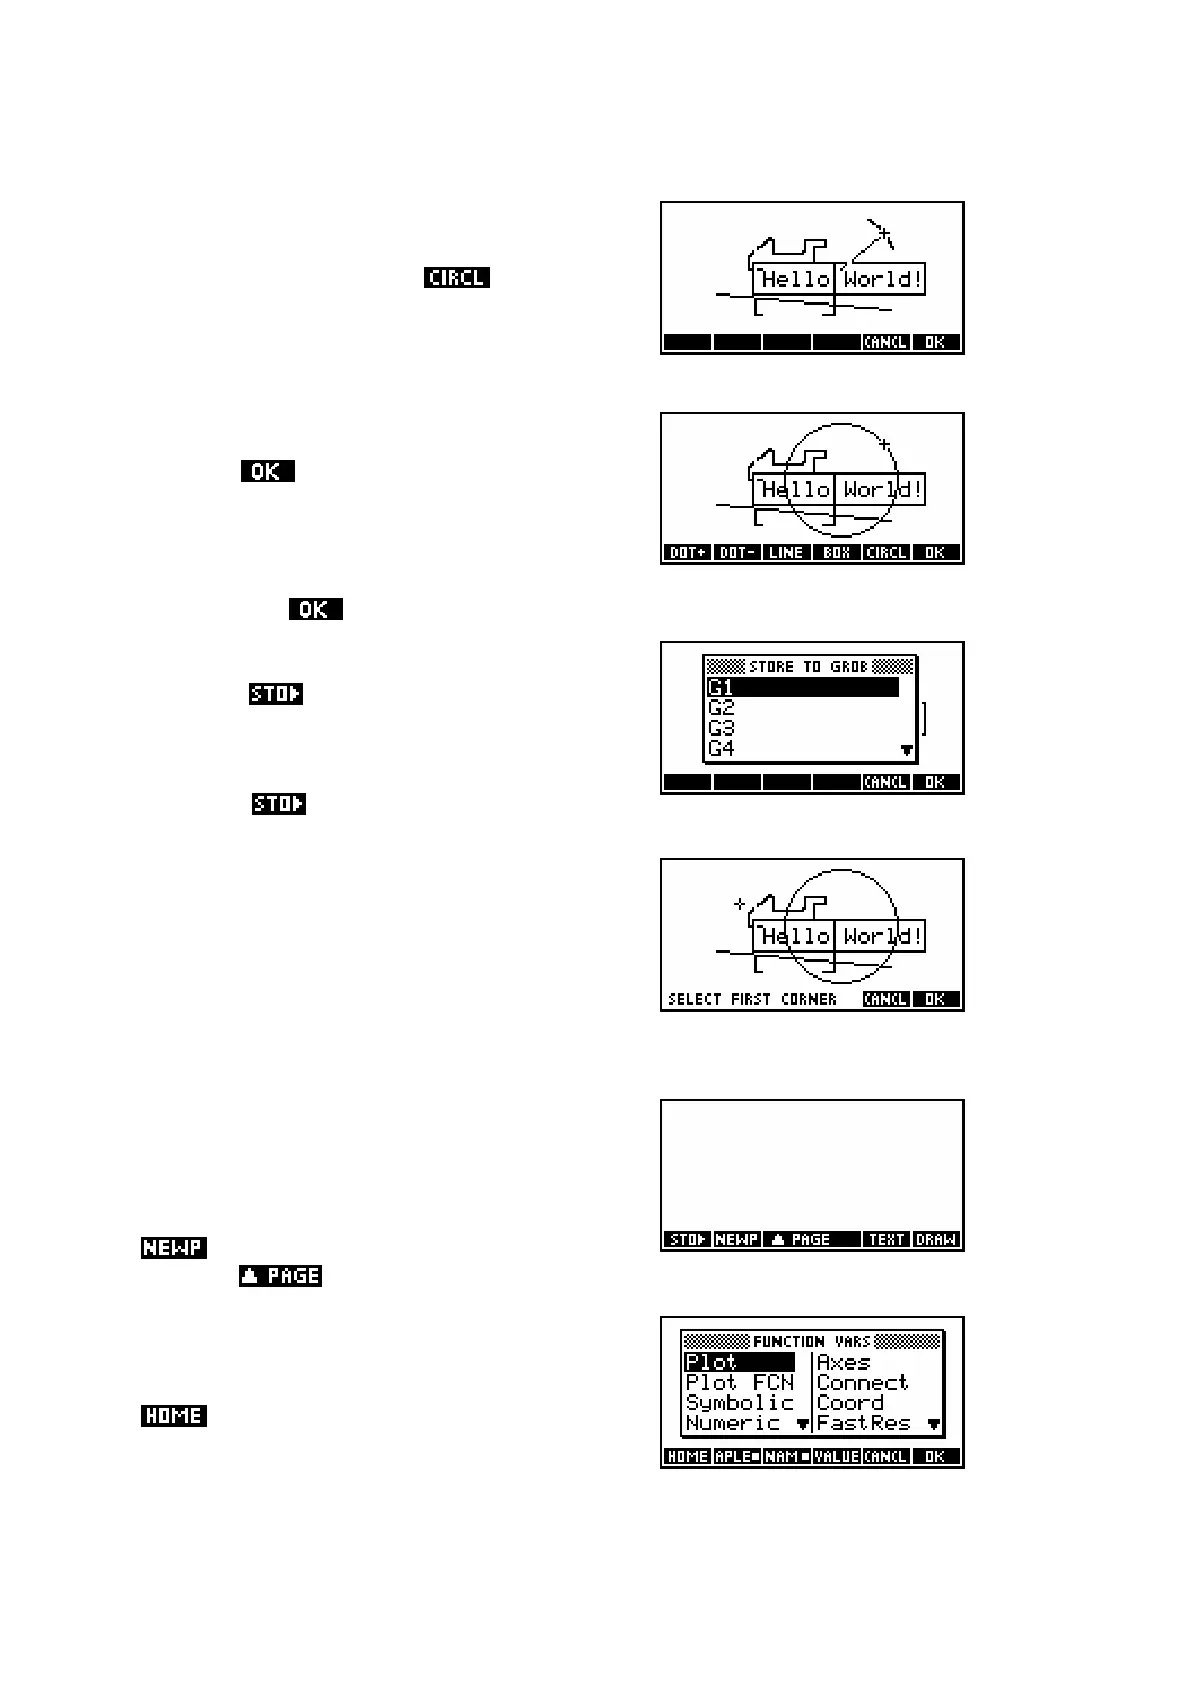
The circle command is similar. You should
position the cursor at the center of the
proposed circle. Pressing , move the
cursor outwards from the center, forming a
radius. As you do so you will see a small arc
appear, giving you an indication of the
curvature of the circle.
Pressing (or ENTER ) will then complete
the circle.
Finally, press to leave the drawing tools view.
Cut and paste (sort of…)
Using the key you can capture part of the
screen and store it into any of ten graphics
memories G1,G2..G9,G0 (called ‘GROBs’,
which is short for graphics objects). When
you press the message you see on the
right will appear, asking which GROB to use.
Storing to a GROB
Once you have chosen a GROB in which to
store the screen capture, you will need to
specify the corners of the rectangle to be
captured.
Once an image is captured, it is possible to
paste the captured screen portion into the a
Sketch page using the VAR key. The screen
does not have to be blank but to make things
clearer, create a new sketch page using the
key (see right). Notice the appearance
of a new key to allow movement between pages.
Using the VAR key
Press the VAR key and, when you see the
screen shown right, press the key labeled
.
 Loading...