66
If you now press ENTER again to accept the
end point, the hp 39g+ will calculate the signed
area and display the result at the bottom of the
screen.
Calculator Tip
It should be clearly understand that although the
label at the bottom of the screen is Area it is a
little misleading.
What has actually been calculated is the definite
integral (right), with ‘areas’ below the x axis
included as negatives. This is why the label on
the original menu reads “Signed area” instead of
just “Area”.
2ndpoint
1stpoint
1( )
Xdx
∫
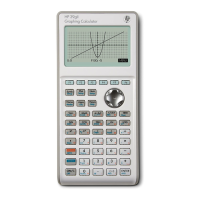
Tracing the integral in
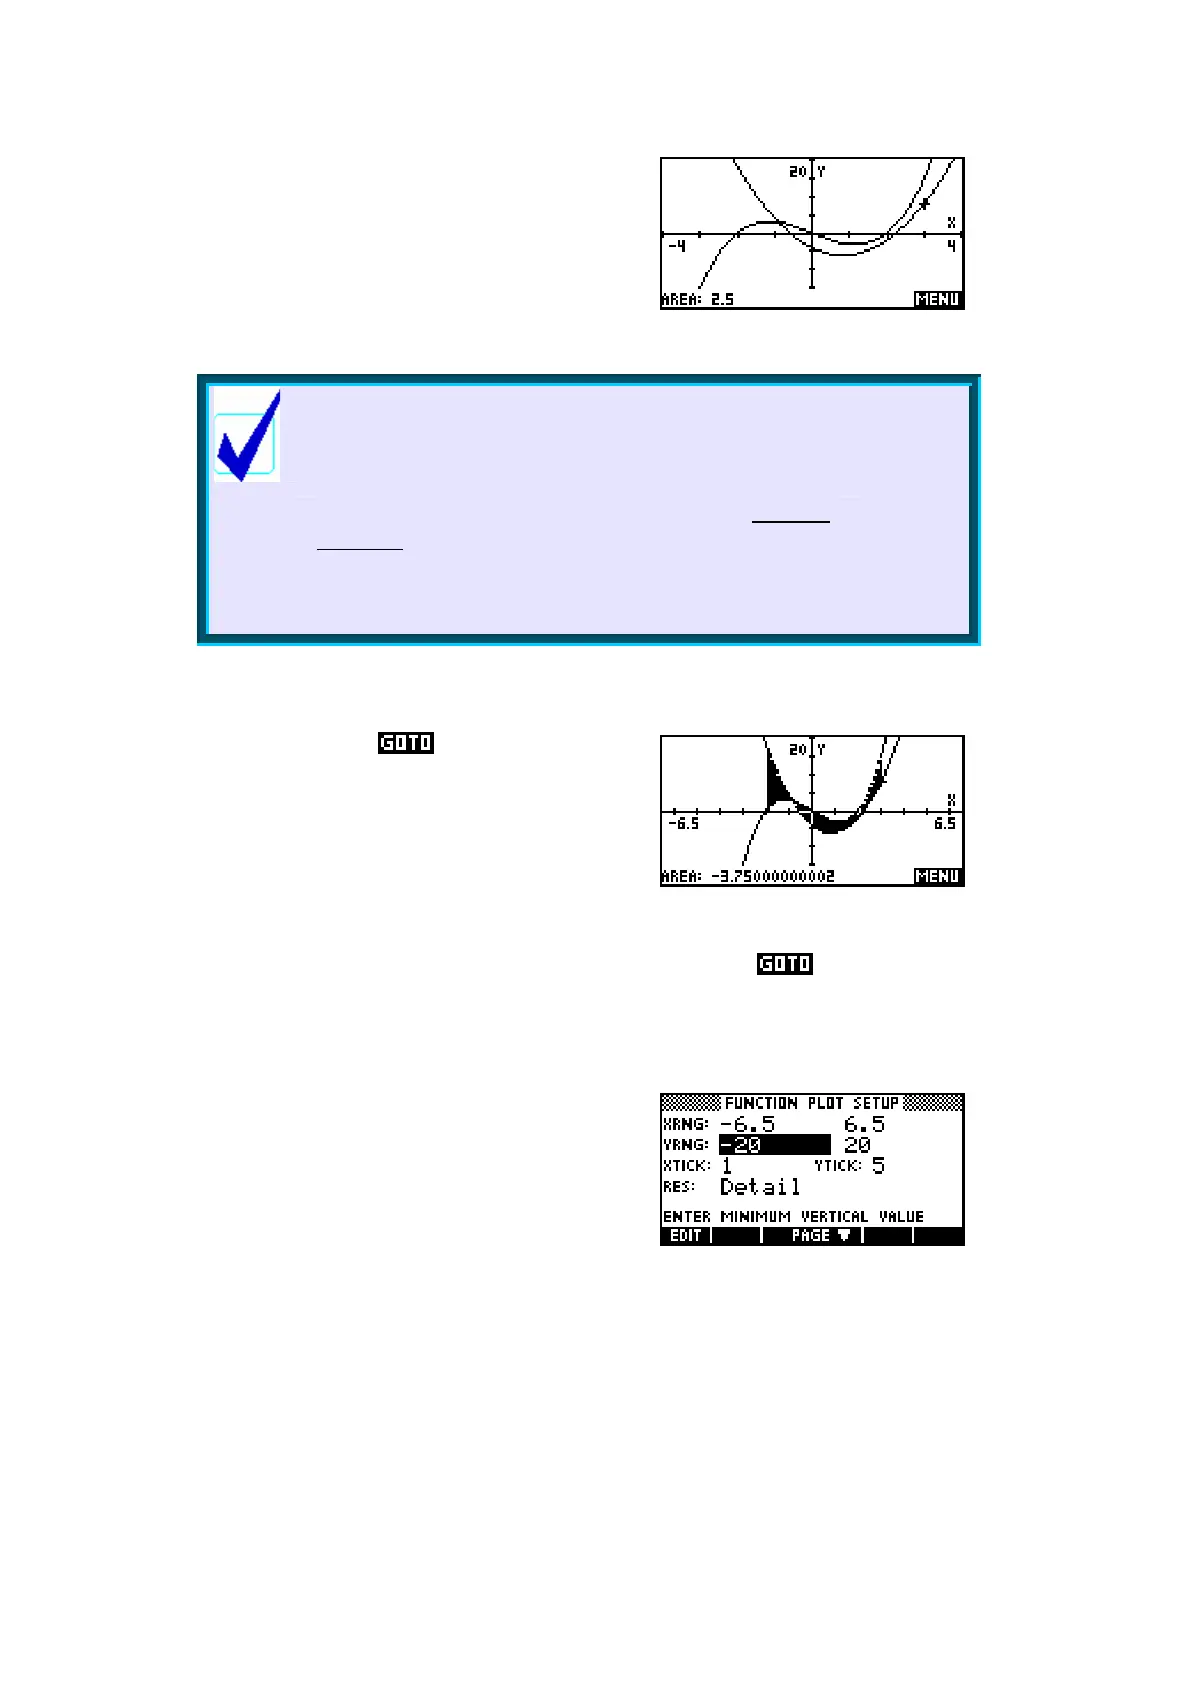
PLOT
Rather than using the key, an alternative
method is to use the tracing facility. The
advantage of this is that the ‘area’ is shown
visually as you go by shading, as can be seen
right.
The disadvantage of this is that you can only trace to values which are
permitted in the scale you are using. As soon as you use the shading
stops. In this case, due to the scale we chose, if you try to trace to the values
x = -3 or x = 2 you will find that they are not accessible so we will need to
change scale.
Change to the PLOT SETUP view and change
the x axis (only) back to -6.5 to 6.5, then
PLOT again.
 Loading...