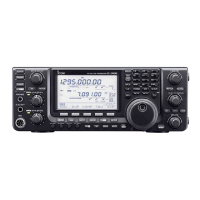
• Calling CQ
My call sign:
JA3YUA
CQ
Area
Zone
Repeater q: JP3YHL
q w e r
R2
R2
Ú
≈ R2
CLR EDT NAME GRP
R1
R1
Ú
≈
JP3YHL
R1
CLR EDT NAME GRP
UR
MY
MY
Ú
≈
JA3YUA ⁄
MY1
CLR EDT NAME
UR
Ú
≈
CQCQCQ
UR
CLR EDT NAME GRP
• Calling an individual station
My call sign:
JA3YUA
Station call sign:
JG3YMK
Repeater q : JP3YHL
q w e r
Area
Zone
R2
R2
Ú
≈ R2
CLR EDT NAME GRP
R1
R1
Ú
≈
JP3YHL
R1
CLR EDT NAME GRP
UR
MY
MY
Ú
≈
JA3YUA ⁄
MY1
CLR EDT NAME
UR
Ú
≈
JG3YMK
UR
CLR EDT NAME GRP
■ Repeater operation using the VFO
D Making a CQ call or a call to an individual station through your local area (access) re-
peater (Local Area call)
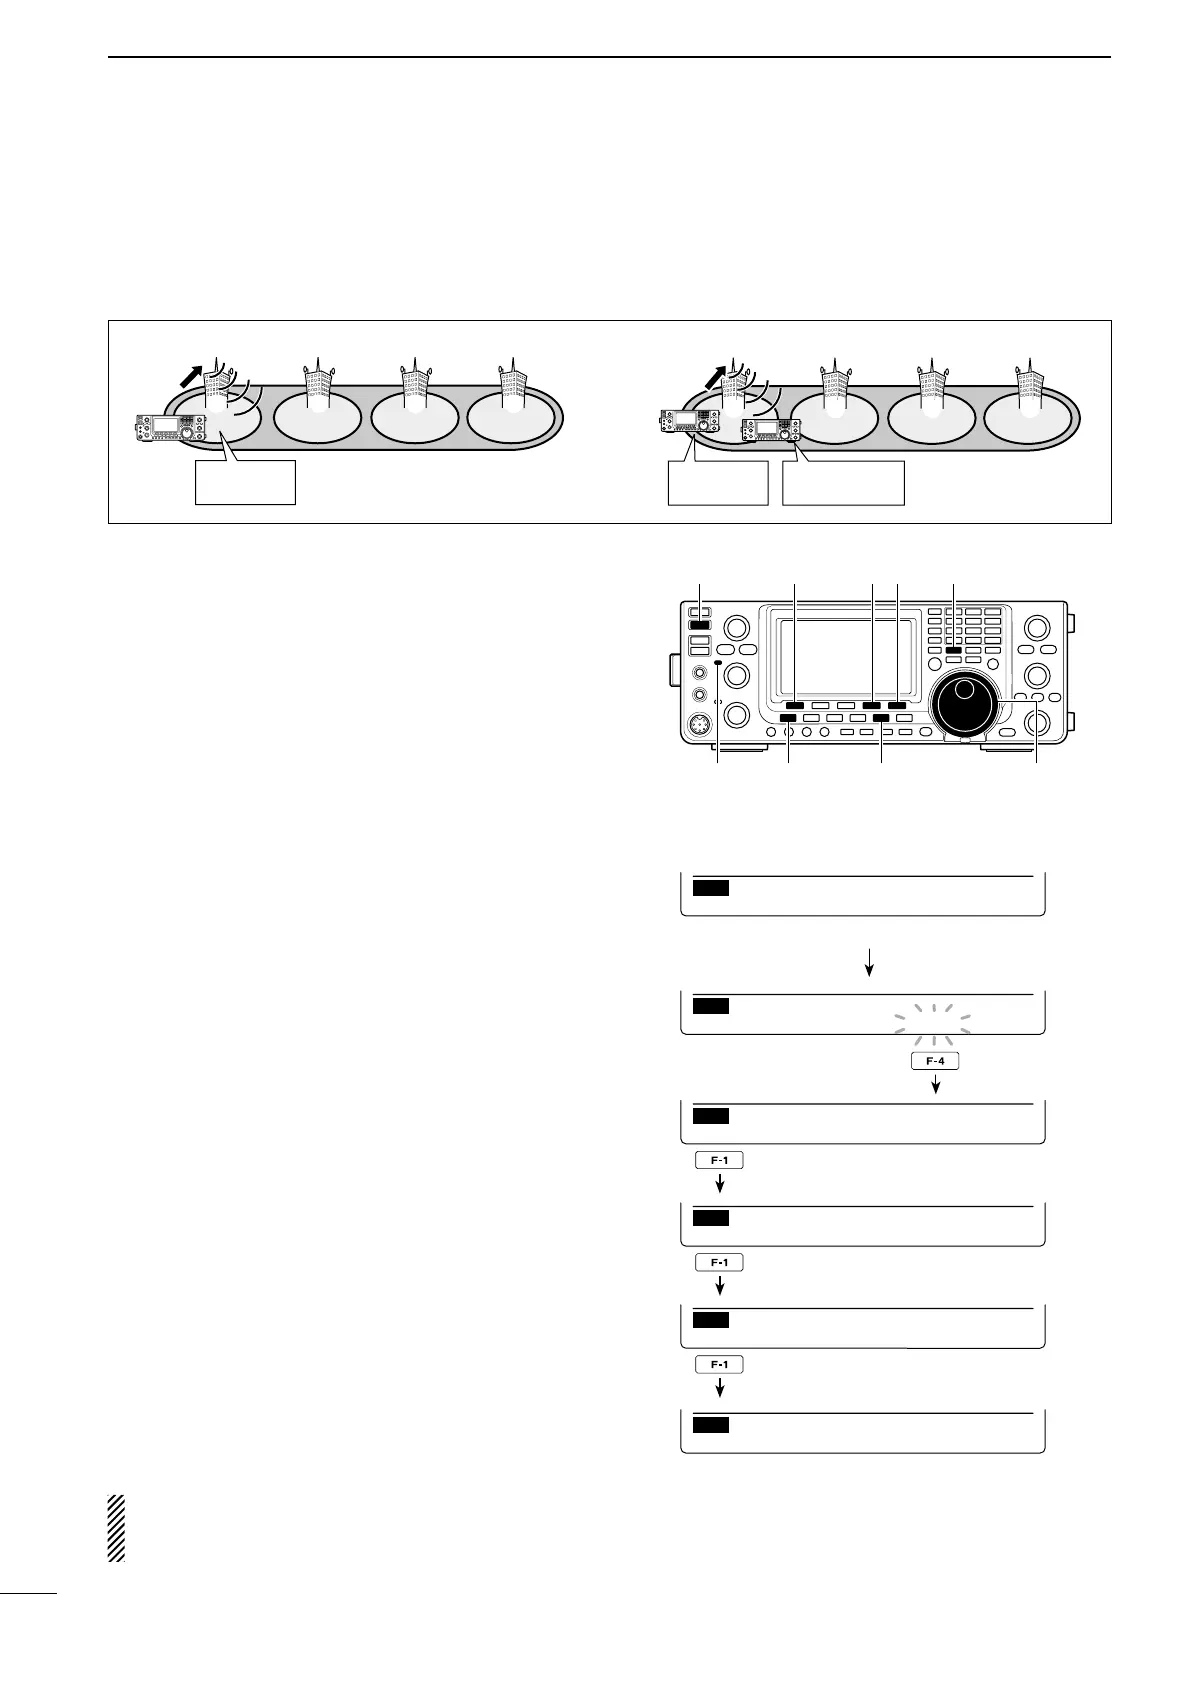
[TRANSMIT]
MAIN Band
TX/RX indicator
[MAIN DIAL]
[DV•DR][MENU]
[VFO/MEMO][SET][Z] [GRP]
UR
Ú
≈ UR
CLR
JG3YMK
EDT NAME GRP
R1
Ú
≈ R1
CLR
JP3YHL
EDT NAME GRP
Rotate [MAIN DIAL]
MY
Ú
≈ MY1
CLR
JA3YUA ⁄
EDT NAME
UR
Ú
≈ UR
CLR
CQCQCQ
EDT NAME GRP
• When calling CQ through a single repeater
q Select the desired frequency band. (p. 35)
w Push [VFO/MEMO] to select the VFO mode.
e Push [DV•DR] to select the DV mode.
r Set the repeater’s transmit frequency, duplex direc-
tion and offset. (pp. 37, 65, 163)
t
P
ush [MENU] one or more times to display the “M3”
screen (Menu 3).
y
P
ush [CS](F-1) to display the “CS” screen (Call
Sign).
u
P
ush [Z](F-1) to display the “UR” screen, and rotate
[MAIN DIAL] to select UR call sign, then push [SET]
(F-4).
•Firstselectingthecallsignmemorygroupsbypushing
[TS•GRP]or[GRP](F-5)makesitmoreconvenient.
• When calling CQ : Select “CQCQCQ”
• When calling an individual station
: Select the station’s call sign
i
P
ush [Z](F-1) to display the “R1” screen, and rotate
[MAIN DIAL] to select the access repeater call sign,
then push [SET](F-4).
•Firstselecting therepeatercall sign groupmakes it
more convenient, if you have programmed repeaters
into Groups. (p. 93)
•Push[NAME](F-4)totogglethecallsignandrepeater
name display, if the name has been programmed.
o
P
ush [Z](F-1) to display the “R2” screen, and rotate
[MAIN DIAL] to set R2 to “NOT USE✱,” then push
[SET](F-4).
!0
P
ush [Z](F-1) todisplay“MY,”andsetyourowncall
sign if necessary, then push [SET](F-4).
!1 Push [PTT] on the microphone to transmit. (or
[TRANSMIT] on the transceiver)
•TheMAINBandTX/RXindicatorlightsred.
!2 Release [PTT] to receive. (or push [TRANSMIT]
again)
•Ifanotherstationsreplies,it’scallsignwillbestoredin
the receive log.
•Receivedcallsignscanbeautomaticallystoredintothe
received call record. See page 95 for details.
After setting, rotate [M-CH] to select a memory
channel, then hold down [MW] for 1 second to save
this temporary programmed data into the channel.
 Loading...