Configure Routing
190
ProSAFE 10-Gigabit Smart Managed Switch XS728T and XS748T User Manual
If you do not know the IP address of the switch, see Change the Default IP Address of the
Switch on page 10.
The login window opens.
4. Enter the switch’s password in the Password field.
The default password is password.
The System Information page displays.
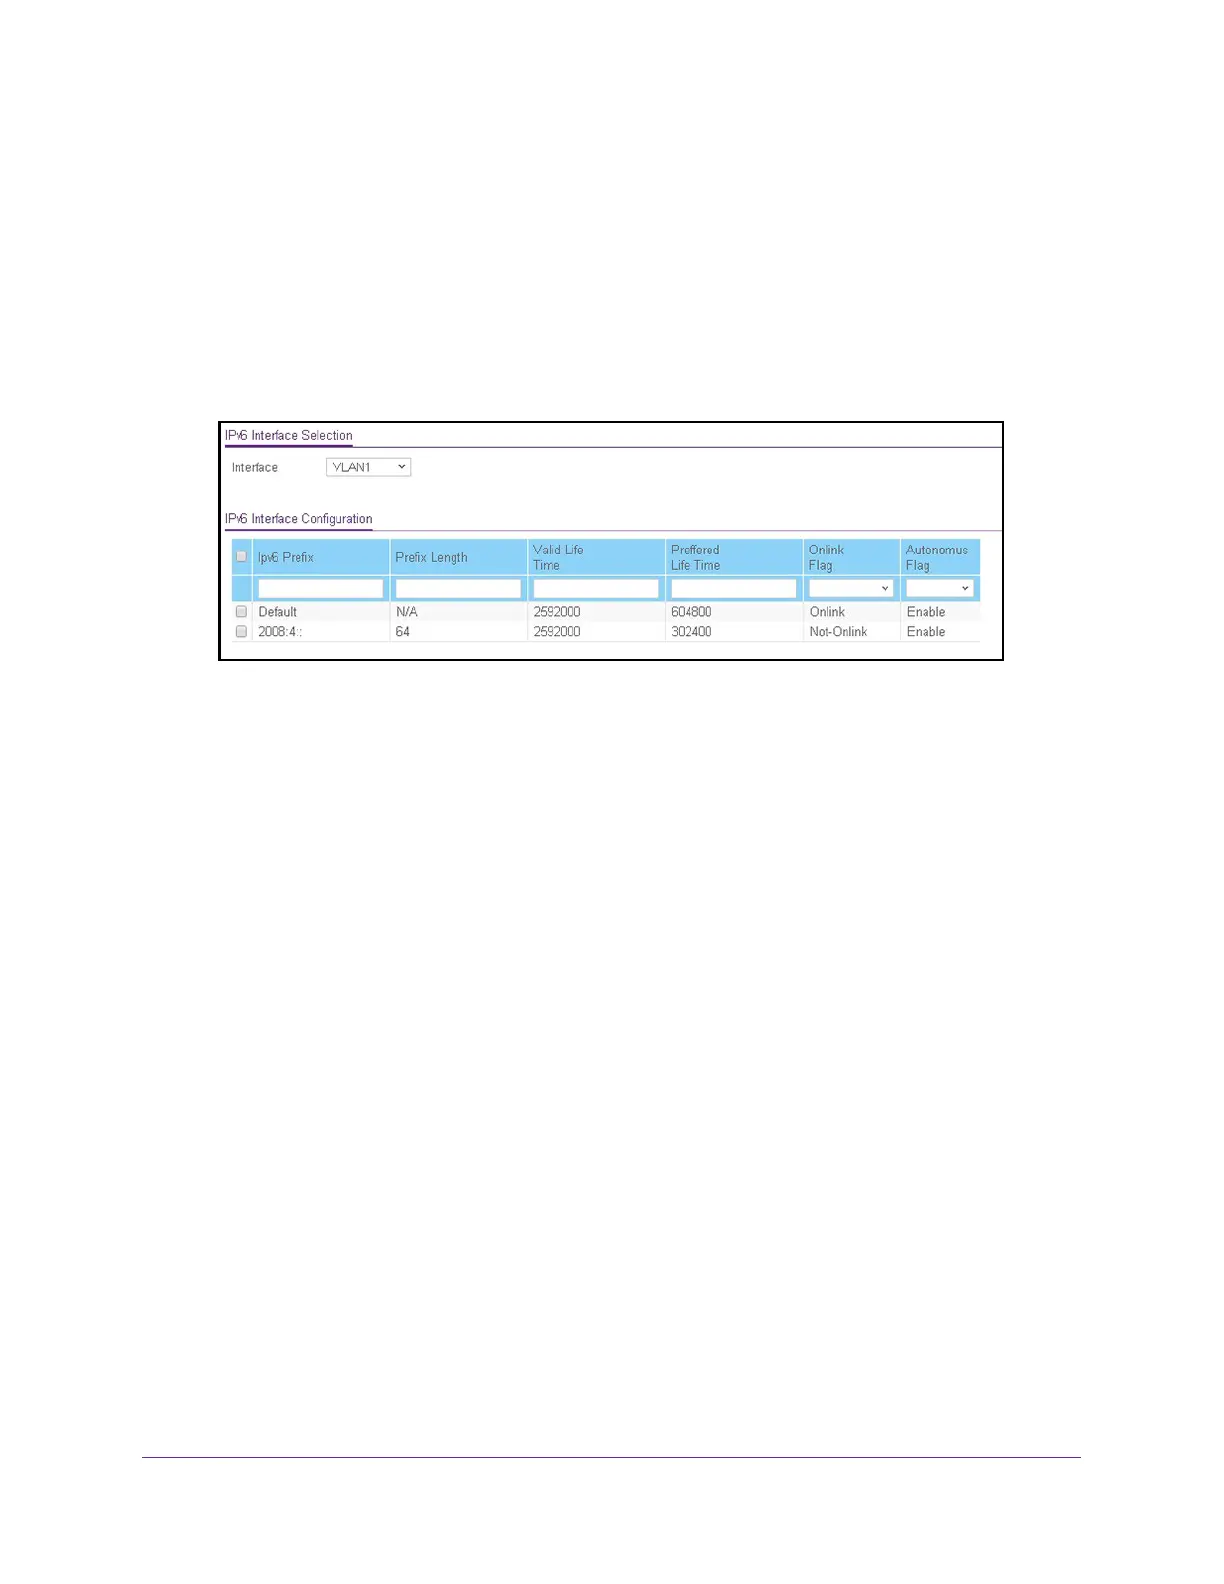
5. Select Routing> IPv6 > Advanced > Prefix Configuration.
6. From the Interface menu, select the VLAN.
7. In the Ipv6 Prefix field, specify the IPv6 prefix.
8. In the Prefix Length field, specify the IPv6 prefix length.
9. In the Valid Life Time field, specify the router advertisement per prefix time.
This is the time during which the switch considers the prefix valid for on-link
determination. The valid life time must be in the range 0 to 4294967295. The default
value is 2592000.
10. In the Preferred Life Time field, specify the router advertisement per prefix time.
An autoconfigured address generated from this prefix is preferred. The preferred life time
must be in the range 0 to 4294967295. The default value is 604800.
11. From the Onlink Flag menu, select one of the following options:
• Onlink. The prefix can be used for on-link determination. The default is Onlink.
• No-Onlink. The prefix cannot be used for on-link determination.
• Off-Link. The prefix can be inserted in the routing table.
12. From the Autonomous Flag menu, select Enable or Disable to specify whether the
selected prefix can be used for autonomous address configuration.
The default value is Enable.
13. Click the Add button.
The IPv6 address prefix is added to the VLAN.
 Loading...