Configure Quality of Service
214
ProSAFE 10-Gigabit Smart Managed Switch XS728T and XS748T User Manual
The new class is added.
9. After creating the class, click the class name.
The class name is a hyperlink to the page on which you can define the class
configuration.
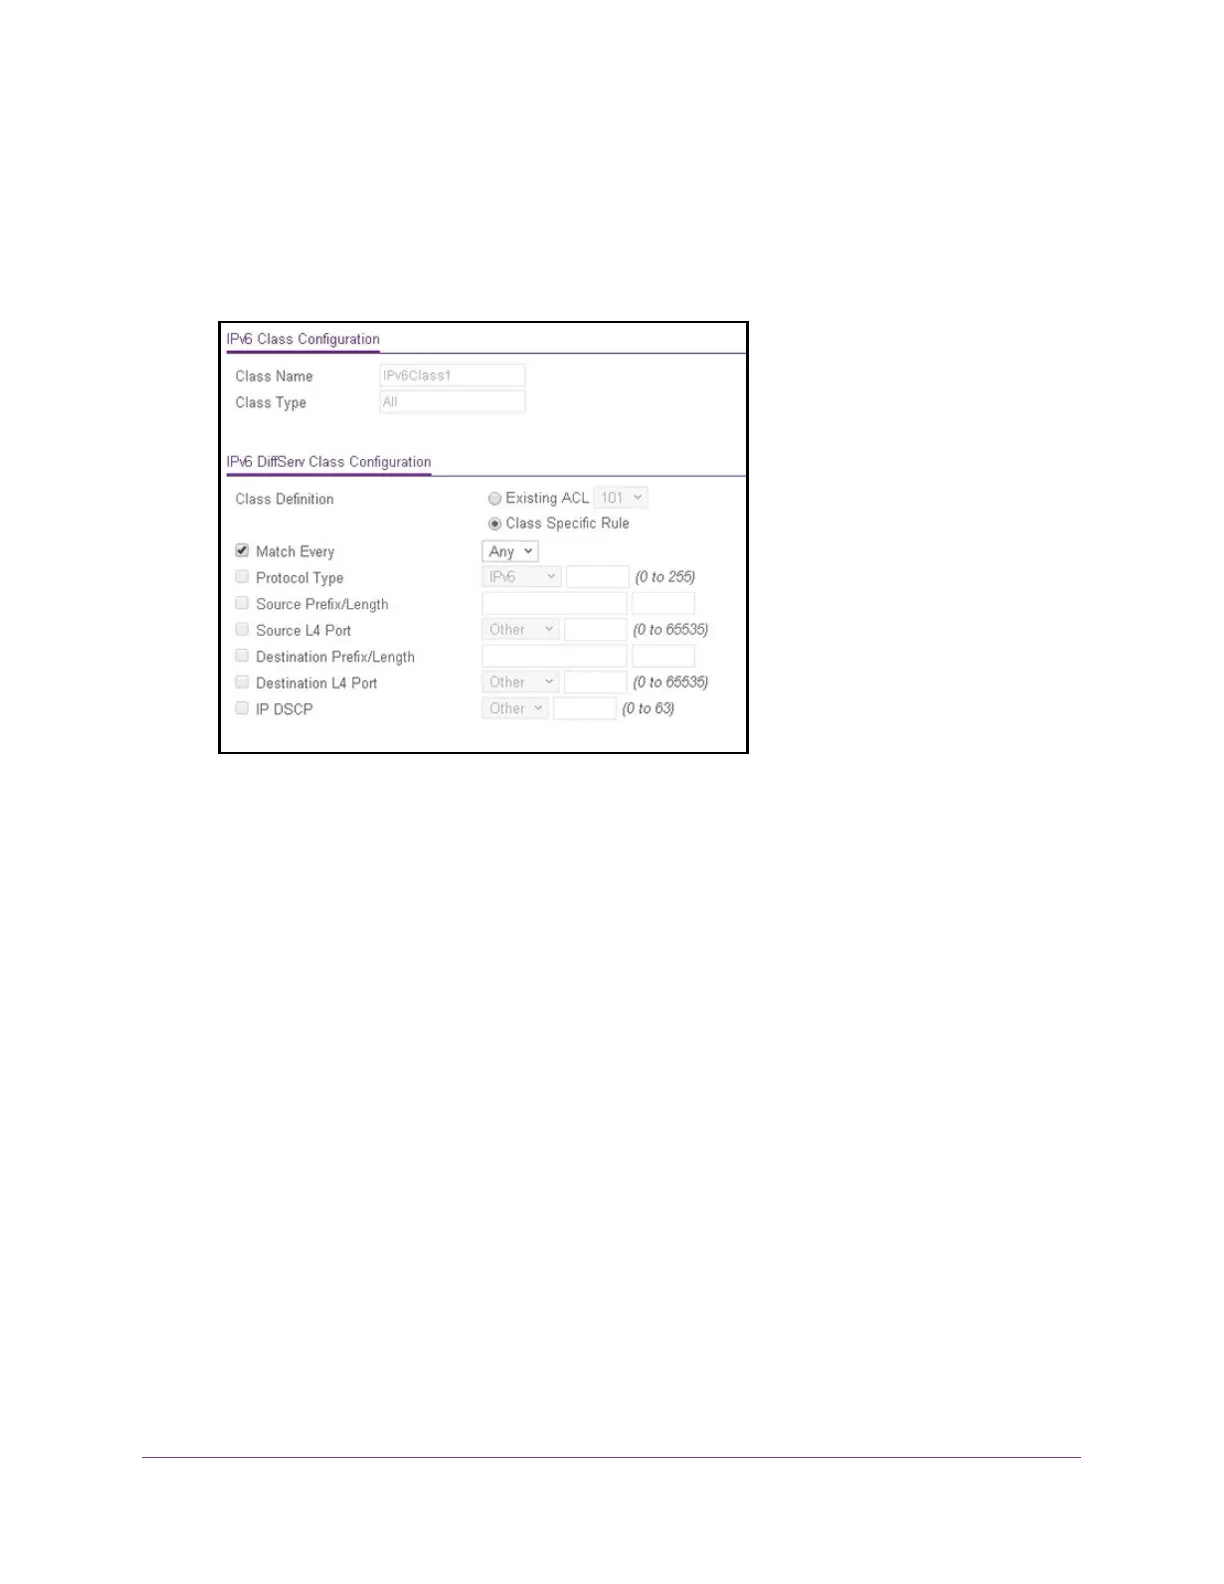
The class name and class type are stated in the IPv6 Class Configuration section at the
top of the page. These fields are nonconfigurable on this page.
10. Select one of the following Class Definition radio buttons:
• Existing ACL. From the menu, select an existing ACL for traffic classification. For
information about creating ACLs, see Configure Access Control Lists on page 272. If
you select this radio button, the fields on the page are disabled and you cannot define
classification rules.
• Class Specific Rule. Use class-specific rules. If you select this radio button (which is
selected by default), the fields on the page are enabled so that you can define
classification rules. See the next step.
11. If you select the Class Specific Rule radio button, define the criteria that must be
associated with the IPv6 DiffServ class:
• Match Every. Select this check box to add a match condition that considers all
packets to belong to the class. The only selection from the Match Every menu is Any.
If you select the Match Every check box, you cannot define any other options.
• Protocol Type. Select this check box to require a packet’s Layer 4 protocol to match
the specified protocol, which you must select from the menu. If you select Other from
the menu, you can enter a protocol number from 0 to 255.
• Source Prefix/Length. Select this check box to require a packet’s source prefix and
prefix length to match the specified source IPv6 prefix and prefix length. The prefix
must always be specified with the prefix length. The prefix can be in the hexadecimal
 Loading...