3
Installation
3-9
5. Robot connections
5.1 Connecting the robot cables
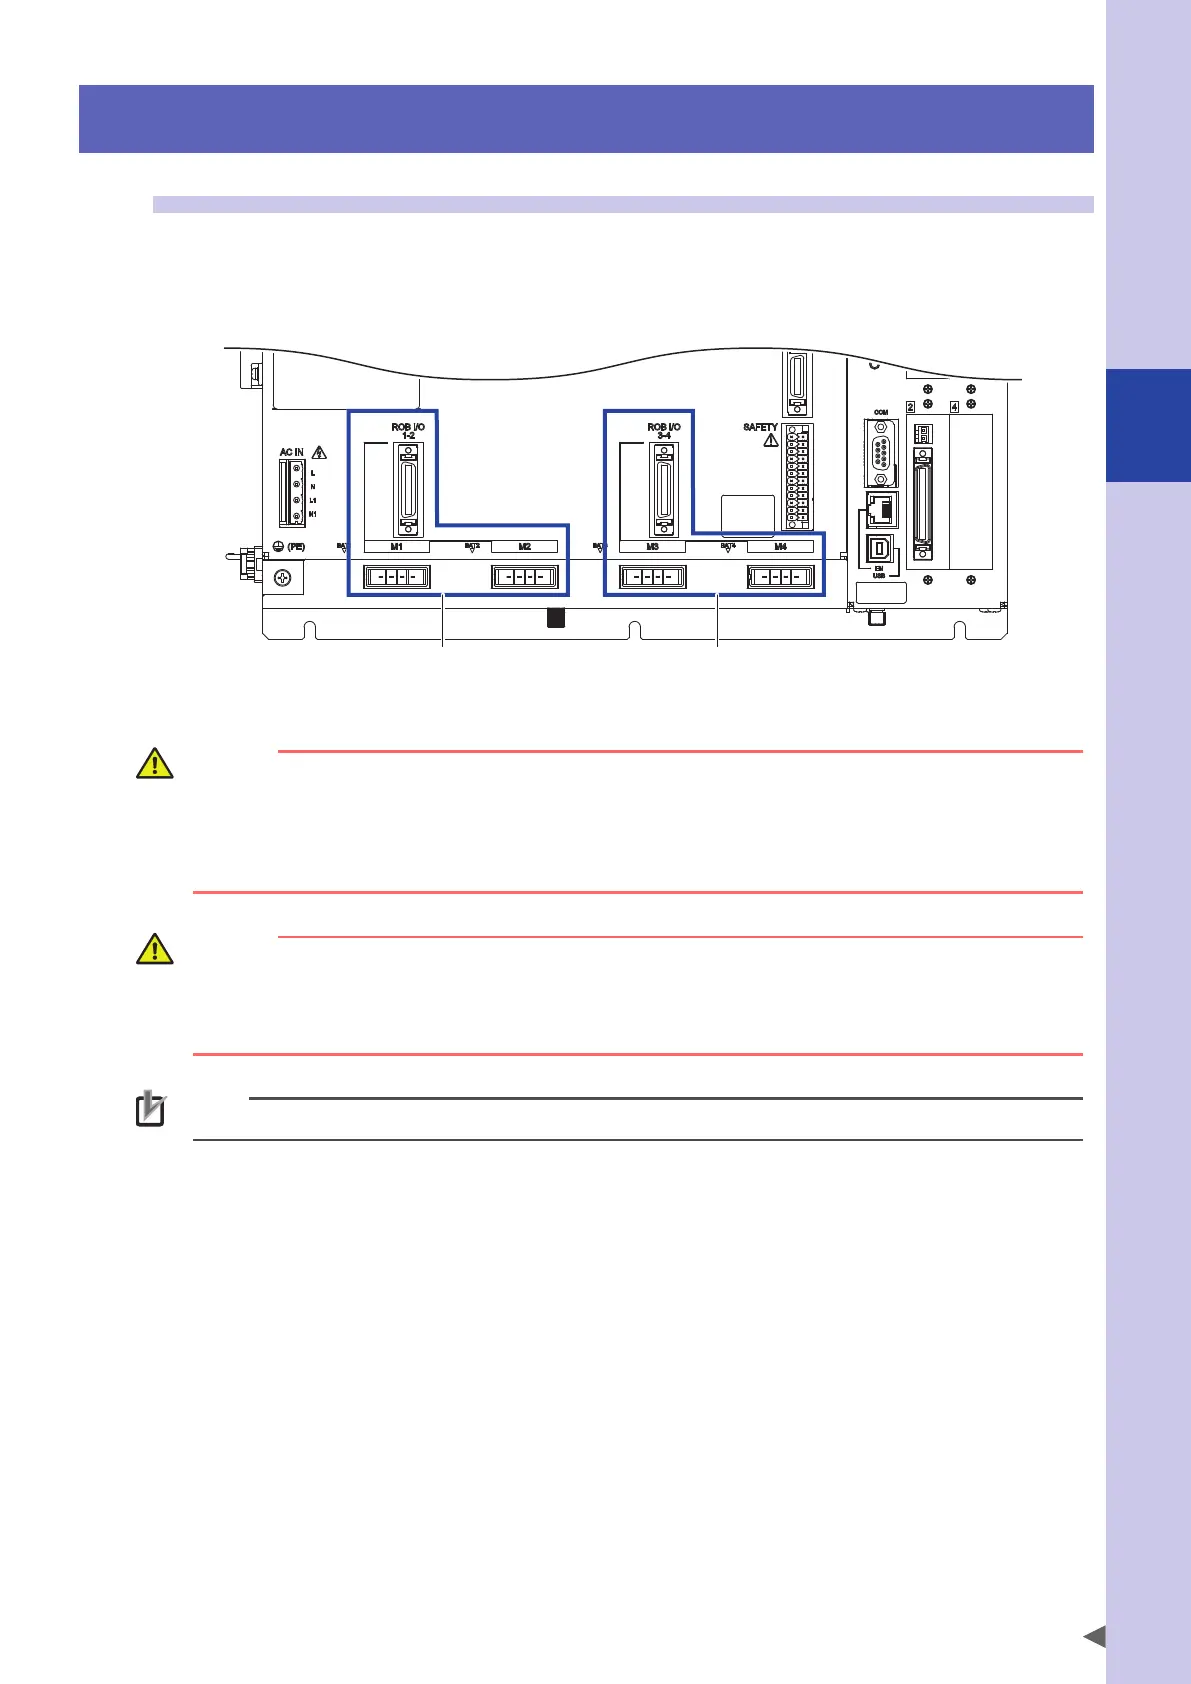
Connect the cables to the "M1", "M2", "M3", "M4", "ROB I/O 1-2", and "ROB I/O 3-4" connectors on the front
of the controller.
The "M1" and "M2" connectors and the "ROB I/O 1-2" connector are intended for axis 1 and 2. Additionally,
the "M3" and "M4" connectors and the "ROB I/O 3-4" connector are intended for axis 3 and 4.
For axes 1 and 2
For axes 3 and 4
YRCX
The robot connection cable specification may vary depending on the robot. For details, refer to the robot
manual.
WARNING
The power to the controller must be off when connecting the robot cables.
The "M1", "M2", "M3", and "M4" connectors and the ROB I/O connector (1-2/3-4) have the same shape. Be careful
not to make incorrect connections. Otherwise, the robot may malfunction.
Keep the robot cables separate from the power cables and other equipment power lines. Failure to follow this
instruction may cause malfunctions.
CAUTION
Always securely connect the robot cables. If they are not securely connected and fail to make good contact,
the robot may malfunction. Before turning on the controller, make sure again that the cables are securely
connected.
Additionally, ground the robot securely. For details about grounding, refer to the robot manual.
NOTE
Make sure there are no bent or broken connector pins and no cable damage before connecting.

 Loading...