tighten
to a torque oÍ 7.2
lb ft. The lst/2nd
gear
fork I
must be secured
with
a
new locking
pin.
Before
refitting the
gear
assembly
the clutch
housing
must be checked
Íor the
parallelism
oÍ
its Íront
and
rear
faces.
This is done by laying it on a
flat
surface and using
a dial
gauge
as
shown in FIG
6
:32. ïhe housing must be
renewed of the
faces
are out of
parallel
by more than .
1
mm.
Install the
gear
assembly into the
lefthand
housing
as shown in
FIG
6:33, taking caÍe to see that the striking
Íorks are corÍectly engaged with the synchronizer rings.
Fit the outer
race for the intermediate
gearshaft
front
bearing
if it was removed, then apply a
thin
coat of sealer
to the mating faces of the halÍ
housings
and
fit them
together,
lnsert the four housing bolts shown at 4 in FIG 6:34
and tighten
them to a torque of 3.6 lb ft.
Smear
the
rear
Íace of the clutch housing with sealer and secure with
six bolts
tightened to 20 lb Ít. Secure the reaÍ backing
plate
with Íour Allen screws tightened to
7.2
lb
Ít.
Now slacken ofÍ
the Íour housing bolts
and
tap the
housrng
halves with
a
mallet while rotating the drive
shaÍt.
Finally retighten the four bolts to a torque of
11 lbÍr.
FIG 6:23
Removing the
locking needle 1 from the
3rd/4th
gear
Íork shaft
FIG
6:24
Removing the spiral
pin
2 from the raverse
pinion
shaÍt 3
P404
3
Beverse
gear
4 Shifting fork
FIG 6:26
InstallingthelockingballTandspringSinthe
channel 6
with
plug
9
Kêy to
Fig
6
:25
5
Drain hole
FIG 6:25 Fitting reverse
pinion
and
fork
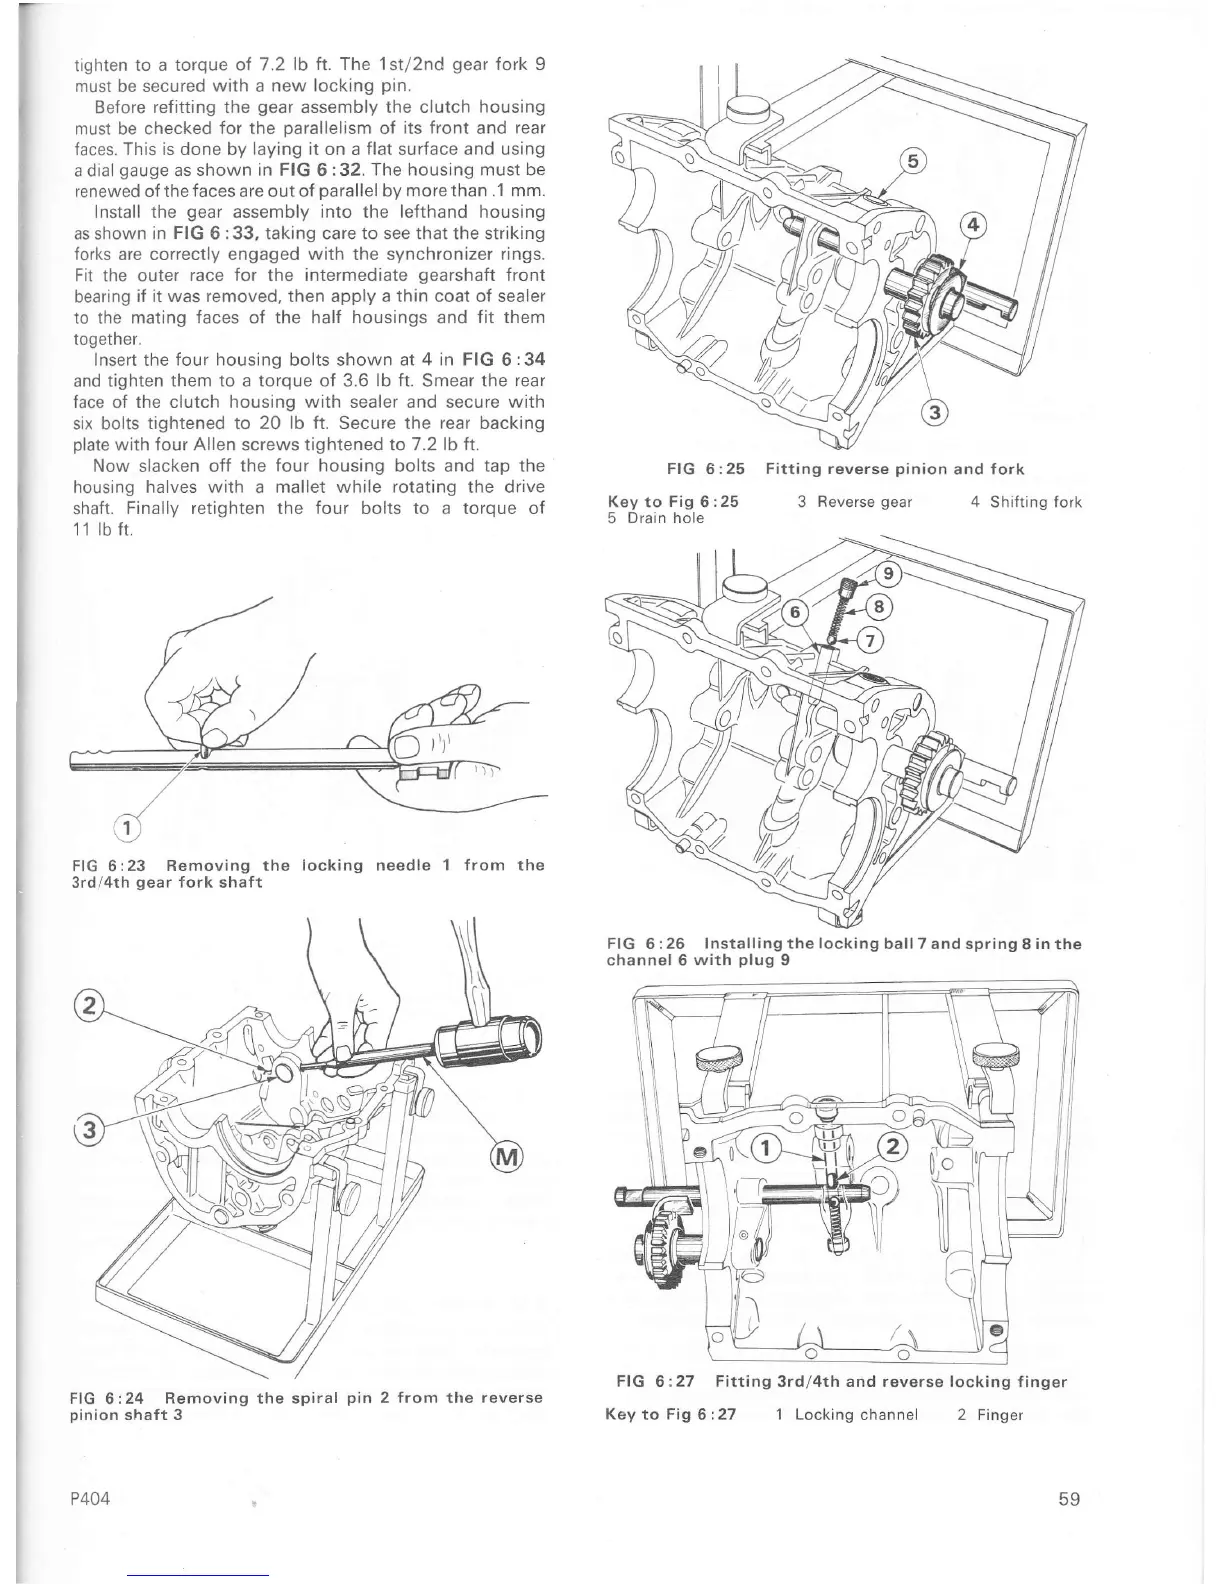
FIG 6:27
Fitting
3rd/4th and reverse locking
finger
Key
to
Fig
6:27
1
Locking channel 2 Finger
qo

 Loading...


