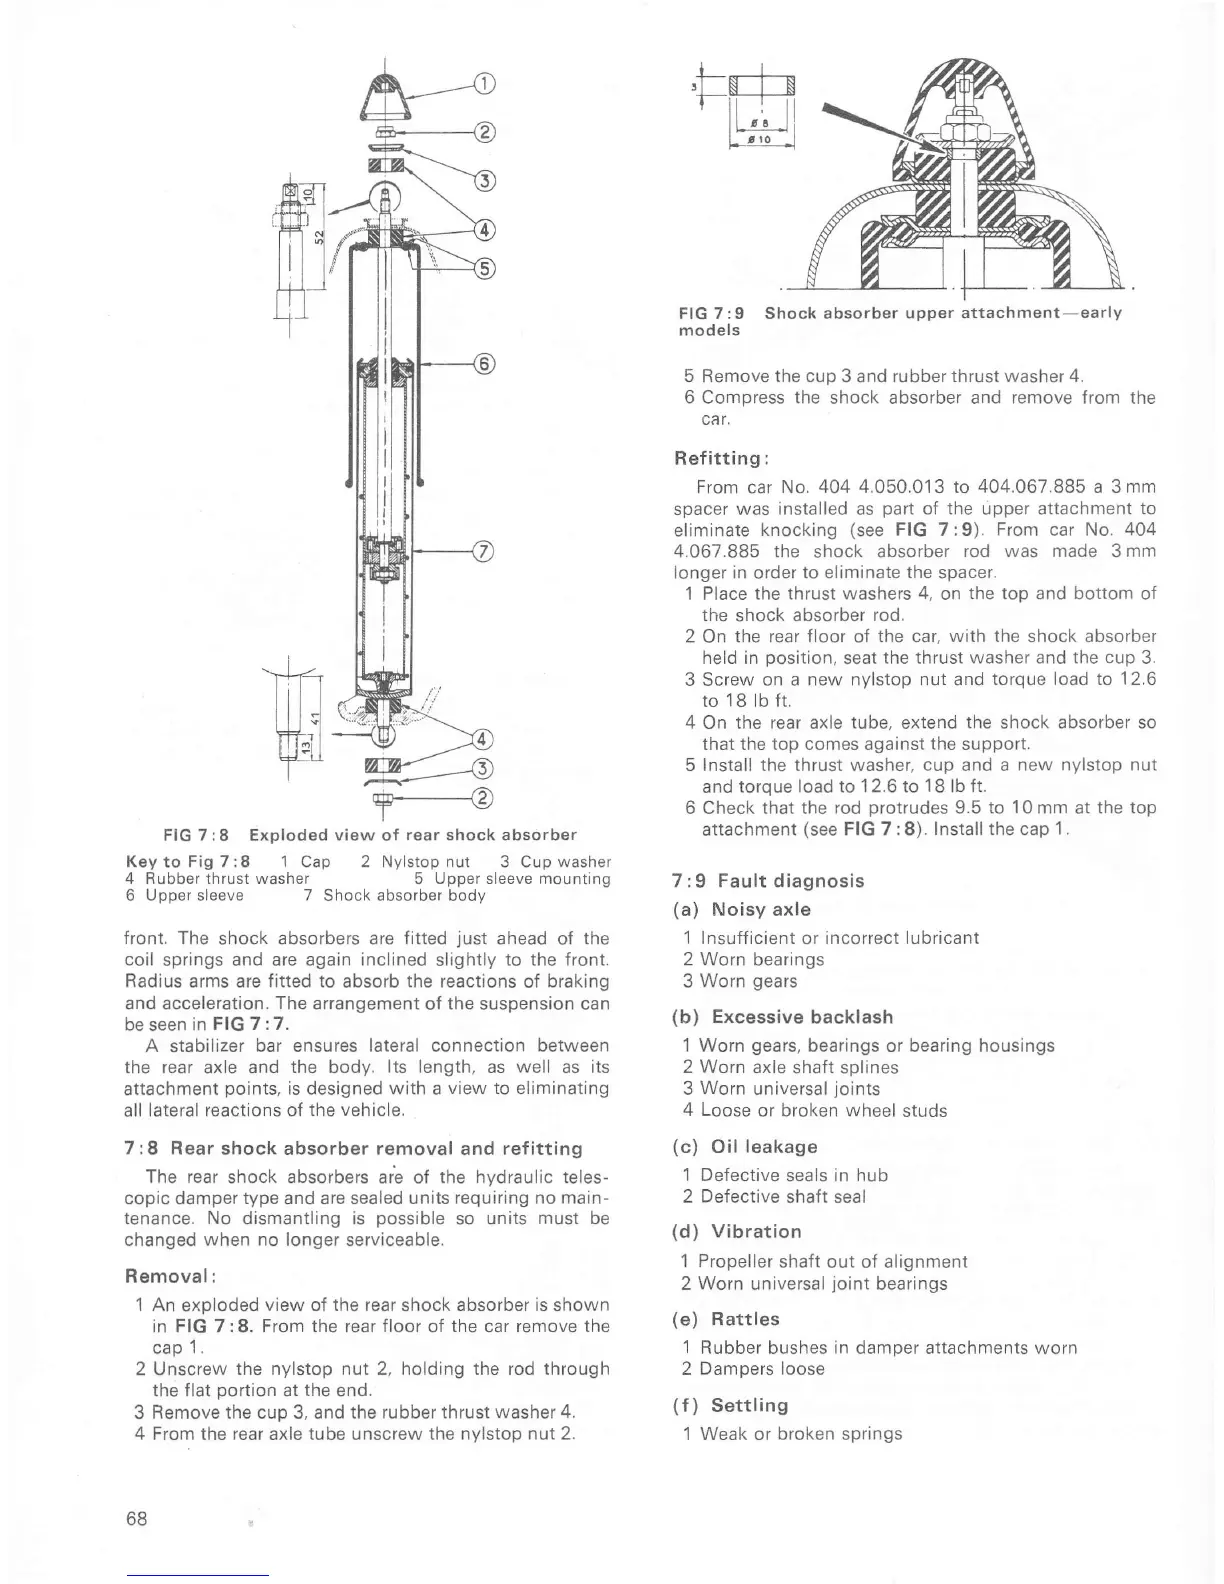
FIG
7:8
Exploded
view
oÍ
rear shock absorber
Key to Fig
7
:8
1
Cap 2 Nylstop nut 3 Cup
washer
4 Rubber thrust washer
5
Upper sleeve mounting
6 Upper sleeve
7
Shock absorber body
front. The shock absorbers are fitted
just
ahead of the
coil
springs and
are again inclined
slightly
to the front.
Radius arms are Íitted to absorb the reactions
of
braking
and acceleration.
The
arrangement
of
the suspension
can
be seen in
FIG 7:7.
A stabilizer
bar ensures lateral connection
between
the rear axle and
the body. lts length, as
well
as its
attachment
points,
is designed with a
view to eliminating
all lateral Íeactions oÍ
the vehicle.
7 :8
Rear shock absorber removal
and
refitting
The rear
shock absorbers aÈ of the hydraulic teles-
copic damper
type
and are sealed
units Íequiring
no main-
tenance. No dismantling is
possible
so units
must
be
changed when no longer
serviceable.
Removal:
1 An exploded
view of the rear
shock
absorber is
shown
in FIG 7:8. From
the
rear floor of
the
car
remove the
cap
'l
.
2 Unscrew
the nylstop nut 2, holding the rod through
the flat
portion
at
the
end.
3 Remove the cup 3. and
the rubber thrust
washer
4.
4 From the rear axle tube unscrew the nylstop
nut 2.
68
FIG 7:9 Shock absorber
upper attachment-early
models
5
Remove
the cup
3 and
rubber thrust washer 4.
6 Compress
the
shock absorber and remove from the
Ref
itting:
From car No.404
4,050,013 to 404.067.885 a 3mm
spacer was
installed
as
part
of the upper attachment to
eliminate knocking
(see
FIG 7:9). From car No. 404
4.067.885 the shock absorber
rod was made
3
mm
longer in oÍder to eliminate
the
spacer.
1 Place the thrust washers
4,
on
the top
and bottom oÍ
the
shock
absorber rod
2 On the rear Íloor oÍ the car,
with the
shock absorber
held in
position,
seat
the thrust washer and the
cup
3.
3 Screw
on
a
new nylstop nut and
torque load to 12,6
to
18
lb ft,
4
On the rear axle
tube,
extend
the shock absorber so
that the top comes against
the
support.
5 Install the thrust washer,
cup
and a new
nylstop nut
and
toroue load to 1 2.6 to
18
lb Ít.
6 Check that the rod
protrudes
9.5 to 10mm
at
the top
attachment
(see
FIG 7 :8).
Install the
cap
'l
.
7:9 Fault diagnosis
(a)
Noisy axle
1 InsuÍficient
or
incorrect Iubricant
2 Worn bearings
3 Worn
gears
(b)
Excessive
backlash
1
Worn
gears,
bearings or bearing housings
2 Worn axle
shaft splines
3
Worn
universal
joints
4 Loose
or
broken wheel
studs
(c)
Oil
leakage
1 Defective
seals in hub
2
Defective
shaft seal
(d)
Vibration
1 Propeller
shaÍt out of alignment
2 Worn universal
joint
bearings
(e)
Rattles
1
Rubber bushes in damper aïtachments
worn
2 Dampers loose
(f)
Settling
1 Weak or
broken
springs

 Loading...


