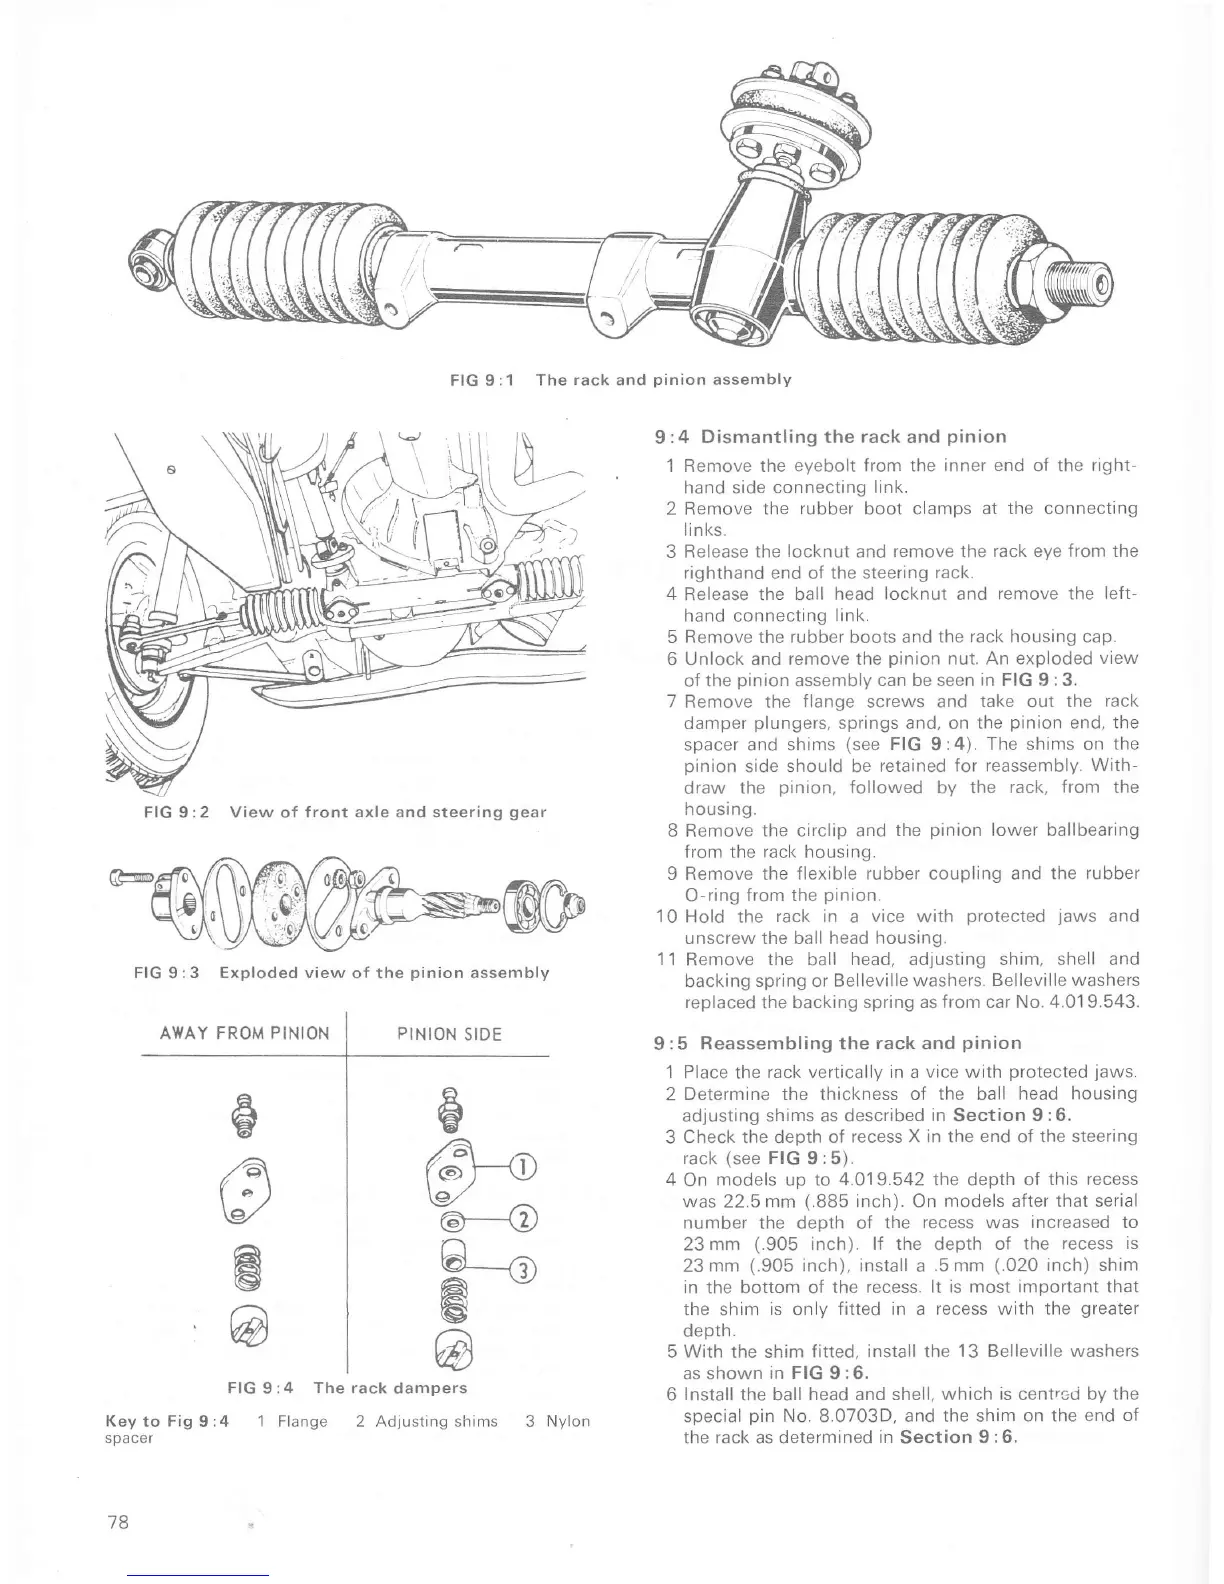
FIG 9:1
The
rack
and
pinion
assembly
FIG
9:3
Exploded view
of the
pinion
assembly
FROM
PINION
FIG
9:4
The rack
da
9:4
Dismantling the
rack
and
pinion
1
Remove
the eyebolt Írom the
inner end of
the
right
hand side connecting
link.
2 Remove the
rubber
boot clamps at
the connecting
lin ks.
3
Release the
locknut
and remove the
rack eve from the
Íighthand end
of the
steering rack.
4
Release the ball
head locknut and
remove
the
left-
hand
connecting
link.
5 Remove the
rubber
boots and
the rack housing cap.
6
Unlock and remove the
pinion
nut.
An exploded view
oÍ the
pinion
assembly
can be seen in FIG 9
:3.
7
Remove the
flange
screws and
take out the
rack
damper
plungers,
springs and, on the
pinion
end,
the
spacer and shims
(see
FIG
9:4),
The shims on the
pinion
side should be
íetained for reassembly.
With-
draw
the
pinion,
followed by the
rack, from the
housing.
B Remove the circlip and
the
pinion
lower ballbearing
from
the
rack
housing.
9 Remove the
Ílexible rubber
coupling
and the rubber
O-ring
Írom the
pinion.
10
Hold the
rack in
a
vice with
protected
jaws
and
unscrew the ball head housing.
1
1 Remove the ball
head. adjusting shim, shell and
backing
spring
or
Belleville
washers. Belleville washers
replaced
the backing
spring as f rom car No. 4.01 9.543.
9:5
Reassembling the
rack
and
pinion
1 Place
the
rack vertically in a vice with
protected
jaws.
2
Determine the
thickness
of the ball
head housing
ad.justing shims as described
in
Section
9 :6.
3
Check
the depth
of recess
X in
the
end
of
the steering
rack
(see
FIG
9:5).
4
On
models up to 4.019.542 the depth oÍ
this recess
was 22.5 mm
(.885
inch).
On
models
after
that serial
number
lhe
deoth
of
the
recess
was
incÍeased to
23 mm
(.905
inch). lf the
depth
oÍ the
recess is
23
mm
(.905
inch), install
a
.5 mm
(.020
inch) shim
in
the
bottom
oÍ
the Íecess.
lt is most important that
the
shim
is only fitted in a recess with the
greater
deoth.
5 With the shim fitted,
install the 13 Belleville washers
as shown
in FIG
9
:6.
6
Install
the ball head and shell,
which
is
centrcti by
the
special
pin
No.
8.0703D,
and the shim on the
end of
the rack as determined
in
Section 9
:6.
ê
&e
ló./
v
(_3)
n
@_rà
A
\:/
ë
@
mpers
Key
to
Fig
I
:4
spacer
78
FIG
9:2 View of front axle and steering
geaÍ
PINION
SIDE
'1
Flange 2 Adjusting shims 3
Nylon

 Loading...


