3. DRUM UNIT
3.1 CHARGE CORONA WIRE AND WIRE CLEANER PAD
REPLACEMENT
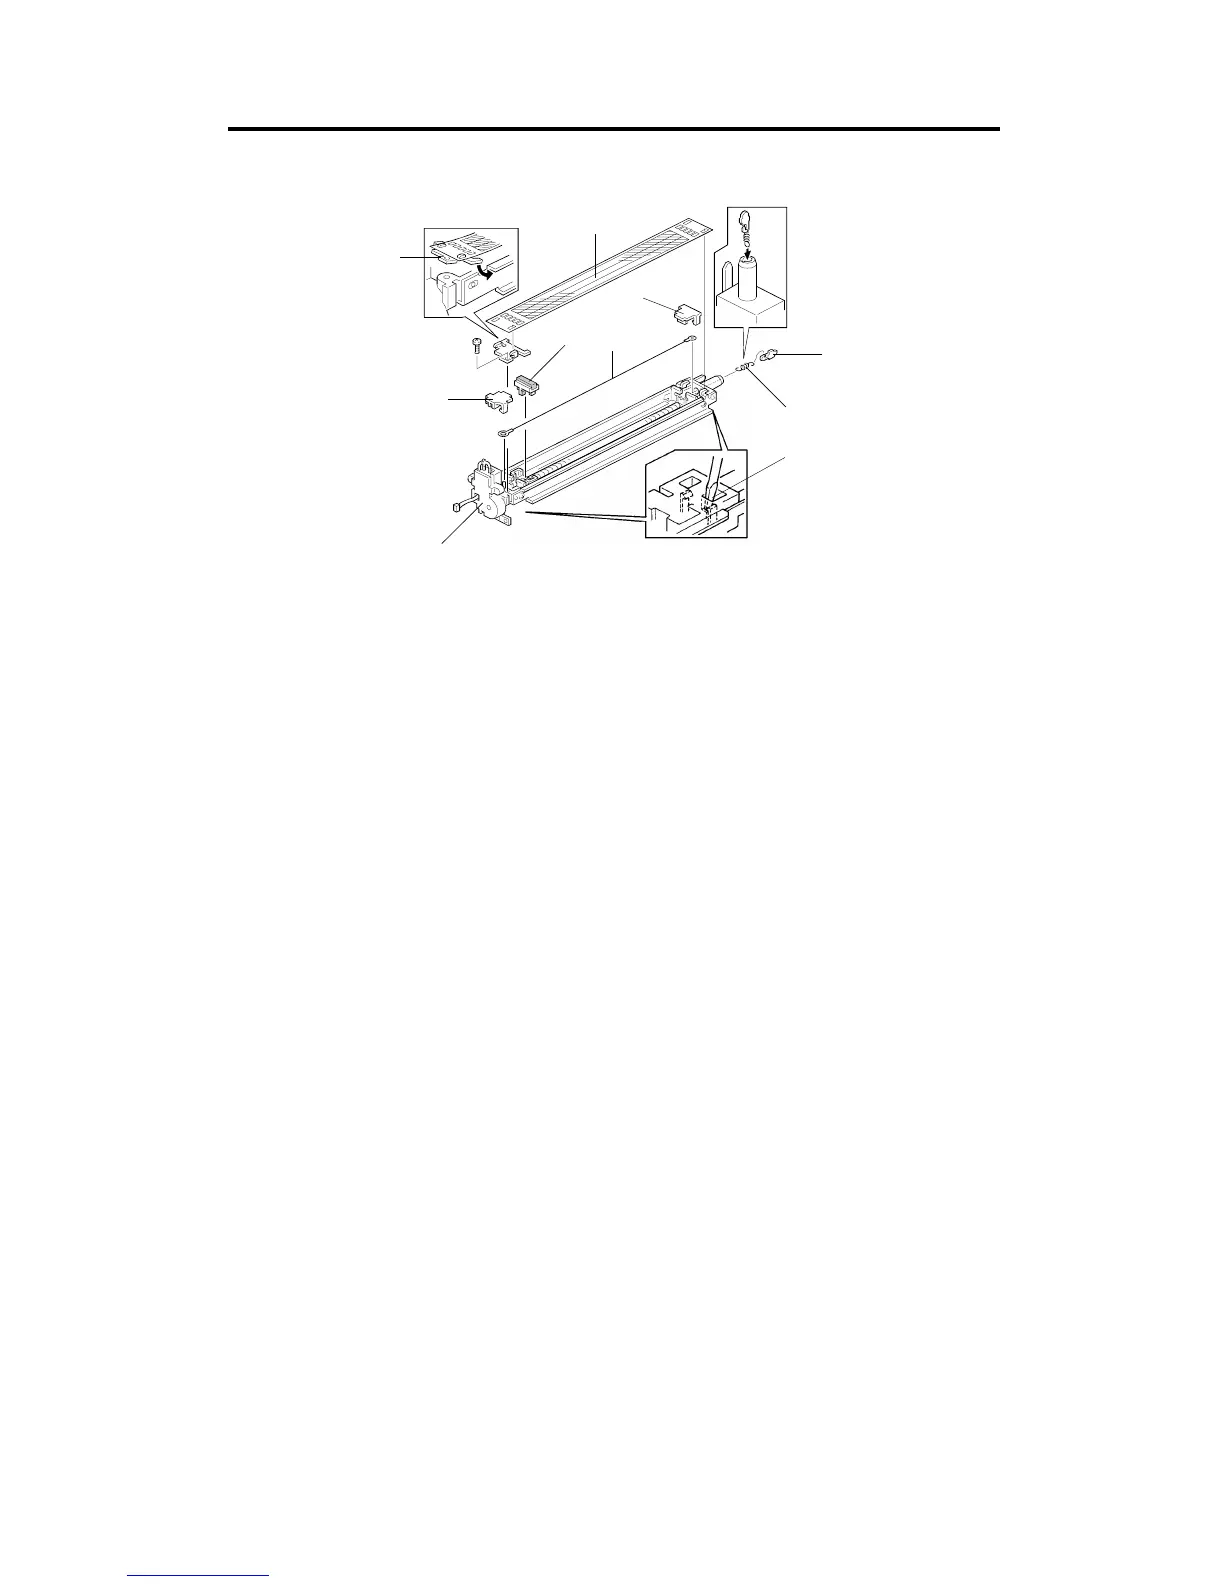
1. Take out the charge corona unit [A]. (See A109 Drum Unit Removal.)
2. Remove the grid plate [B] (1 screw).
3. Remove the wire cleaner [C].
4. Remove the front end block cover [D] and the rear end block cover [E] by
using a small screwdriver at the rear of the unit as in [F].
5. Remove the terminal spring [G] and then remove the charge corona wire
[H].
NOTE:
When reinstalling, do the following.
1) Hook the spring [G] to the bias terminal [I].
2) Install the two parts down through the hole as shown.
3) Hook the corona wire [H] to the spring.
4) Hook the other end of the wire [H].
5) Snap in both end block covers [D], [E].
6) Set the wire cleaner [C] so that the corona wire runs between
the cleaner pads.
7) Install the grid plate [B] using the holder bracket [J], making
sure that the hooks lie under the casing as shown (1 screw).
6. If the grid plate, casing, or the corona wire were replaced or cleaned,
perform the "Process Control Self Check" (SP Test Mode P-4).
[B]
[J]
[D]
[C]
[E]
[I]
[G]
[A]
[H]
[F]
A172/A199 5-8 SM

 Loading...


