EasyManuals Logo

Ricoh A172 User Manual

Ricoh A172
525 pages
To Next Page IconTo Next Page
To Previous Page IconTo Previous Page
Page #349 background imageLoading...
Page #349 background image
15. REPLACEMENTS AND ADJUSTMENTS
15.1 UPPER COVER REMOVAL
1. Turn off the main switch and open the feed-in cover [A].
2. Remove the stopper screw [B].
3. Remove the 2 screws securing the table bracket [C].
4. Remove the original table [D] (3 screws).
NOTE:
Do not loosen the 2 screws securing the original table to the
table bracket.
5. Remove the small cover [E] at the rear side of the upper DJF cover (1
screw).
6. Remove the upper cover [F] (6 screws).
[A]
[B]
[D]
[C]
[E]
[F]
A172/A199 7-28 SM
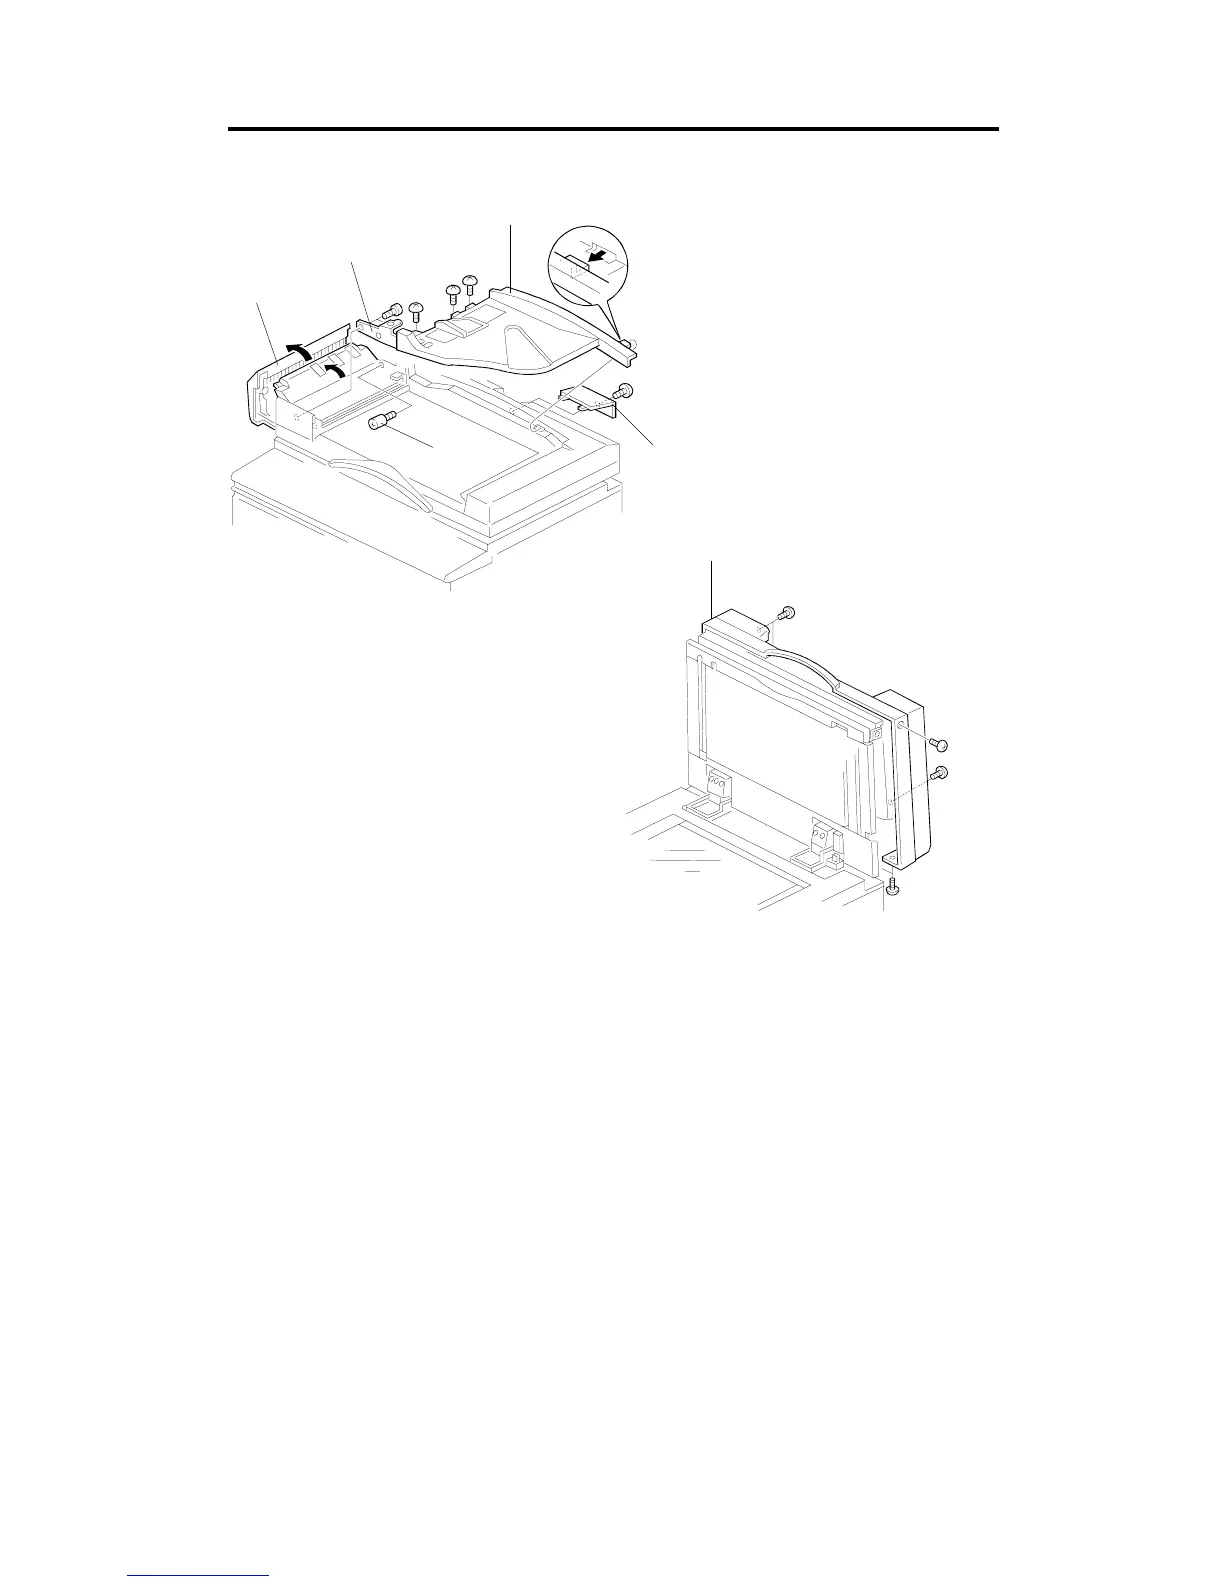
Table of Contents

Questions and Answers:

Question and Answer IconNeed help?

Do you have a question about the Ricoh A172 and is the answer not in the manual?

Ricoh A172 Specifications

General IconGeneral
BrandRicoh
ModelA172
CategoryAll in One Printer
LanguageEnglish

Related product manuals