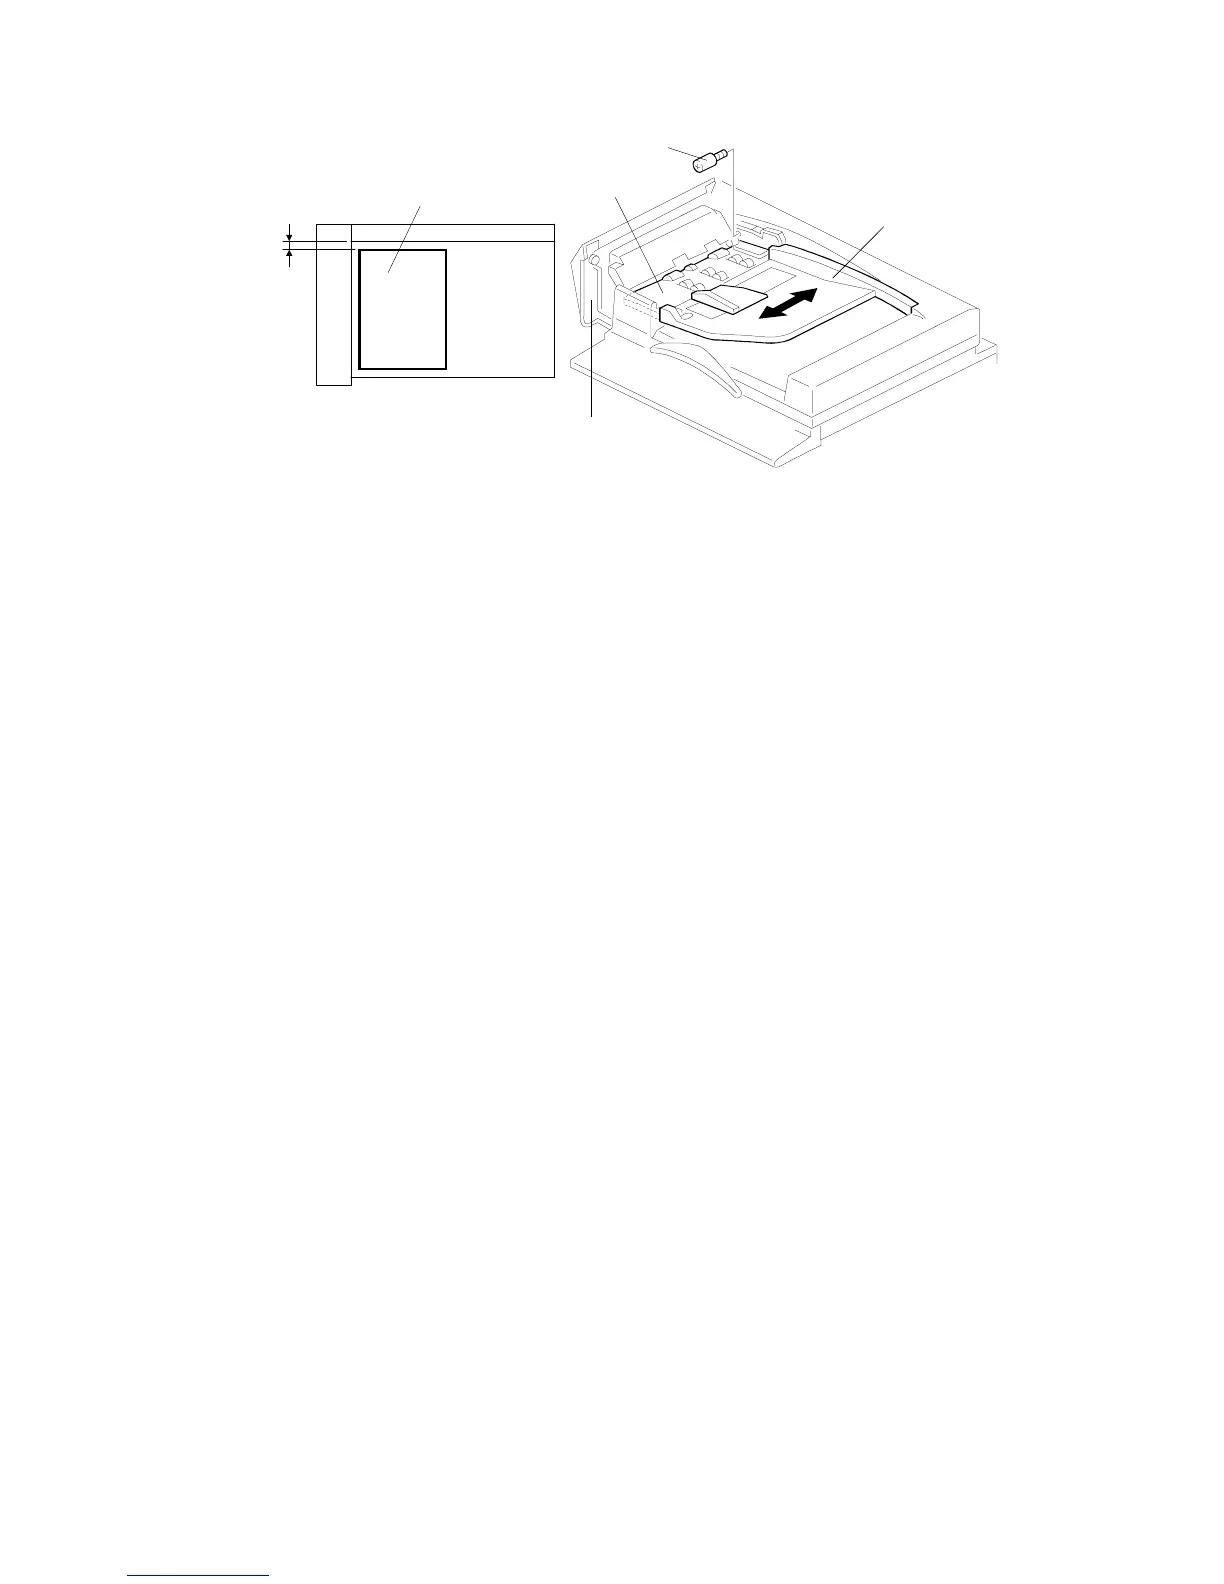
15.19 SIDE-TO-SIDE REGISTRATION ADJUSTMENT
1. Place a sheet of A4/8
1/2
" x 11" sideways paper [A] (64 g/m
2
, 17 lb) on
the original table and press the Start key.
2. Check the side-to-side registration comparing the original paper and the
copied paper.
3. If the side-to-side registration is not within 0 ± 2 mm, enter the SP mode
and perform the following steps:
1) Open the DJF Side To Side Registration Adjustment page.
2) Change the setting with the
and
keys to meet the above
specification. (The original stopping position will not change.)
Note that the direction of the image shift will differ for each base copier.
4. If it is still out of specification, leave SP mode and perform the following
original table positioning adjustment:
1) Place a sheet of A4/8
1/2
" x 11" sideways paper [A] (64 g/m
2
, 17 lb) on
the original table and press the Start key.
2) After the original stops on the exposure glass, gently raise the DJF so
that the original does not move.
3) Check if the gap between the rear edge of the paper and the original
rear scale is 5 ± 2 mm.
4) It the gap is not within specification, remove the stopper screw [C],
loosen the 8 screws securing the original table [D] and the original
guide [E] and shift the original table and the original guide position
accordingly.
NOTE:
Before putting an original on the original table again, open and close
the feed unit cover [F].
5 ± 2 mm
[A]
[C]
[E]
[D]
[F]
A172/A199 7-50 SM

 Loading...


