Publication 2094-UM001A-EN-P — September 2006
Removing and Replacing the Kinetix 6000 Drive Modules 167
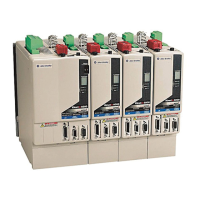
Replacing the Power Rail
This procedure assumes you do not need to change the location of
the power rail on the panel and you intend to reuse the mounting
bolts of the power rail you just removed.
Follow these steps to replace the power rail.
1. Align the replacement power rail over the existing mounting bolts.
2. Tighten the mounting bolts.
3. Re-attach the braided grounding strap to the power rail grounding
stud (refer to page 166).
IMPORTANT
If you need to change the location of the power rail, or if you
are installing a power rail designed for additional or fewer
modules than you removed, refer to Kinetix 6000 Power Rail
Installation Instructions, publication 2094-IN003.
ATTENTION
To avoid damage to the power rail during installation, do not
remove the protective boots until the module for each slot is
ready for mounting.
IMPORTANT
To improve the bond between the power rail and subpanel,
construct your subpanel out of zinc plated (paint-free)
steel.
 Loading...