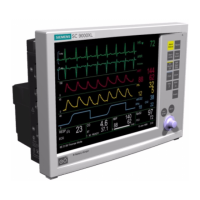
SC 7000 and SC 9000XL Patient Monitors Service Manual
ASK-T898-03-7600 Siemens Medical Systems, EM-PCS Danvers 61
7k9kXLSM.c4.CD_ROM.fm/04-99/kaupp
NOT A CONTROLLED DOCUMENT
1) Press the key and verify that a change occurs in the display.
2) Double-click key to return display to former status.
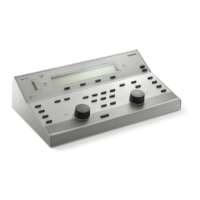
6.7 Record Key
The Record key starts and stops a recording of limited duration when the
monitor is mounted on an IDS (or CPS).
1) With monitor mounted on IDS (or CPS) press Record key.
2) Verify that message “Recording Not Accepted” appears in message
field at bottom right-hand side of display.
6.8 Print Screen Key
Print Screen key initiates printing a copy of the display, on network printer.
1) Press Print Screen key twice.
2) Verify that message “Printer Unavailable, Waiting” appears in
message field at bottom right-hand side of display.
6.9 NBP Start/Stop Key
The NBP Start/Stop key initiates or terminates the inflation cycle for the
non-invasive blood pressure monitor function.
1) Press Menu key. Access Monitor Setup → Monitor Options → Speaker
Volumes, and set Attention Tone Volume to 50%.
2) Press NBP Start/Stop key.
3) Verify that monitor sounds a tone. (Cuff must not be plugged into cuff
connector.)
6.10 Zoom Key
When a patient is being monitored, the Zoom key calls up a 1-hour trend
display for a quick overview of patient status.
1) Press Zoom key, and verify that “Fast Access Menu” displays.
2) Press Main Screen key to return.
6.11 Help Key
1) Press Help key and observe that Main Help Menu appears on display.
2) Press Main Screen key to clear display.
6.12 Mark Key
The Mark key inserts parameter values with time and date stamp in the
tabular trends. Verify that Mark membrane switch is functional as follows:
1) Press Menu key and select Review → Trend Table.
2) Press Mark key and observe that time stamp on HR readout changes
from white to green and Mark symbol appears above stamp.
7 ECG/RESP
Functions
With the cable plugged into the monitor connect either a 3-lead, 5-lead, or
6-lead ECG cable from the Patient Simulator into the MultiMed POD.
7.1 ECG/RESP Test Setup
1) Select HR parameter box and press rotary knob in to bring up ECG
menu.
• Set all ECG Lead settings at default values and remaining
parameters as follows:
-- ARR Monitoring Basic
-- RESP Monitoring ON
-- Pacer Detection ON
• QRS Sync Marker ON
• Pulse Tone Source ECG
• Pulse Tone Volume 10%
 Loading...