Procedure
1. Undo the six screws ③ and open the door of the wall-mounted device.
2. Remove the shielding plate ④ on the right side panel. To do this loosen the screws.
3. Unscrew the union nut of the cable gland ⑤.
4. Insert the connecting cable through the cable gland ⑤.
5. Press the wire end ferrules (VDE 0100 Part 520) onto the ends of the wires. Then connect the
wires of the connecting cable to the appliance plug ② at the marked spot. Make sure that the
power supply and PE conductor connections are correct!
Tighten the screws to the appliance plug with a torque of
– 0.5Nm at the terminals
– 0.3Nm at the strain relief and at the connector housing.
6. Connect the appliance plug ② to the power supply unit ①.
7. Fasten the connecting cable in the cable gland ⑤. To do this, tighten the union nut to a
torque of 3Nm.
8. Insert the shielding plate ④ in the wall-mounted device again and fasten it with screws.
9. Close the door of the wall-mounted device and tighten the six screws ③ again.
10.Connect the device to the equipotential bonding ⑥. To do this screw the ring cable lug with
spring washer to the threaded bolt M4.
8.2.7 Electrical connections and terminal assignment
Note
Number of inputs and outputs
The number of inputs/outputs that are actually available in the device depends on the installed
optional modules. The paragraph below includes an overview of all inputs/outputs.
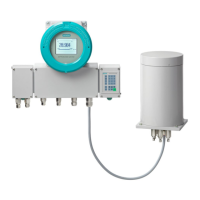
Connecting the device
8.2Electrical connections
Wall-mounted device
114 Operating Instructions, 07/2023, A5E31930403-AB
 Loading...