Print-Quality Troubleshooting 5-9
Print Engine Test Print
Print-quality and engine logic or hardware problems can be easily isolated to either
the Image Processor Board or the Print Engine by running the Print Engine Only Test
Print.
1. Turn printer power OFF.
2. Remove the Image Processor Board.
3. Turn printer power ON.
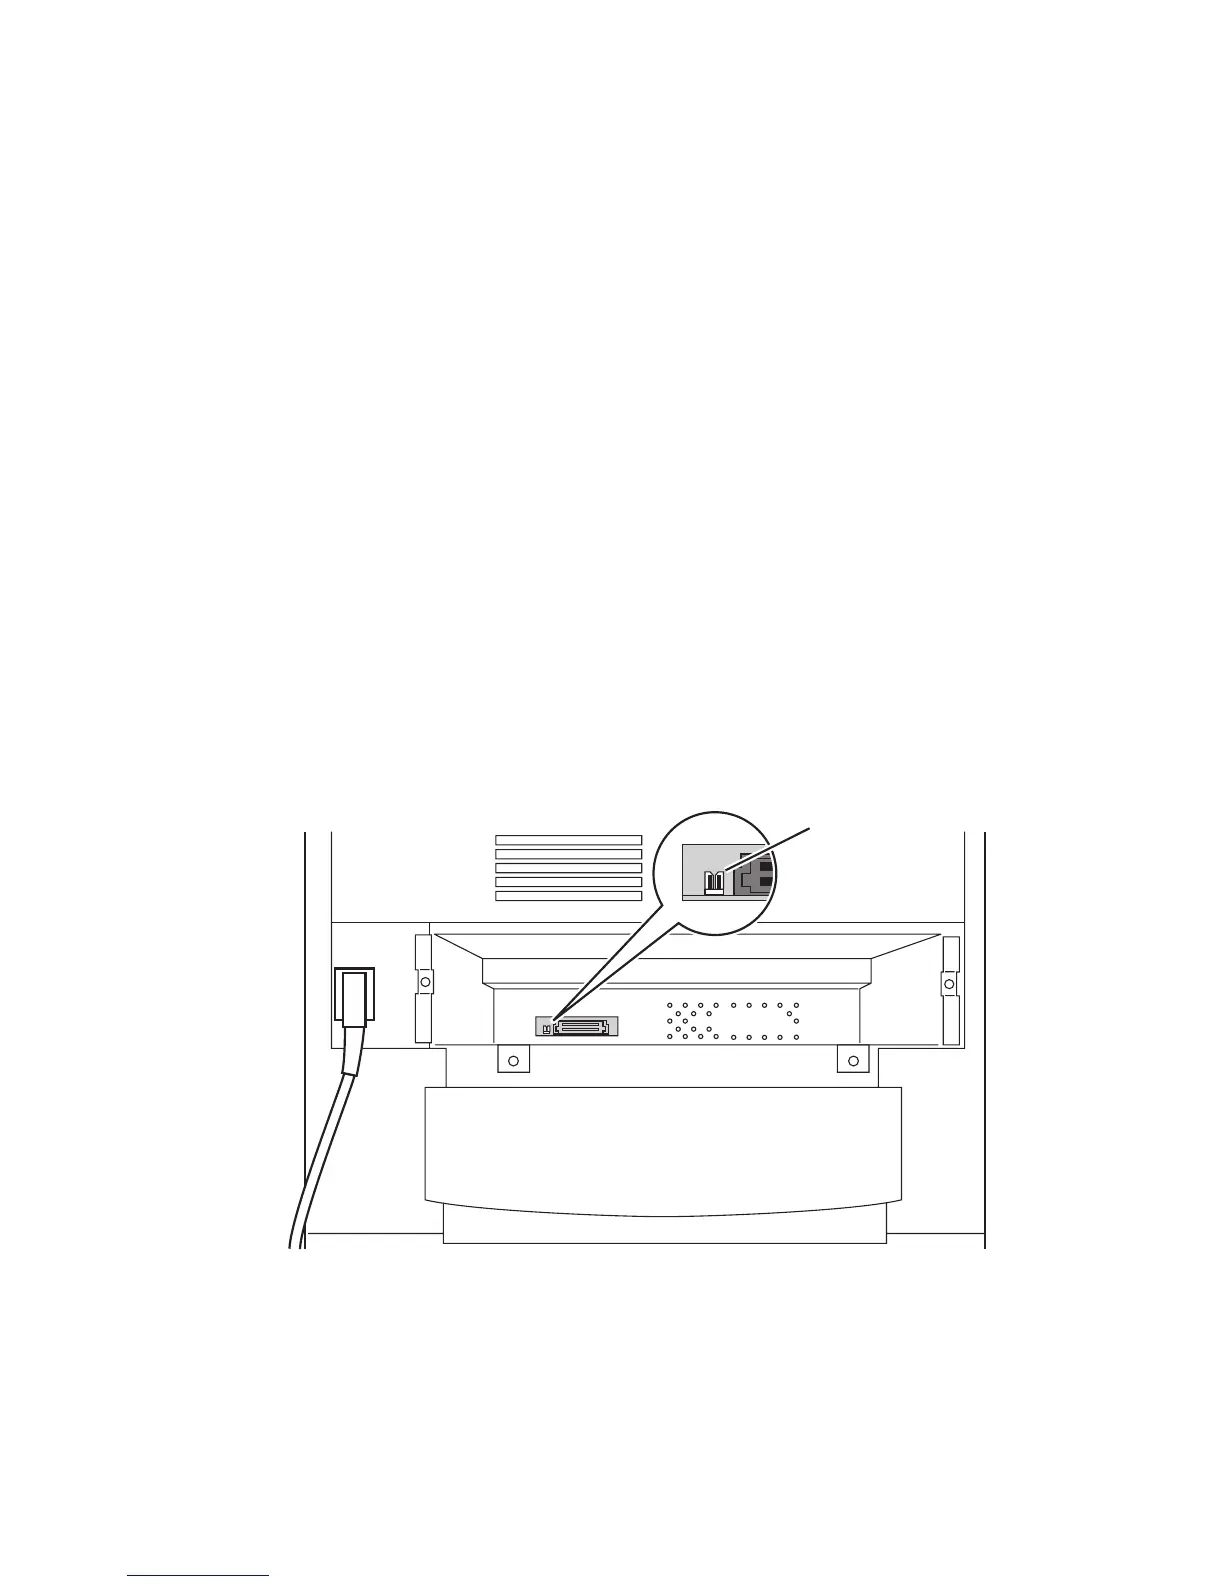
4. Look inside the Image Processor Board cavity, on the rear of the Engine Control
Board locate jumper pins 1 and 2 on connector P31. See figure below or "Map 3"
on page 10-8 for P31 location.
5. With a long screwdriver, touch the pins to short and start the test process, the pins
must remain shorted to execute the test.
6. The printer will begin to print the 600 x 600 engine test print unless an error
status from the Engine Control Board is present. Printing will continue until the
jumper is removed from pin 1 to 2. The prints that are in process will be
completed.
Note
Power to the front panel is disabled during this test. The front panel graphics and
all LED’s are off.
P 31
6250-505
 Loading...