Service Parts Disassembly 8-61
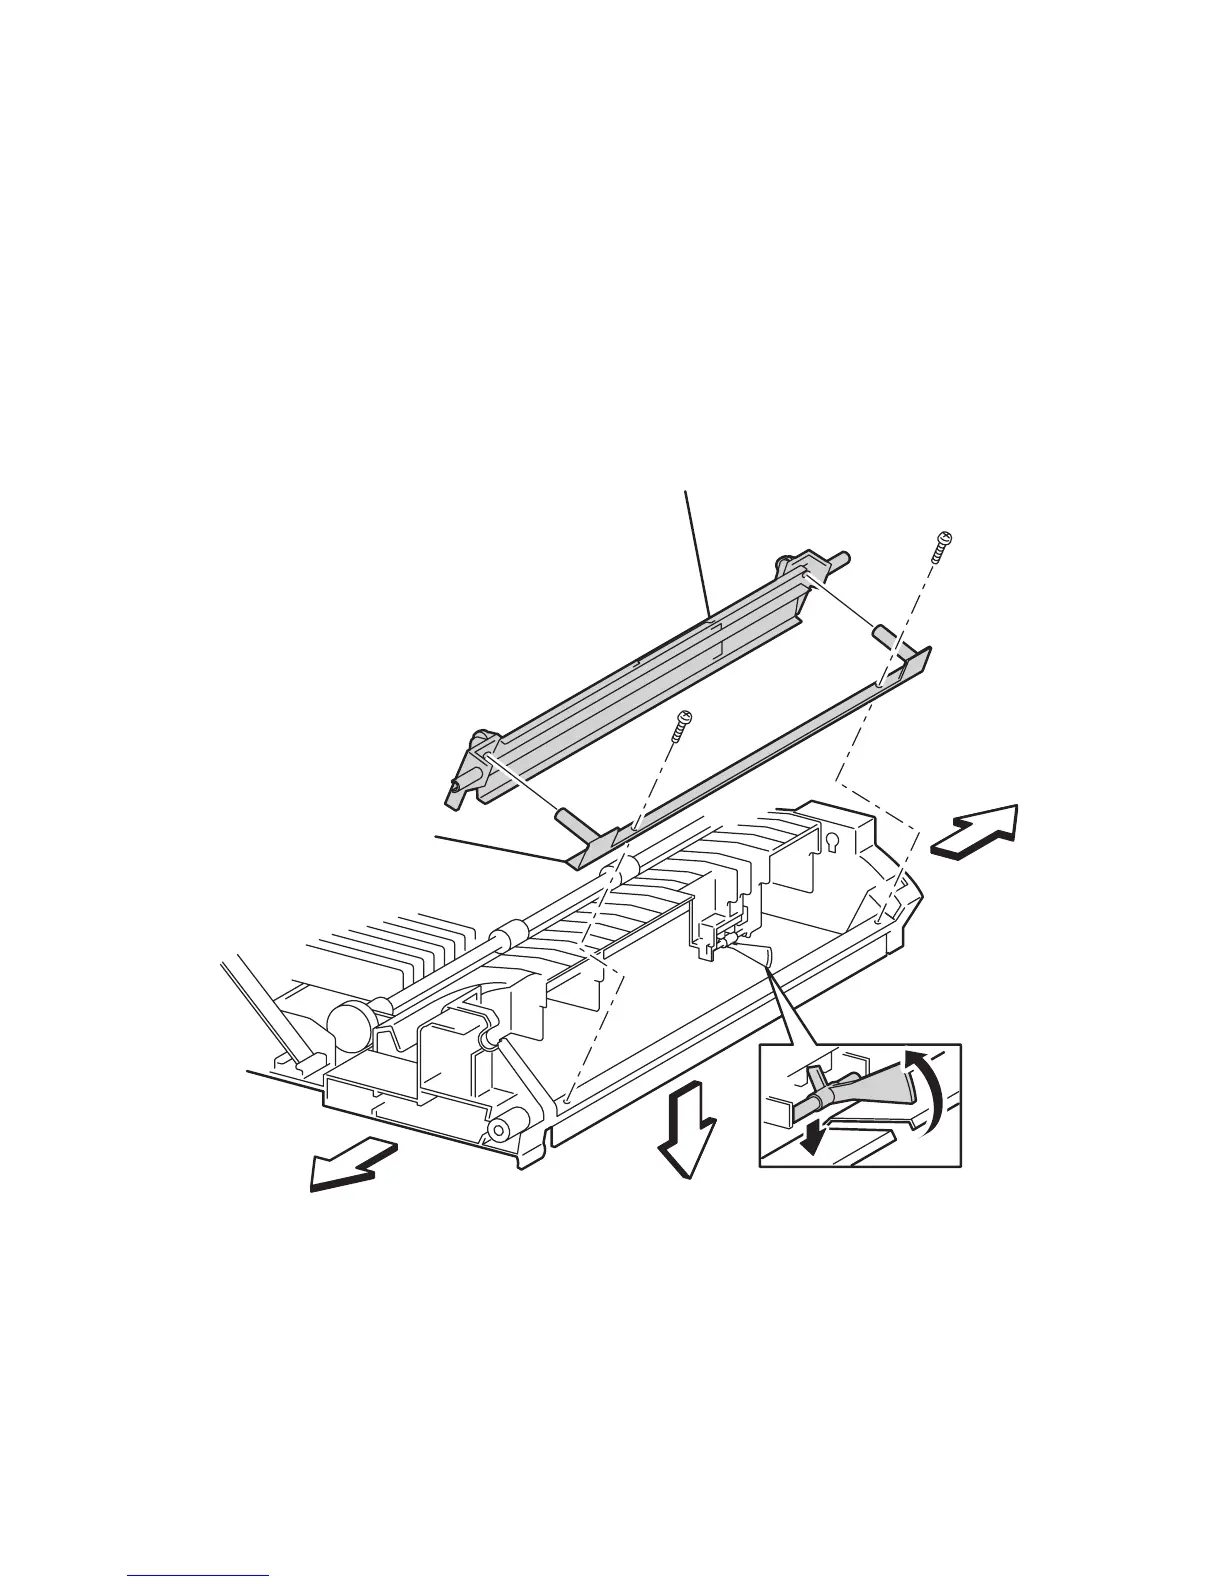
Tray 1 Bottom Plate (PL 6.1.42)
1. Remove the Chute Out Assembly (page 8-47).
2. Remove the 2 screws securing the plate (item #1) to the Chute Out Assembly.
3. Remove the left and right springs from the Tray 1 Shaft.
Note
In the following Steps, shift the actuator out of the hole in the Plate bottom
when removing the Plate.
4. Remove the Tray 1 Bottom Plate Assembly (item #2).
.
Reassembly Notes
Note
Ensure that Tray 1 Bottom Plate is properly seated on locator pins before
tightening the retaining screws, the locator pins are plastic and can be
damaged.
6250-192
2
1
RIGHT
FRONT
LEFT
 Loading...