Service Parts Disassembly 8-91
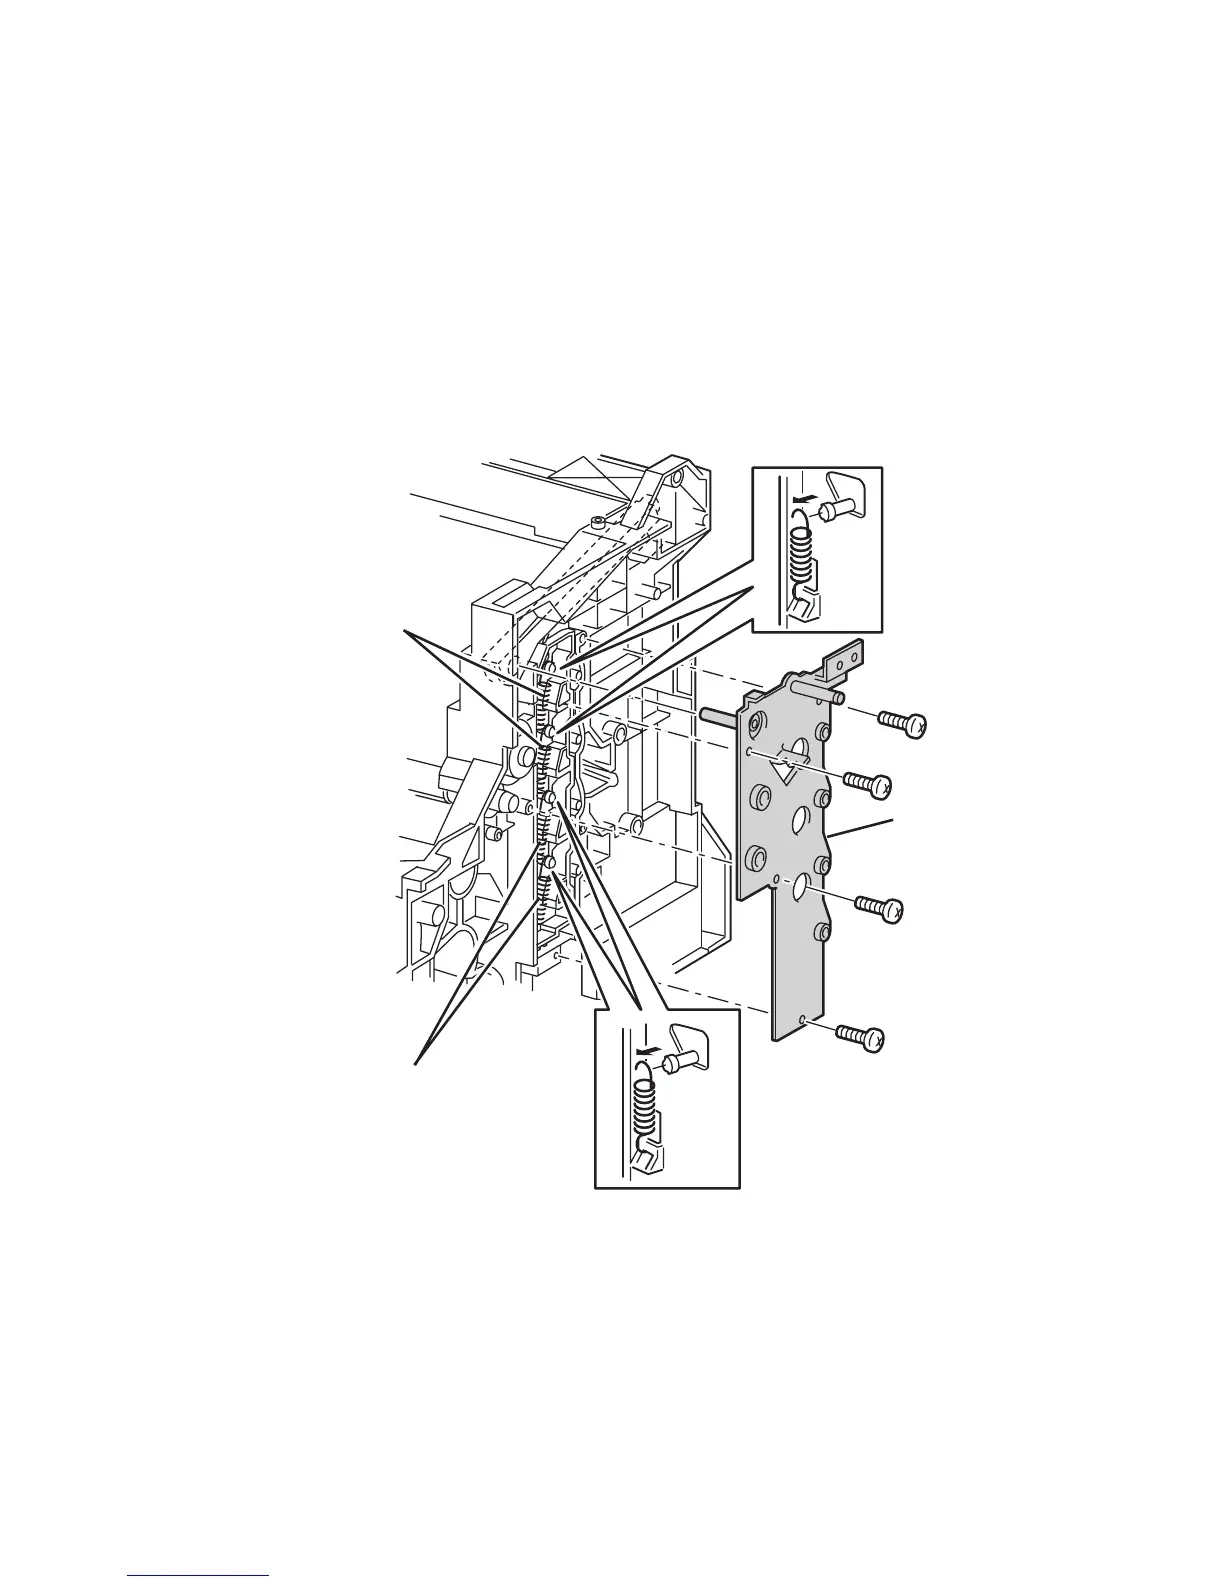
Lever Plate Right (PL 11.1.7), Lever Bracket
(PL 11.1.2), Lever Link (PL 11.1.6), Lever Drum
(PL 11.1.4), and Lever Spring (PL 11.1.5)
1. Remove the Right Cover (page 8-11).
2. Remove the Top Imaging Unit Cover (Door C) (page 8-10).
3. Remove the Right Link Spring (PL1.1.22)
4. Remove the Main Drive Assembly (page 8-94).
5. Remove the Motor Driver Board.
6. Remove the 4 screws securing the Right Plate Assembly (item #1).
7. Press on the aligning post in the upper left corner of the plate from inside the
cavity of the printer to remove the Plate Assembly.
2
2
1
6250-222
 Loading...