CYLINDER HEAD (YP250R)
5-71
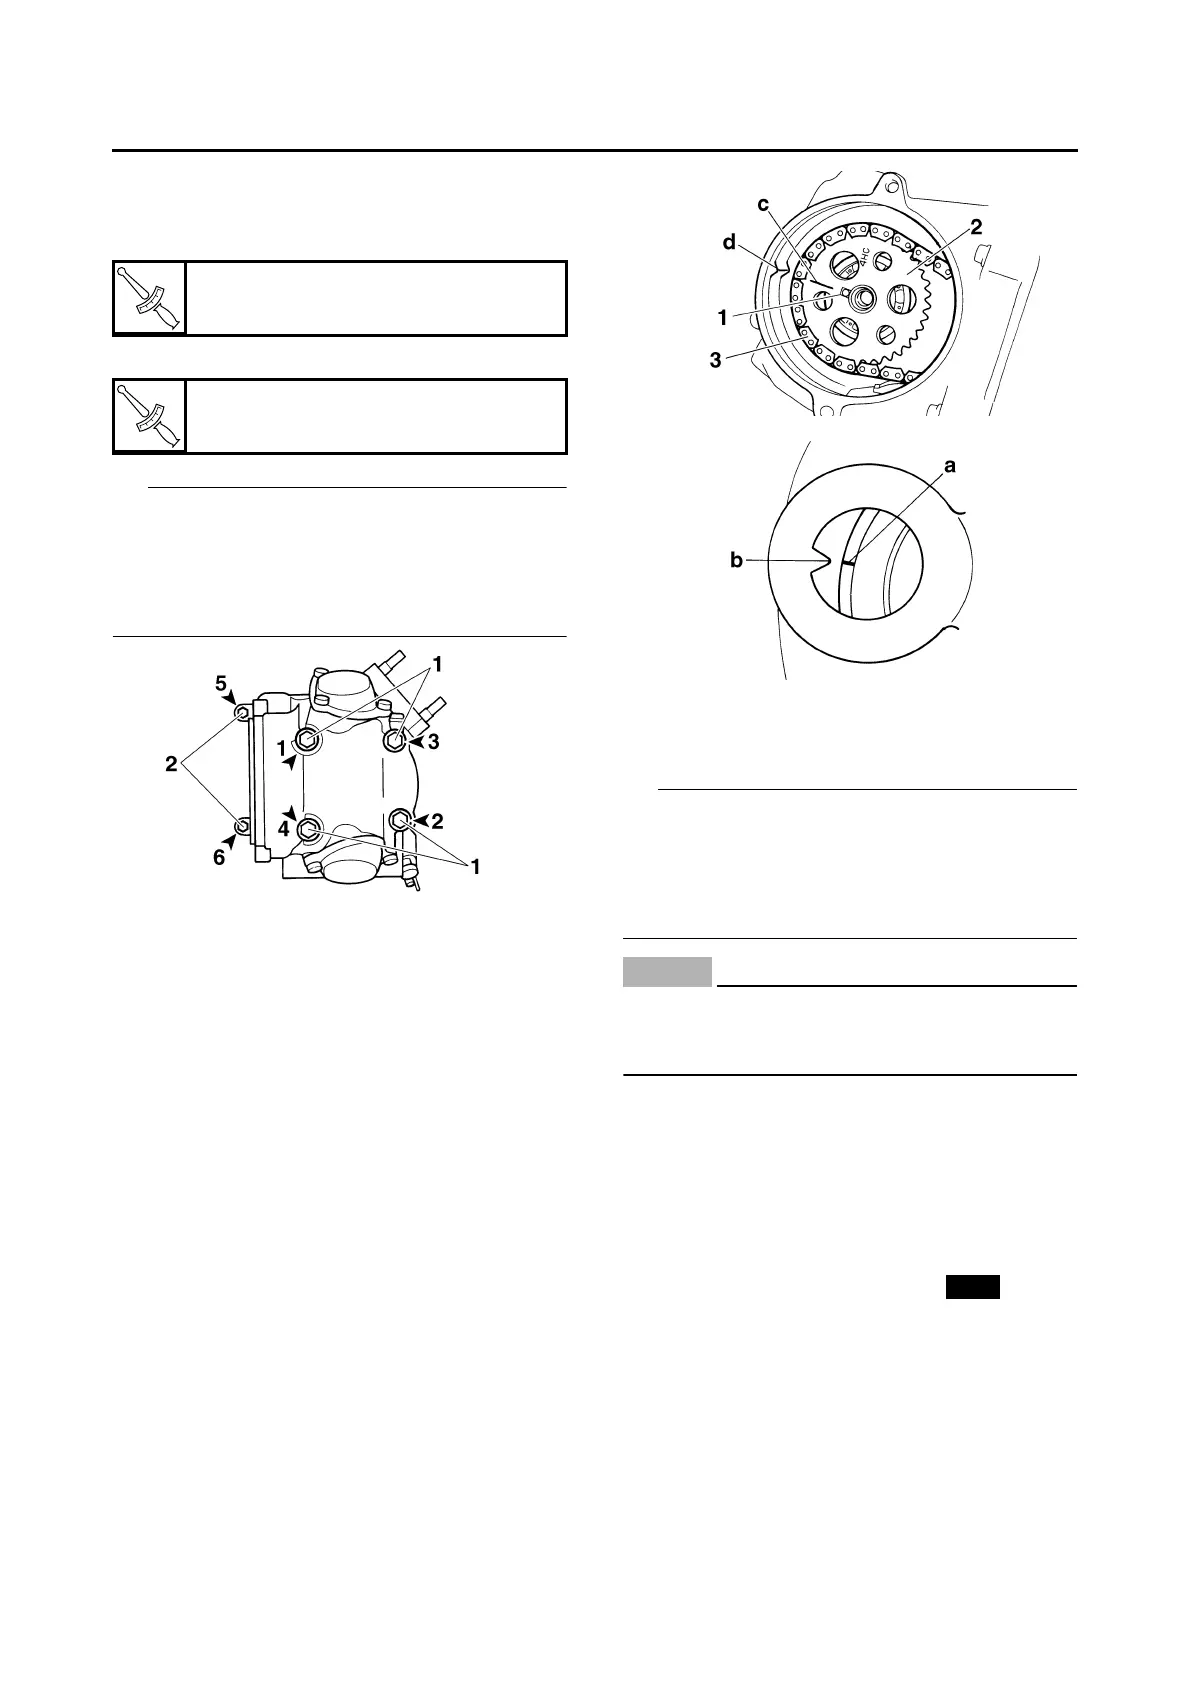
EAS24230
INSTALLING THE CYLINDER HEAD
1. Tighten:
• Cylinder head nuts “1”
• Cylinder head bolts “2”
IP
• Lubricate the cylinder head nuts and washers
with engine oil.
• Tighten the cylinder head nuts and bolts in the
proper tightening sequence as shown and
torque them in two stages.
2. Install:
• Dowel pin “1”
• Camshaft sprocket “2”
• Timing chain “3”
• Camshaft sprocket plate
• Washer
• Camshaft sprocket bolt
▼▼▼▼▼▼▼▼▼ ▼ ▼▼▼▼▼▼▼▼▼ ▼ ▼▼▼▼ ▼ ▼▼▼▼ ▼▼▼
a. Turn the primary sheave nut on the left side
of the crankshaft counterclockwise to turn the
crankshaft.
b. Align the “I” mark “a” on the generator rotor
with the stationary pointer “b” on the genera-
tor cover.
c. Align the “I” mark “c” on the camshaft sprock-
et with the stationary pointer “d” on the cylin-
der head.
d. Install the timing chain onto the camshaft
sprocket, and then install the camshaft
sprocket onto the camshaft.
IP
• When installing the camshaft sprocket, be sure
to keep the timing chain as tight as possible on
the exhaust side.
• Align the dowel pin “1” on the camshaft with the
slot in the camshaft sprocket.
NOTICE
ECA37P1009
Do not turn the crankshaft when installing
the camshaft to avoid damage or improper
valve timing.
e. Install the camshaft sprocket plate and cam-
shaft sprocket bolt.
f. While holding the primary sheave nut, tempo-
rarily tighten the camshaft sprocket bolt.
g. Remove the wire from the timing chain.
▲▲▲▲▲▲▲▲▲ ▲ ▲▲▲▲ ▲ ▲▲▲▲ ▲ ▲▲▲▲ ▲ ▲▲▲▲ ▲▲▲
3. Install:
• Timing chain tensioner gasket
• Timing chain tensioner
▼▼▼▼▼▼▼▼▼ ▼ ▼▼▼▼ ▼ ▼▼▼▼ ▼ ▼▼▼▼ ▼ ▼▼▼▼ ▼▼▼
a. Remove the timing chain tensioner cap bolt
“1” and spring “2”.
b. Release the timing chain tensioner one-way
cam “3” and push the timing chain tensioner
rod “4” all the way into the timing chain ten-
sioner housing.
T
R
.
.
Cylinder head nut
22 Nm (2.2 m·kgf, 16 ft·lbf)
T
R
.
.
Cylinder head bolt
10 Nm (1.0 m·kgf, 7.2 ft·lbf)
New
 Loading...