STARTER CLUTCH AND GENERATOR (YP250R)
5-102
2. Check:
• Starter clutch idle gear
• Starter clutch gear
Burrs/chips/roughness/wear → Replace the
defective part(s).
3. Check:
• Starter clutch gear’s contact surfaces
Damage/pitting/wear → Replace the starter
clutch gear.
4. Check:
• Starter clutch operation
▼▼▼▼▼▼▼▼▼ ▼ ▼▼▼▼▼▼▼▼▼ ▼ ▼▼▼▼ ▼ ▼▼▼▼ ▼▼▼
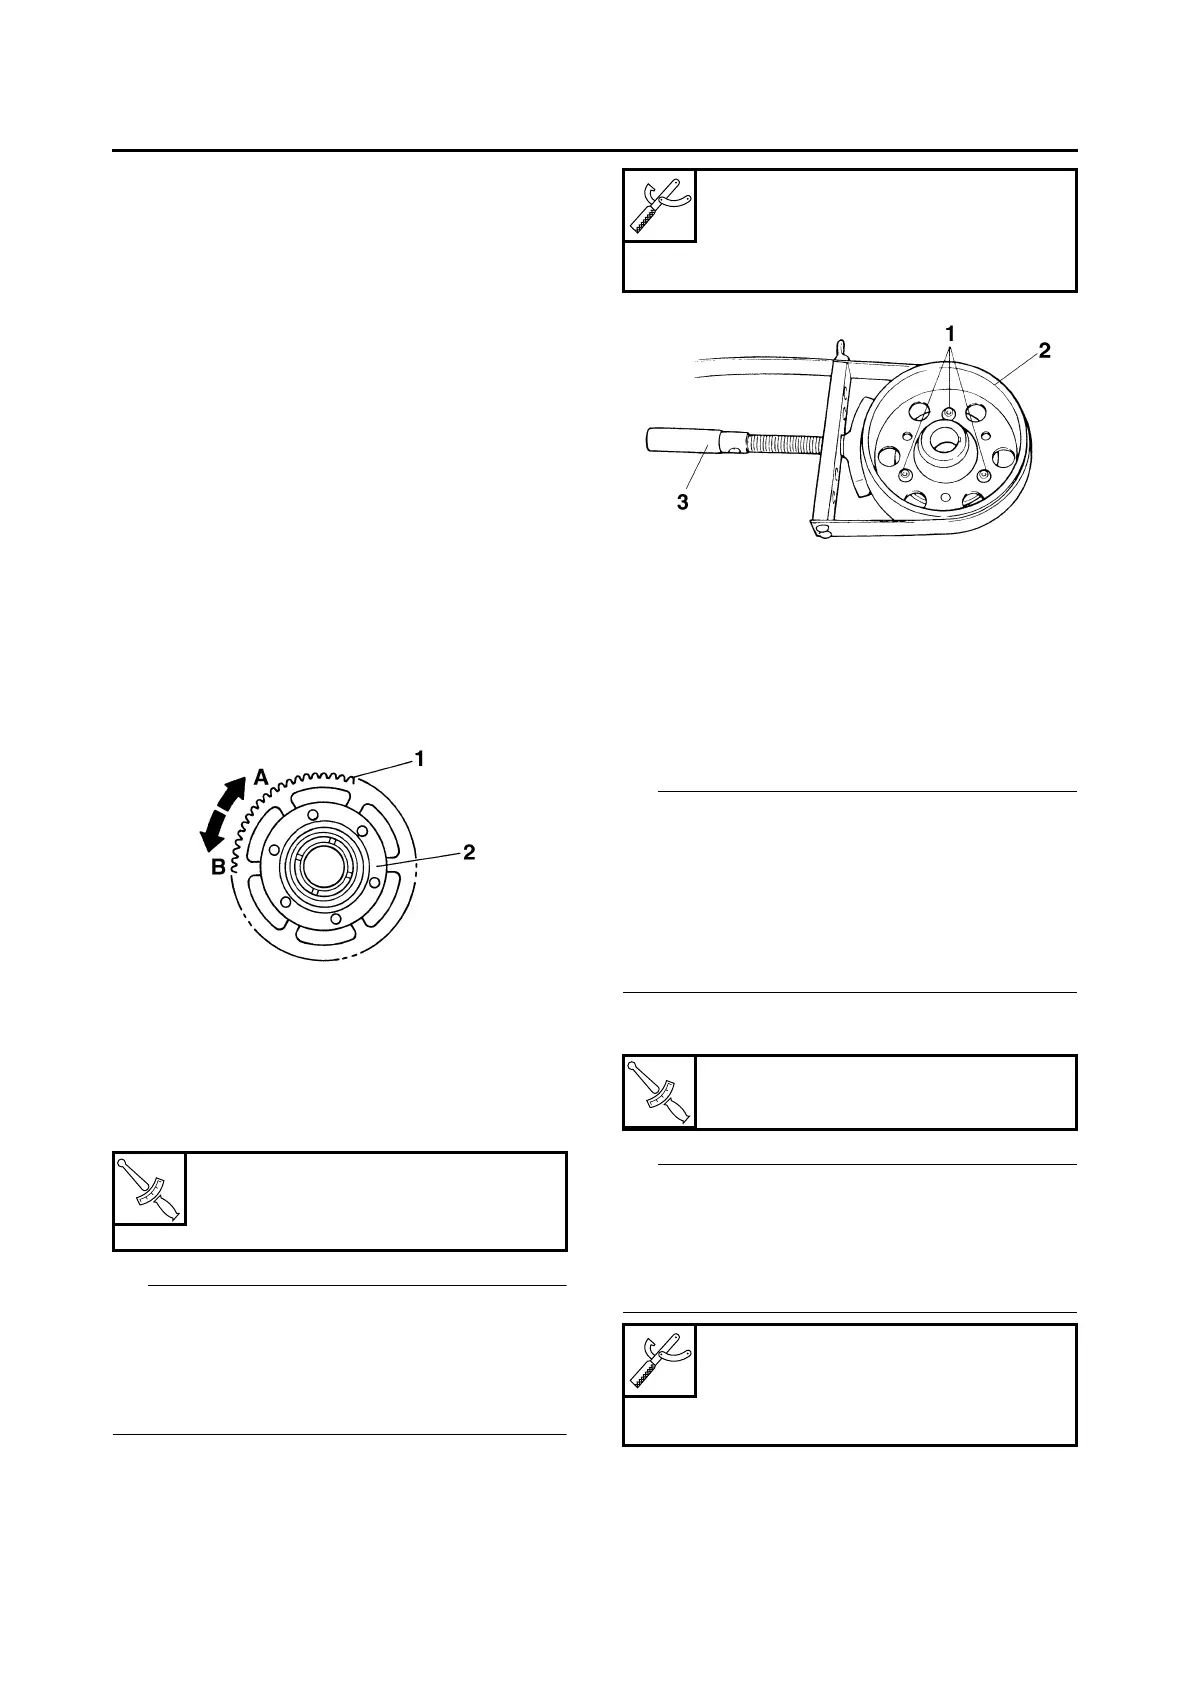
a. Install the starter clutch gear “1” onto the
starter clutch “2” and hold the starter clutch.
b. When turning the starter clutch gear clock-
wise “A”, the starter clutch and the starter
clutch gear should engage, otherwise the
starter clutch is faulty and must be replaced.
c. When turning the starter clutch gear counter-
clockwise “B”, it should turn freely, otherwise
the starter clutch is faulty and must be re-
placed.
▲▲▲▲▲▲▲▲▲ ▲ ▲▲▲▲▲▲▲▲▲ ▲ ▲▲▲▲ ▲ ▲▲▲▲ ▲▲▲
EAS24600
INSTALLING THE STARTER CLUTCH
1. Install:
• Starter clutch
• Starter clutch bolts “1”
IP
• While holding the generator rotor “2” with the
sheave holder “3”, tighten the starter clutch
bolts.
• Do not allow the sheave holder to touch the
projection on the generator rotor.
EAS24500
INSTALLING THE GENERATOR
1. Install:
• Starter clutch gear
• Woodruff key
• Generator rotor
• Washer
• Generator rotor nut
IP
• Clean the tapered portion of the crankshaft and
the generator rotor hub.
• When installing the generator rotor, make sure
the woodruff key is properly seated in the key-
way of the crankshaft.
• Make sure that the blunt-edged corner of the
washer is facing outward.
2. Tighten:
• Generator rotor nut “1”
IP
• While holding the generator rotor “2” with the
sheave holder “3”, tighten the generator rotor
nut.
• Do not allow the sheave holder to touch the
projection on the generator rotor.
T
R
.
.
Starter clutch bolt
30 Nm (3.0 m·kgf, 22 ft·lbf)
LOCTITE®
Sheave holder
90890-01701
Primary clutch holder
YS-01880-A
T
R
.
.
Generator rotor nut
80 Nm (8.0 m·kgf, 58 ft·lbf)
Sheave holder
90890-01701
Primary clutch holder
YS-01880-A
 Loading...