Getting Started
25
Powering Up the Tablet
This section explains installing the battery, connecting the tablet to external power, and powering up the tablet.
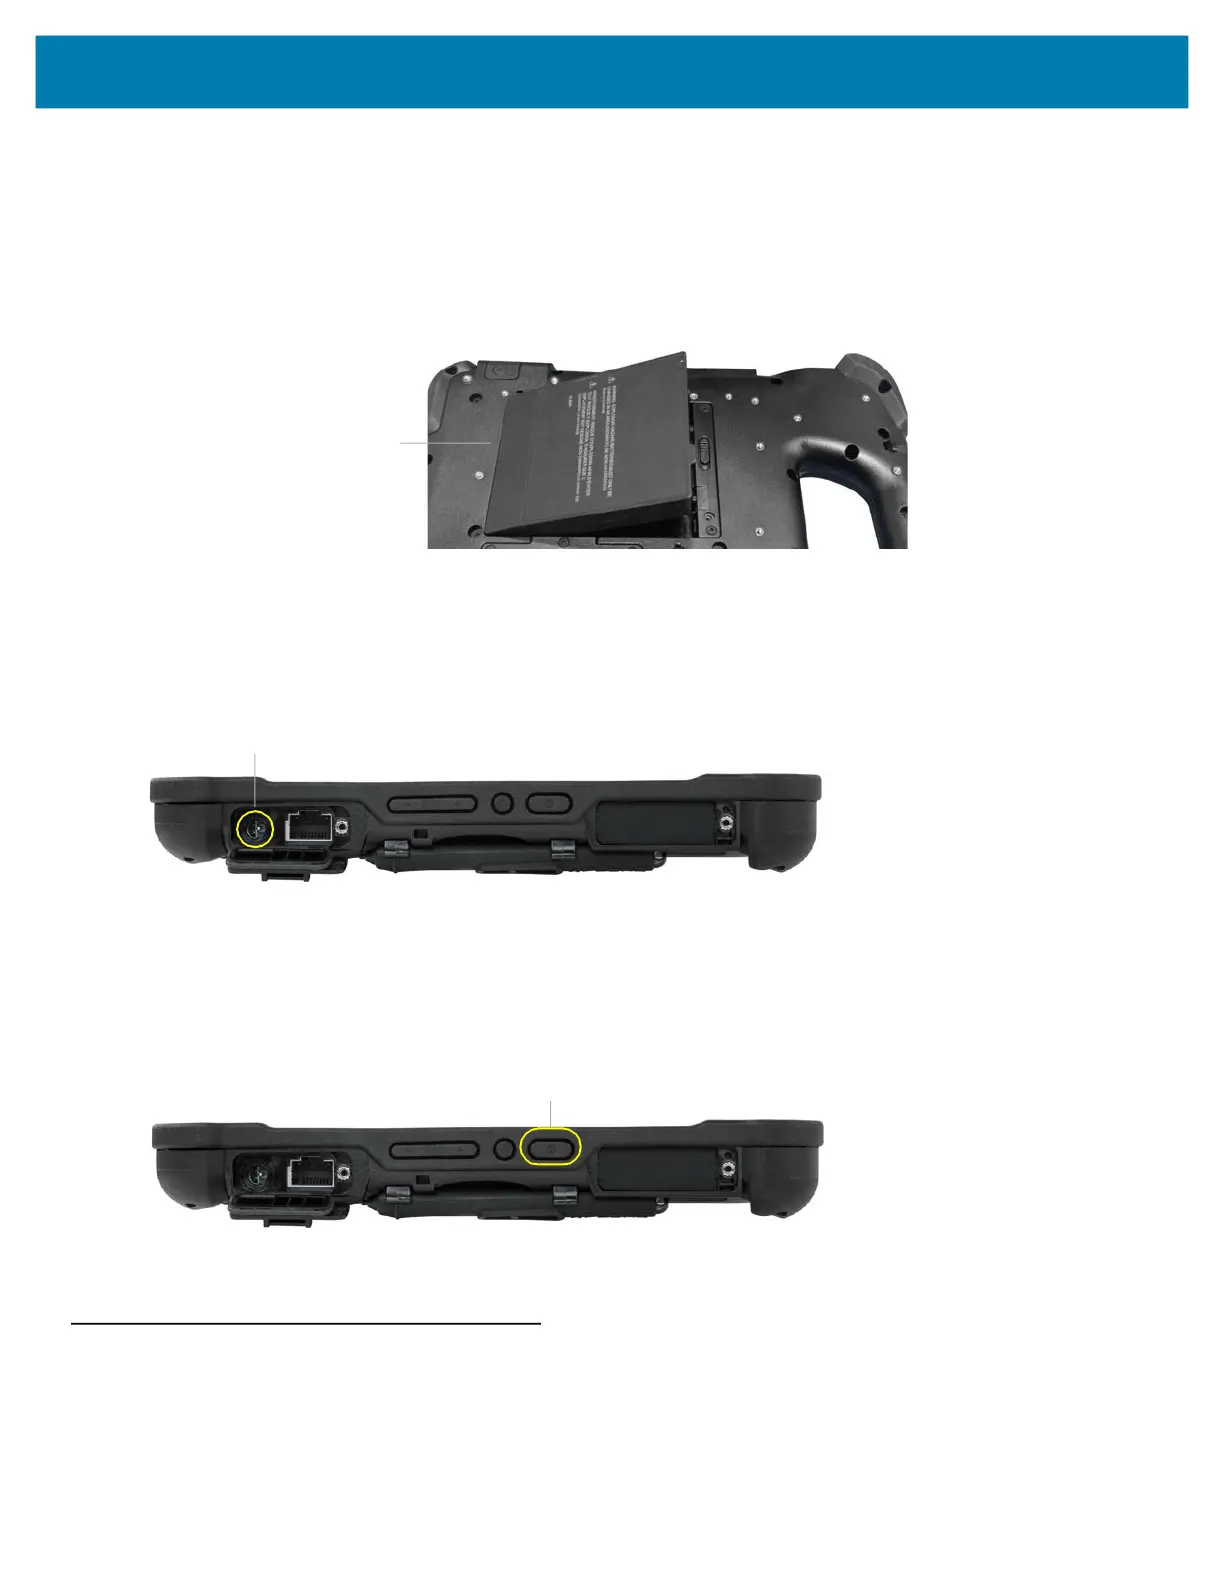
1. If you have not yet inserted the battery, remove it from the packaging. On the back of the tablet, insert the
bottom of the battery into the bay. Tilt the tray as shown and press it down until it clicks securely into place.
Figure 13 Installing the Battery
2. The external power has two parts: the part that plugs into the power source and the adapter with a cord that
plugs into your tablet. Join the two parts by plugging the power cord into the adapter to form one long cord.
3. To connect external power to the tablet, open the port door to expose the power adapter port. Plug the AC
adapter into this port on your tablet.
Figure 14 Power Adapter Port
4. Plug the power cord into an outlet.
The battery charging indicator on the front of the L10 tablet blinks green to indicate that the battery is charging.
It is solid green when fully charged
5. Press and release the oval Power button in the center of the right side of the tablet to turn it on.
Figure 15 Power Button
6. Keep the tablet on AC power until the battery is fully charged. However, you don’t have to wait until the tablet is
fully charged to turn it on. The L10 will charge while you use it.
Pens for the L10 Tablets
All L10 tablets support touch input with your finger. In addition, a pen or stylus is provided with your tablet, and is
compatible with the screen configuration that you order. Many people use a pen for more convenience or precision.
The pen is particularly effective for precise data entry and navigation.
Insert this end of the battery
first.
Power adapter port
Power button
 Loading...