Scanner Settings (Touch Screen)
This section explains how to use the touch screen to configure the scanner settings.
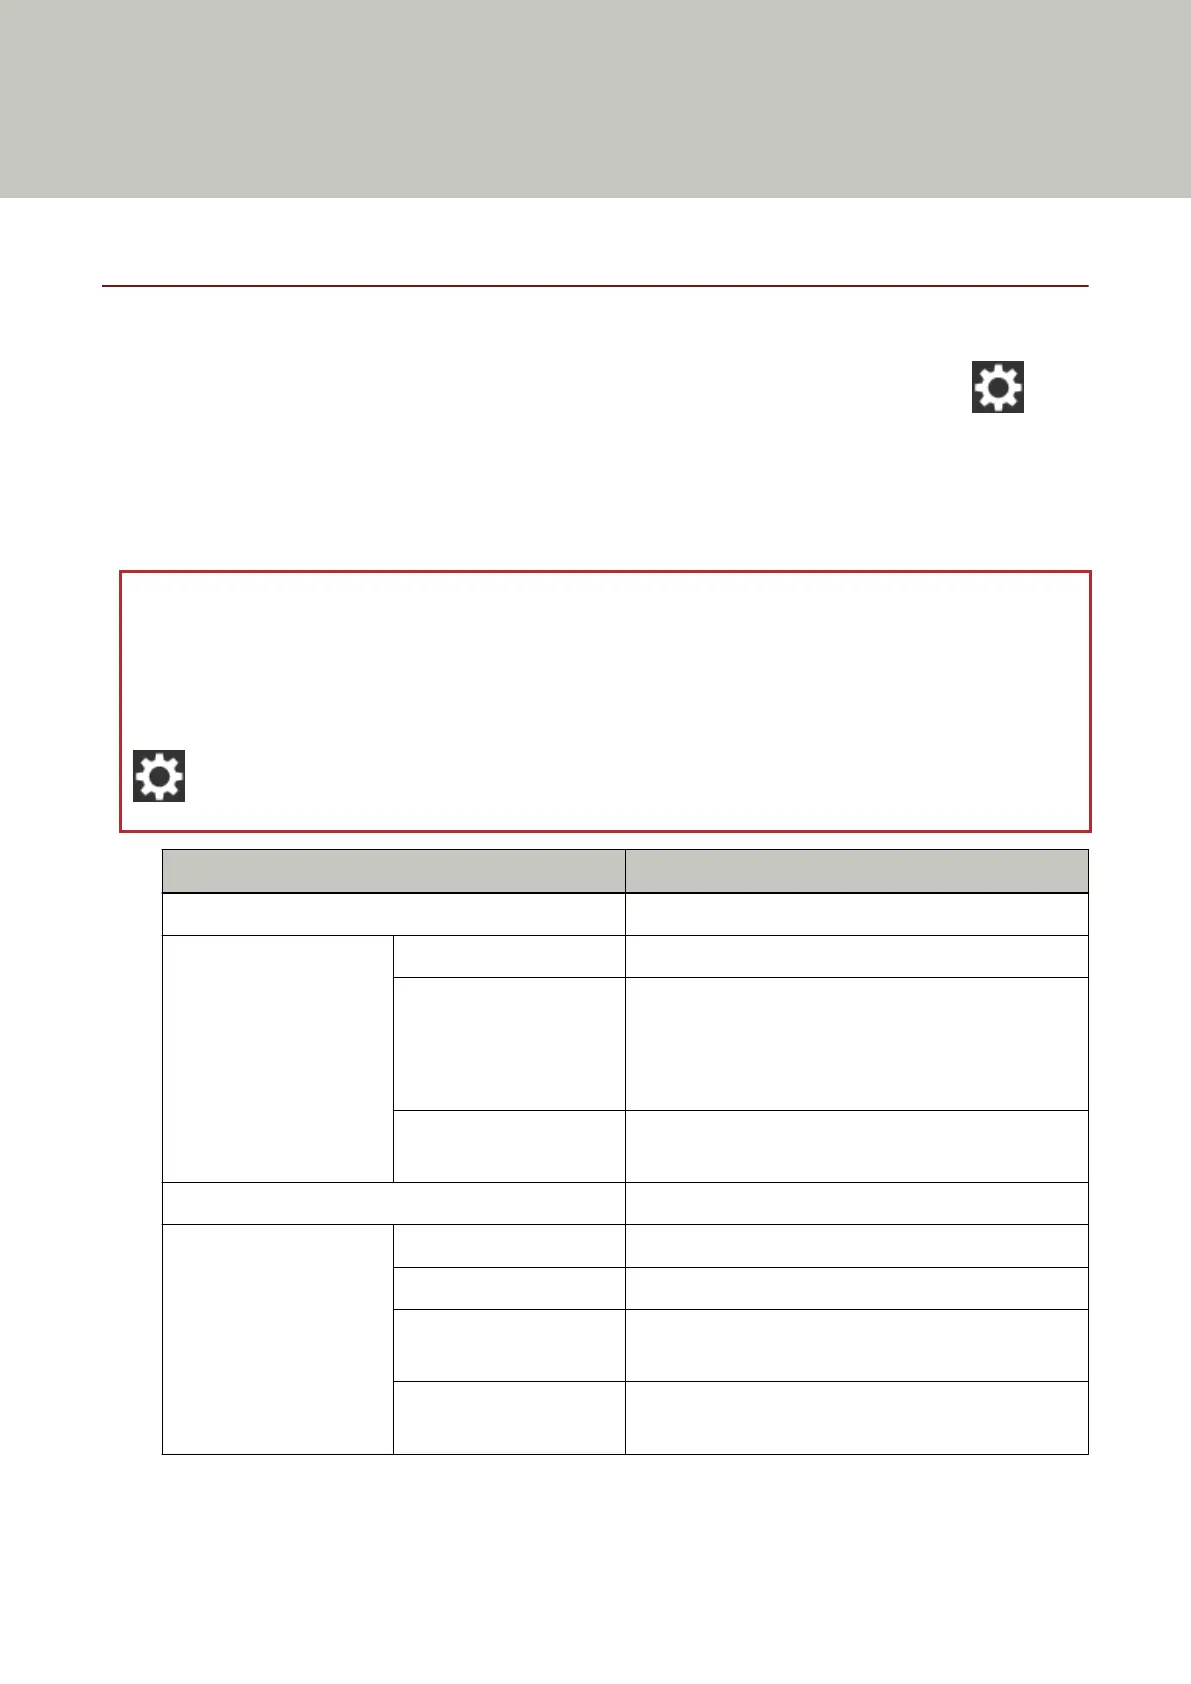
Setting Items
The scanner settings can be changed in [Scanner Settings] on the screen that appears when you press in the
lower right of the touch screen.
This section shows a list of setting items that you can configure.
Some setting items can also be configured from the Software Operation Panel. For details, refer to Scanner Settings
(Software Operation Panel) (page 241).
ATTENTION
To change the scanner settings, the administrator password is required. The default password is "password".
Change the administrator password to prevent the settings from being changed by other users.
Also, change the administrator password regularly.
The administrator password can be changed in the screen that appears in the following procedure:
→ [Scanner Settings] → [Admin Password]
Setting Items Description
How to connect (page 219) Specify a connection method for the scanner.
Power Management
(page 220)
Startup mode (page 220) Specify a startup mode for the scanner.
Power Save Mode (page
220)
You can specify the waiting time for the scanner to
automatically enter power saving mode or to be
automatically turned off if it is left on for a certain
period of time without being used.
Power Button (page 220) Specify whether or not to turn on/off the scanner by
pressing the [Power] button on the scanner.
Scanner Name (page 222) Set a scanner name.
Network (page 223) Wi-Fi (page 223) Configure the settings for Wi-Fi.
Wired LAN (page 224) Configure the settings for wired LAN.
Server (page 224) Configure the settings for a server, which is to be
connected to the scanner.
Network Encryption (page
226)
Specify whether to encrypt network communications.
216
 Loading...