3. Put the silver chassis screw in its original bag from the box for the
enclosure mounting rails or in a bag that you supply.
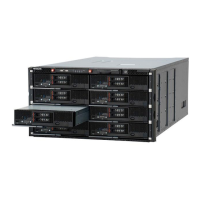
Step 18 (conditional): Remove the outer enclosure rails
from the rack
If the S10 Node was returned racked, after removing the enclosure from the
rack, you need to remove the outer enclosure mounting rails from the rack.
Removing an outer enclosure rail from the rack requires two people — one
at the front of the rack and one at the rear.
To remove an outer enclosure rail from the rack:
•
At the front of the rack, using the #2 Phillips screwdriver, unscrew and
remove the six screws that attach the front of the rail to the rack.
While unscrewing the top two screws, hold onto the screw plate and
shelf locking bracket so they don't fall. While unscrewing the last screw,
support the rail with your other hand so the rail doesn't fall.
•
At the rear of the rack, using the #2 Phillips screwdriver, unscrew and
remove the four screws that attach the back of the rail to the rack.
While unscrewing the screws, hold onto the screw plate so it doesn't fall.
While unscrewing the last screw, support the rail with your other hand
so the rail doesn't fall.
Put the screws, screw plates, and shelf locking brackets into their original
packaging from the box for the mounting rail kit or into bags that you
supply.
Chapter 3: Refurbishing an HCP S10 Node
51
HCP S Series Node Refurbishment
Step 18 (conditional): Remove the outer enclosure rails from the rack
 Loading...